
Archer Button-Up Sew-Along
Introduction, Fabric & Supplies

Everyday Woven Fabrics
The Archer works in a wide range of everyday wovens. We'll look at finished shirts in flannel, linen, soft and sturdy chambrays, and cotton shirtings from lightweight to crisp to brushed, so you can see how each weight and weave moves once it's sewn.
Drapey and Fine Fabrics
Rayon, silks, and lawns all make beautiful Archers, but some are trickier to sew than others. We'll share which fabrics are best saved for after your first Archer, plus an idea for color blocking down the road.
Can I Use Quilting Cotton?
It's one of the questions we hear most about the Archer. We'll explain why most quilting cottons aren't the best fit for a button-up, and the exception that makes some of them worth considering.
Taking Your Measurements & Choosing a Size

Taking Your Measurements & Choosing a Size
Bust, waist, and hip are the three measurements you'll need, but the Archer's straight fit through the waist means bust and hip matter most. This section covers measuring accurately, reading the size chart, and what to do when your measurements land in different sizes.
Blending Between Sizes
Blending lets you move from one size at the bust to another at the hip. This section shows where the transition belongs and which Archer pattern pieces follow each size.
Length Adjustments
The Archer can be lengthened or shortened through the body, at the hem, and at the sleeve. This section also covers raising or lowering the View B gathered back panel, and why sleeve changes happen at the elbow.
Bust Adjustments
The 0–18 size range is drafted for a B cup and the 14–32 for a D cup, so if your sewing cup size differs, a full or small bust adjustment can fine-tune the fit. This section covers finding your adjustment amount, marking your apex, and carrying the change through to the back and button band.
Cutting Your Fabric

Preparing Your Fabric
Pre-washing, pressing, and finding the right side of your fabric all happen before you cut. This section covers washing your yardage the way you'll wash the finished shirt, a trick for pressing wrinkly linen, and clues for telling the right side from the wrong side.
Stripes, Plaids, and Directional Prints
Stripes and plaids open up lots of design choices on a shirt with this many pieces. We'll show how to line up horizontal stripes across the body and sleeves, how View A and View B handle vertical stripes, and when cutting pieces on the bias or cross grain makes matching easier.
Laying Out, Tracing, and Cutting
The Archer's two front pieces aren't identical, so they're cut together in a specific way depending on which version of the pattern you own. This section covers the cutting diagrams, getting pieces on grain, tracing and marking, clipping notches, and the leftover piece you'll want to discard right away.
Grab the Archer Button-Up Patterns
-
Archer Button Up Shirt
Sizes 0-18Regular price From $18.00 USDRegular priceUnit price per -
Archer Popover Add-On
Sizes 0-18Regular price $14.00 USDRegular priceUnit price per -
Archer Button Up Shirt
Sizes 14-32Regular price From $18.00 USDRegular priceUnit price per -
Archer Popover Add-On
Sizes 14-32Regular price $14.00 USDRegular priceUnit price per


Cutting and Fusing Your Interfacing

Choosing Your Interfacing
Interfacing comes in many types and weights, and the one you choose affects how your finished shirt hangs. This section compares woven, tricot, and bonded interfacings on shirting and linen so you can see the difference in drape for yourself.
Cutting Your Interfacing
Interfacing has a grain line just like your fabric. We'll cover laying it out, cutting the collar, collar stand, and cuffs, and a measuring trick that makes the long, narrow button band strips much easier to cut.
Applying Your Interfacing
Pressing rather than ironing keeps your interfacing from shifting as it fuses. This section covers protecting your iron and ironing board, fusing the smaller pieces, and where the interfacing belongs on each front band.
Sewing the Darts

Creating and Attaching the Pockets

Assembling the Backs

View A Back Pleat
View A's inverted box pleat comes from the Archer's menswear roots, but you can reverse it into a traditional box pleat if you prefer. This section shows both versions, plus an easy way to anchor the pleat so there's nothing to remove later.
View B Gathered Lower Back
Gathering the lower back panel takes a little prep, but it's worth it. We'll explain where to place your gathering stitches and why, how to distribute the gathers evenly, and why sewing with the gathers facing down makes the process easier.
Yoke Method One

Yoke Method Two

Inserting Your Sleeve Plackets

Setting Your Sleeves

Sewing the Side Seams

Assembling & Attaching the Collar

Assembling the Collar
You may notice that the undercollar is cut on the bias and drafted slightly smaller than the top collar, both details that help you achieve a more professional looking collar. This section covers sewing the collar, a small stitching trick for better points, and pressing so the seam line rolls to the underside.
Adding the Collar Stand
Instead of notching the curved seam allowances of the collar stand, we trim them close, a technique borrowed from ready-to-wear. We'll explain why that gives you a smoother curve and show how to press each side for a clean finish.
Attaching the Collar to the Shirt
Pinning a nearly straight collar stand to a curved neckline may look like it won't work, but we promise, the seam lines do match up. We'll show where the stand should meet the button band, how to get clean corners at the front, and how to finish the stand with edgestitching.
Assembling & Attaching the Cuffs

Hemming Your Shirt

Double-Fold Hem
This narrow hem is the one used in the pattern instructions, and it can be sewn on any machine. We'll show a guide stitch that makes the first fold easier, how to ease the extra fabric around the curve, and a quick way to reduce bulk where the hem meets the button bands.
Serger Differential Feed Hem
If your serger has an adjustable differential feed, it can gently draw in the curved edge so the hem presses up flat without small tucks. This method is especially helpful for shifty fabrics like linen, and we'll cover testing your settings before you start.
Buttons & Buttonholes

Testing and Sewing Buttonholes
A test buttonhole on the same layers as your button band shows you exactly how your machine will perform. This section covers checking the size against your button, placement on the button band, cuffs, and collar stand, and why we open buttonholes with a chisel.
Marking Button Placement
The buttons go on after the buttonholes have been sewn and where you mark them does make a difference. We'll explain why centering a button in its buttonhole can leave the tops of your button bands uneven, and how to mark placement so everything lines up.
Sewing Your Buttons On
Buttons can be sewn on by machine with a button sew-on foot or by hand. We'll show both methods, including how to create a thread shank so the buttonhole sits flat around each button.
Extras
-

Alder + Archer Dress — Method 1
Add the Archer SleevesTransform your Alder into a sleeved shirtdress by combining it with Archer sleeves using this blending method. Extend the armholes to accommodate sleeves, measure sleeve cap ease for proper fit, transfer notches accurately, and find the new shoulder point. This method maintains the Alder's fitted bodice with bust darts.
-
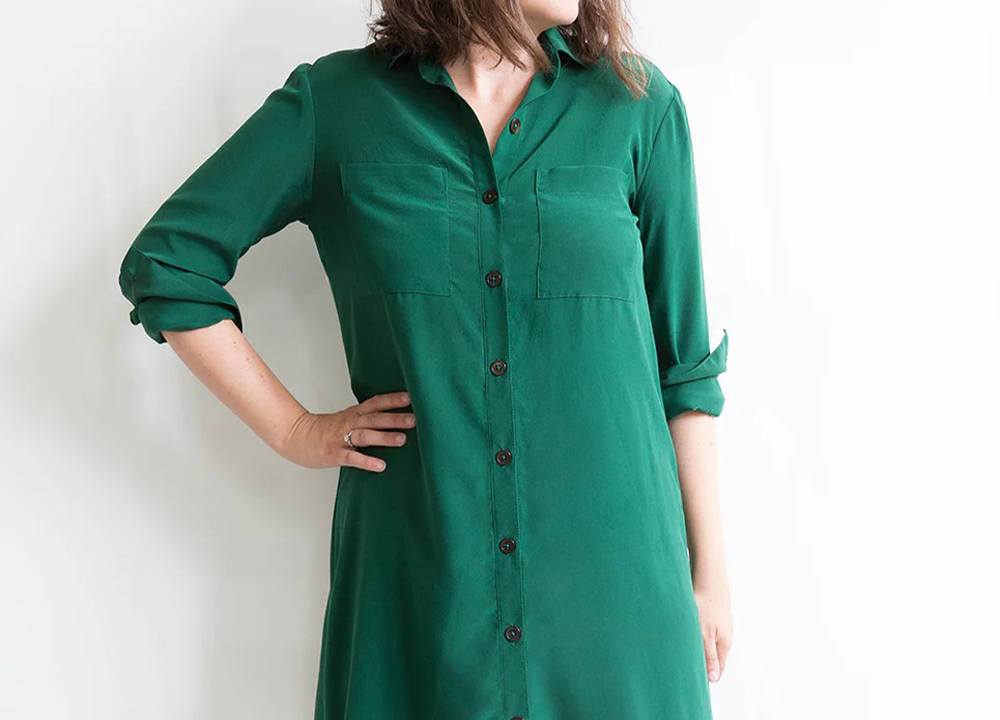
Alder + Archer Dress — Method 2
Try the Simpler MethodCombine the Archer bodice with the Alder skirt for a sleeved shirtdress without complex alterations. This simpler method uses the Archer's looser fit through the bodice and joins it at the waistline with the Alder's slightly flared skirt. Requires only basic blending at side seams and adjusting the right front button band length.
-

Archer Pleated Popover
Add a Front PleatAdd a pleat at the base of the Archer Popover placket with a few simple pattern changes. We’ll show how to extend the center front, mark and pin the pleat, and catch it inside the placket seam. You’ll need both the Archer and the Archer Popover patterns for this one.
-

Color Block Your Archer
Try Color BlockingColor blocking is an easy way to give your Archer a new look with two coordinating fabrics. This tutorial shows how to line up the pattern pieces so the split matches at the side seams and button band, then add seam allowances so each piece comes back together cleanly.
-

Create a Sleeveless Archer
Go SleevelessLeaving off the sleeves works, but a few easy pattern changes help a sleeveless Archer sit better at the armholes. We’ll show how to shorten the shoulder seam, remove a small wedge at the back yoke seam to reduce gaping, and finish the armholes with a bias facing.
-

Alternate Archer Pocket
Draft the PocketThis variation adds a folded triangle to the top of the Archer pocket, as seen on the sleeveless Archer. We’ll show you how to draft it from the original pocket pattern. Since the wrong side of the fabric shows on the triangle, choose one that looks the same on both sides.


