Archer Pleated Popover Variation Tutorial
Shop this post

Archer Button Up Shirt

Archer Button Up Shirt

Archer Popover Add-On

Archer Popover Add-On

Back when we introduced the Archer Popover Variation Pack we had a lot of people interested in a tutorial on how to put a pleat at the bottom of the center front placket. Today we're going to show you how to do just that! You'll need to make a few alterations to your pattern to begin but overall this is a very easy pattern alteration. Please note that you will need both the Archer Pattern and the Archer Popover Pattern to complete this variation.
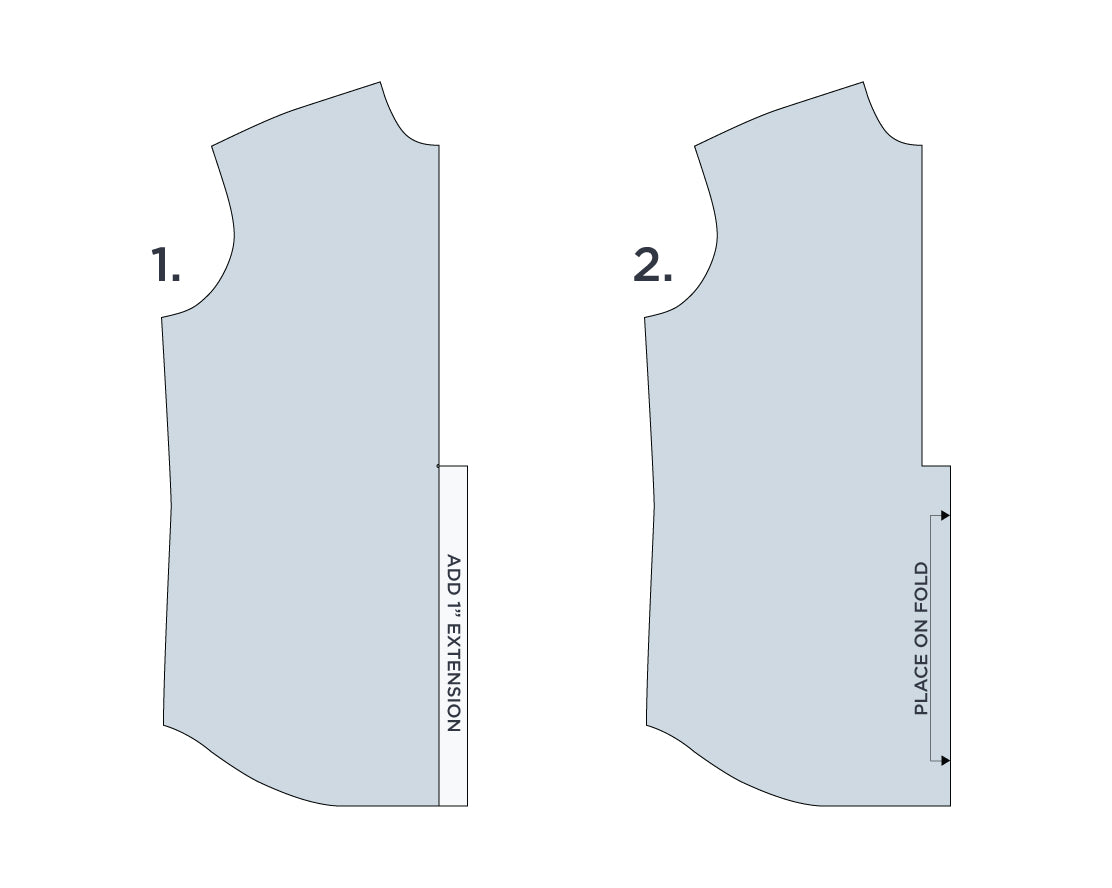
1. To start you'll need to add a 1" extension to the center front edge of the shirt starting at the end point of the placket slash (labeled "End Point" on the pattern) down to the hem. 2. The edge of this extension becomes the center front edge of the new pattern piece.

Once you've cut your pattern, take your front and stitch around the placket area just shy of the 1/2" seam allowance. This will give you a guide to work with in the next steps. You can alternately mark this line with chalk.

Measure in 1/2" from the edge of the placket opening and mark.
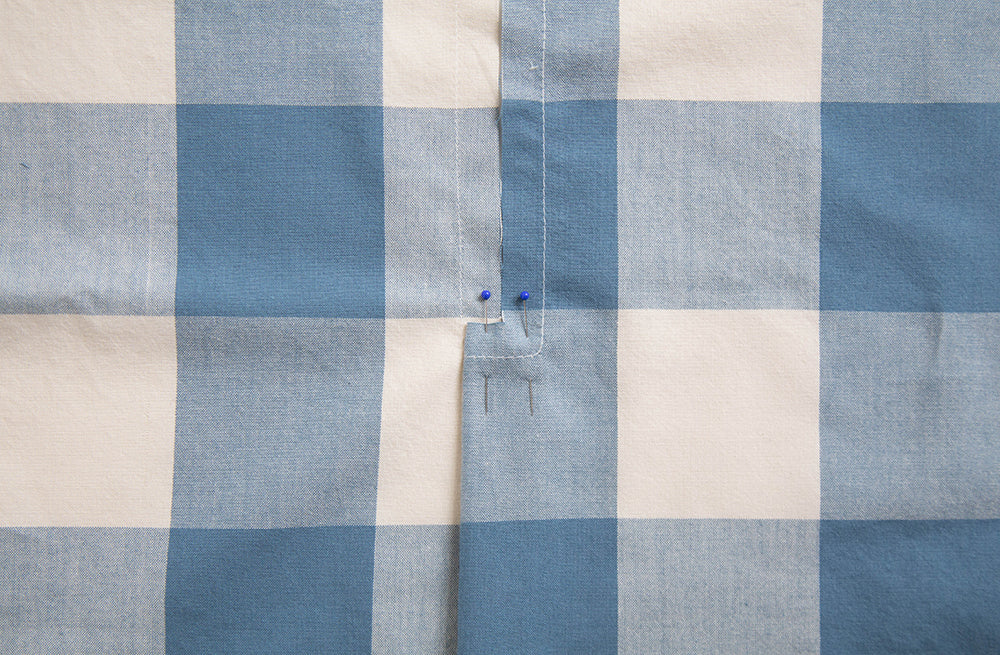

Bring the marked point over to the stitching line on the other side of the placket opening and pin the pleat in place.

Stitch across the bottom of the pleat from one side of the fold to the other to secure the pleat in place during subsequent steps.


Now continue as you would for step 01 and 02 of the popover instruction booklet. Your placket will look like this.

Before cutting the placket open as per step 03, double check that you've caught the bottom of the pleat inside the seam of the placket. You don't want the edge of the pleat to hang over the sides.


Cut the placket open as you would in step 03, the only difference is that you only need to cut along the placket line on the actual placket piece as the shirt is already separated. You'll need to cut into the corners of both the shirt and the placket. Continue with the steps as written in the instructions.

It's a pretty easy variation, just a little bit of pattern prep and you've got a different look for your next Archer Popover! I left the triangle on the bottom of my placket but you can just as easily omit that part if you prefer a flat bottom to yours. Hope you enjoyed this tutorial variation and if you make one be sure to use the hashtags #archerbuttonup or #archerpopover on social media so we can check them out!
Featured Products: