Poppy Dress Printed Patterns are Now Available!

Archer + Alder Version 02

Alder Archer Pattern Variation

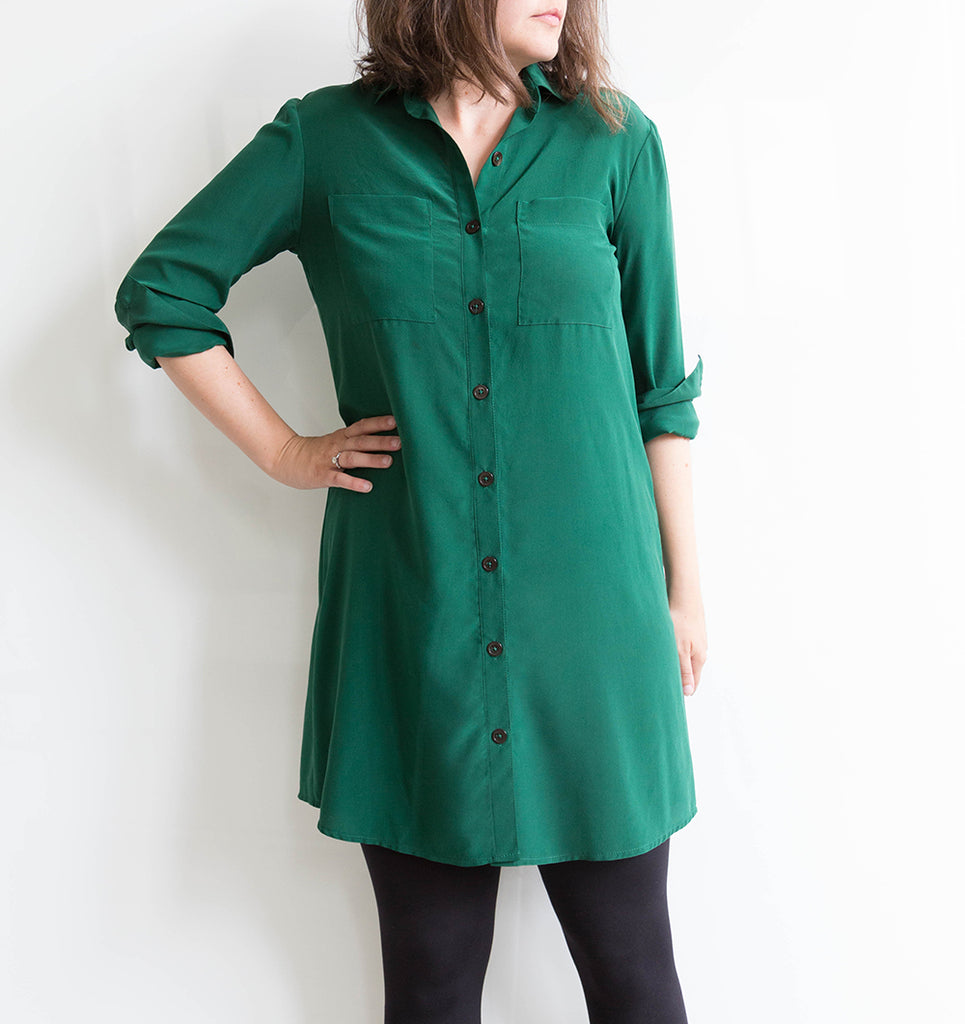
Today I'll be walking you through another version of combining the Alder and Archer patterns to create a dress. If you remember, we posted the first Alder + Archer variation shortly after the Alder was released. That version used the complete Alder pattern and required you to re-draft the yoke to combine with the Archer sleeve. If you know what you're doing it works alright, but it's a bit involved for a tutorial. This version uses the Archer for the top half of the garment and combines with the Alder at the waist, this means the amount of work you need to do is greatly reduced. I'll outline the differences in the fit of the two variations below and then show you how to make the dress above!

Alder Archer Pattern Variation

The main difference in the two methods of combining the Alder & Archer is that in the first tutorial we posted you get the more fitted bodice and dart of the Alder. The caveat with this is that you need to preform some moderately complicated pattern alterations to get the Archer sleeve to fit. You can see in the photo above that the bodice of v.01 is more fitted than that of v.02. With this second method of combination, you are getting the looser fit of the Archer combined with the slightly flared hem of the Alder and you have to perform zero alterations to the sleeve area. Personally aside from the pattern alterations, which don't bother me to do, I prefer the fit of the v.02 in a dress this style. So much so that I own multiple versions of this combination!

Alder Archer Pattern Variation

To combine your Alder & Archer in this method you'll start by locating your front and back pattern pieces. The Archer contains separate pieces for the left and right fronts, for this tutorial you can discard the right front. Align the front and back pieces, matching the waist notches and the center edges of the pattern pieces. The side seam edges will be slightly off at this point, that's fine. We'll remedy that in a later step.

Alder Archer Pattern Variation

Once combined, your pattern pieces will look like this. You can see more easily here where the Archer and Alder are off at the side seams.

Alder Archer Pattern Variation

Blend the jagged edge between the bust and hip as shown above. Make sure you blend similar lines between the front and back pieces so that they sew together smoothly.

Alder Archer Pattern Variation

Your pattern pieces will now look like this. Walk the side seams of the front and back to make sure that your seam lines are the same length. If you need to make adjustments, we recommend making them to the hem edge. If you properly aligned your waist notches, you should't need additional adjustments.

Alder Archer Pattern Variation

Once you have your left front and back pieces settled we'll need to prep the right front and button band. To create the right front, simply trace your left front piece upside down, then trim 2.5" off the center front. For the button band, take the Alder button band and measure to make sure it is the same length as the center front length. Make adjustments to the band, not the dress, if needed. Use the button placement guide on the Alder when it comes time to add your button holes and buttons.

Alder Archer Pattern Variation

You can see how much easier this combination is to make! This variation works with the same fabrics recommended in both the Archer & Alder patterns — the green dress I'm wearing here is silk crepe de chine but I also have a denim version that is equally loved. This variation is perfect for fall layering, hope you'll give it a try!

Mentioned Products

  • Alder Shirtdress 0 – 18
    Alder Shirtdress | Grainline Studio
  • Archer Button Up Shirt 0 – 18
    Archer Button Up | Grainline Studio