The Grainline Blog

Our Poppy Pattern Testers
Pattern testing is one of my favorite parts of developing each pattern – it’s the first time anyone outside of the production process sees it which is always both...
Our Poppy Pattern Testers
Pattern testing is one of my favorite parts of developing each pattern – it’s the first time anyone outside of the production process sees it which is always both...

Poppy Dress Design Details
Earlier this week I introduced you to our newest pattern, Poppy, and I’m thrilled by your response so far! Today I’m diving deeper into the individual design elements of each...
Poppy Dress Design Details
Earlier this week I introduced you to our newest pattern, Poppy, and I’m thrilled by your response so far! Today I’m diving deeper into the individual design elements of each...

It's Giveaway Time! (On Instagram)
I'm so excited to have partnered with Yardblox Fabric to bring you a giveaway + discount code! We used their gorgeous lyocell linen slub for the View D samples of the Poppy and...
It's Giveaway Time! (On Instagram)
I'm so excited to have partnered with Yardblox Fabric to bring you a giveaway + discount code! We used their gorgeous lyocell linen slub for the View D samples of the Poppy and...

Meet the Poppy Dress
Today I'm excited to launch our newest pattern, the Poppy Dress! If you've been following the Grainline Instagram you might have spotted teasers of this pattern over the past six...
Meet the Poppy Dress
Today I'm excited to launch our newest pattern, the Poppy Dress! If you've been following the Grainline Instagram you might have spotted teasers of this pattern over the past six...

Join Me for a Weekend of Sewing
Join me for an in-person retreat Friday, February 28th – Monday, March 3rd with Allyson & Laura Retreats in Berrien Springs, Michigan! This retreat will be a little different...
Join Me for a Weekend of Sewing
Join me for an in-person retreat Friday, February 28th – Monday, March 3rd with Allyson & Laura Retreats in Berrien Springs, Michigan! This retreat will be a little different...

Hadley Top Now in Print
I'm excited to announce that as of today the Hadley Top is available in print in sizes 14 – 32 and the 0 – 18 version is now back in...
Hadley Top Now in Print
I'm excited to announce that as of today the Hadley Top is available in print in sizes 14 – 32 and the 0 – 18 version is now back in...

Boxy Top Shoulder Adjustments – Part 2!
Well I'm back this week with a part 2 to my last video about boxy top shoulder adjustments. In part two of this series I’m covering sleeve adjustments and answering your questions...
Boxy Top Shoulder Adjustments – Part 2!
Well I'm back this week with a part 2 to my last video about boxy top shoulder adjustments. In part two of this series I’m covering sleeve adjustments and answering your questions...

Me Made Sale!
We've been so inspired by everyone's Me Made May posts on our feed – Instagram briefly flagged us as a bot due to our excessive liking and commenting! These posts...
Me Made Sale!
We've been so inspired by everyone's Me Made May posts on our feed – Instagram briefly flagged us as a bot due to our excessive liking and commenting! These posts...

Boxy Top Shoulder Adjustments – Part 1
Have you ever sewn up a boxy top pattern and found that it’s constantly sliding and pulling towards the back? If so this video is for you! Not only will I...
Boxy Top Shoulder Adjustments – Part 1
Have you ever sewn up a boxy top pattern and found that it’s constantly sliding and pulling towards the back? If so this video is for you! Not only will I...

Reed Skirt Now in Size 32
As of today the Reed Skirt is now available in size 32! I’m so excited to be re-releasing these patterns with additional sizes and, as usual, to celebrate we’re offering...
Reed Skirt Now in Size 32
As of today the Reed Skirt is now available in size 32! I’m so excited to be re-releasing these patterns with additional sizes and, as usual, to celebrate we’re offering...

2024 Make Nine: Corin Pattern Adjustments
In this video, I'm showing how I transformed the Corin Top into the Corin Dress. Join me as I guide you through easy pattern adjustments, including creating a yoke, adding...
2024 Make Nine: Corin Pattern Adjustments
In this video, I'm showing how I transformed the Corin Top into the Corin Dress. Join me as I guide you through easy pattern adjustments, including creating a yoke, adding...

2024 Make Nine: Corin Dress
My first Make Nine garment(s) are complete and I'm sharing 3 Grainline Studio Corin Tops turned Dresses. Additionally, I'll guide you through my muslin process and explain the reasons behind...
2024 Make Nine: Corin Dress
My first Make Nine garment(s) are complete and I'm sharing 3 Grainline Studio Corin Tops turned Dresses. Additionally, I'll guide you through my muslin process and explain the reasons behind...
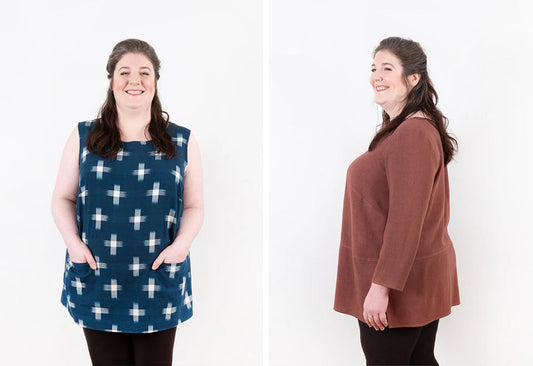
Uniform Tunic Now in Size 32
Today I’m so excited to launch the Uniform Tunic in size 32! Typically we have a launch sale when releasing a new pattern or size range, but this release...
Uniform Tunic Now in Size 32
Today I’m so excited to launch the Uniform Tunic in size 32! Typically we have a launch sale when releasing a new pattern or size range, but this release...