Scrap-Busting: Zippered Fruit Pouches


Welcome back to our Fabric Scrap Busting Series! We were blown away by all of the great comments, suggestions, and ideas community members provided in response to our first post in the series. You can check them out on our Instagram page.

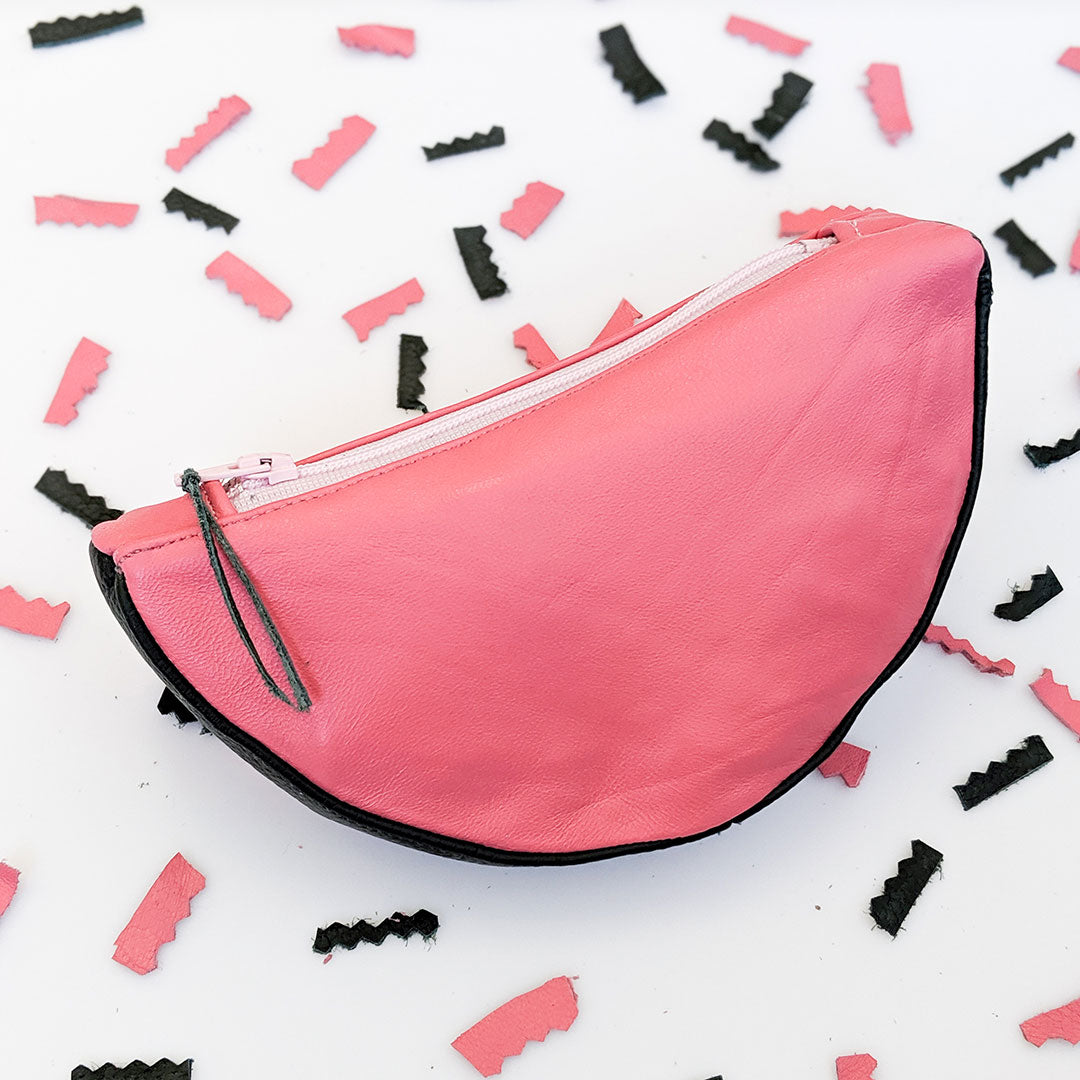
In today's tutorial we're showing you how to turn your scraps into fruit themed zippered pouches. The inspiration for these incredibly cute bags came from the above pictured leather fruit pouches Jen spotted a few weeks back on Cuyana. We originally had something else planned for today's scrap busting series, but when we were looking through our leather scrap drawer and saw that we had pink, green, and yellow scraps on hand it felt like too big of a coincidence to overlook.
If you don't have leather scraps you can still make these pouches. We recommend using thicker weight woven fabric scraps or interfacing your pieces so that your pouches retain your shape. In addition to the fabric you'll also need a zipper and thread. Our pouches are big enough to hold a few small items, but they don't fit a cell phone. Feel free to make your pouches, or fruit, as small or large as you'd like! We're not providing a pattern template this week as these shapes are easy to draw on your own using any circular object. Scroll down for detailed steps on how to make a watermelon and jumbo lemon.
Watermelon Zippered Pouch


To get started you'll need two half circles of any size of your main fabric, two small rectangles in your main fabric, a longer rectangular piece of fabric in contrast fabric whose width will be determined by your zipper plus seam allowance and whose length will be the same as the length of the rounded edge of your fabric plus seam allowance, a zipper, thread, marking tools, leather needles, and clips to hold your pieces together while sewing. Any hole you put in the leather will remain so we recommend clipping your pieces together versus pinning; however, you can pin pieces together within the seam allowance if needed. When in doubt cut out larger pieces - you can always trim things to size if needed.
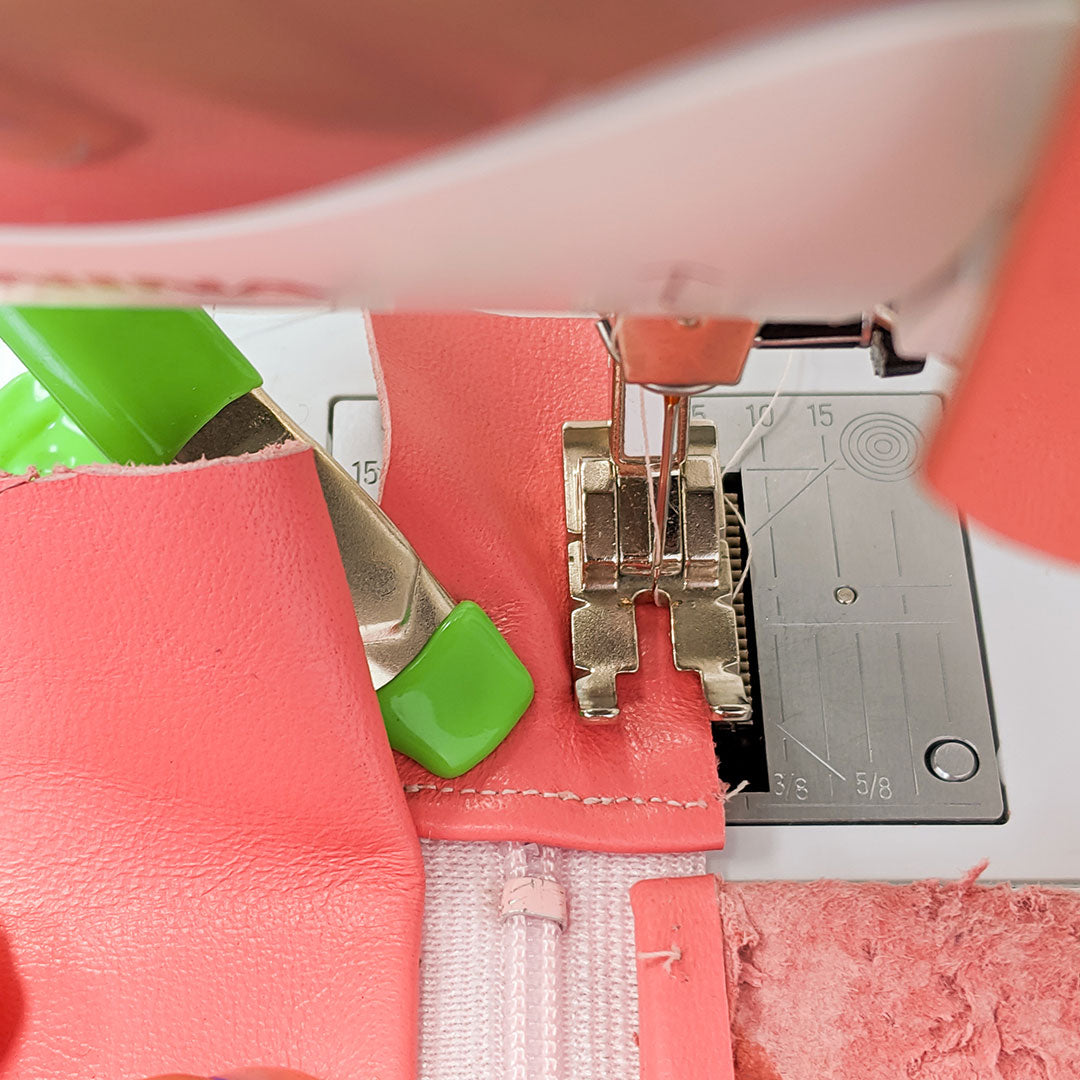
Begin by placing the left side of your zipper along the straight edge of one of your half circles with the right side facing down. We positioned our zipper so that the start of the teeth and zipper stop were approximately 1 inch (2.54 cm) from either end.


Use a zipper foot to sew the zipper at 1/8 inch (0.32cm). Start where the zipper teeth begin and stop at the zipper stop. Flip the seam allowance to the wrong side and press.
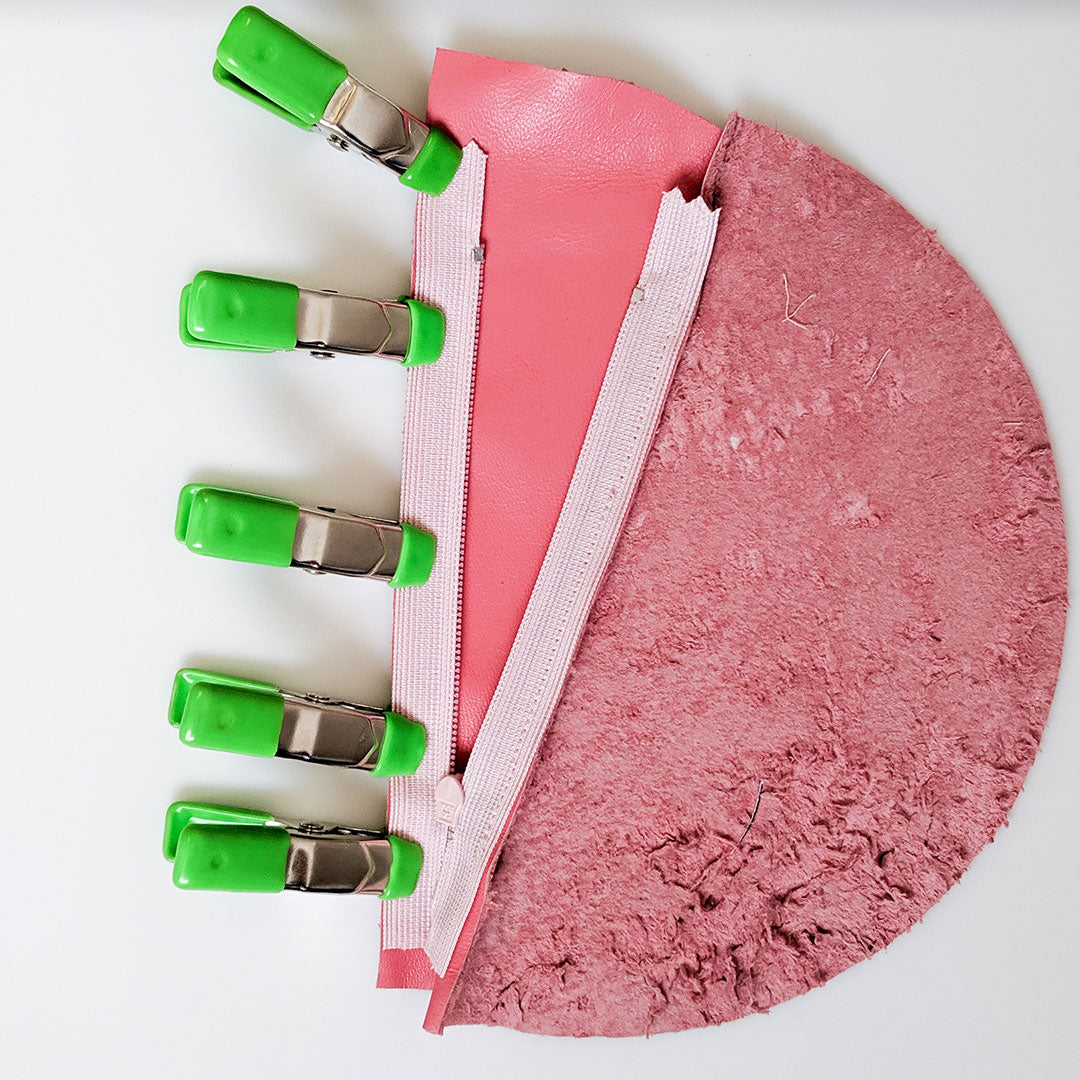
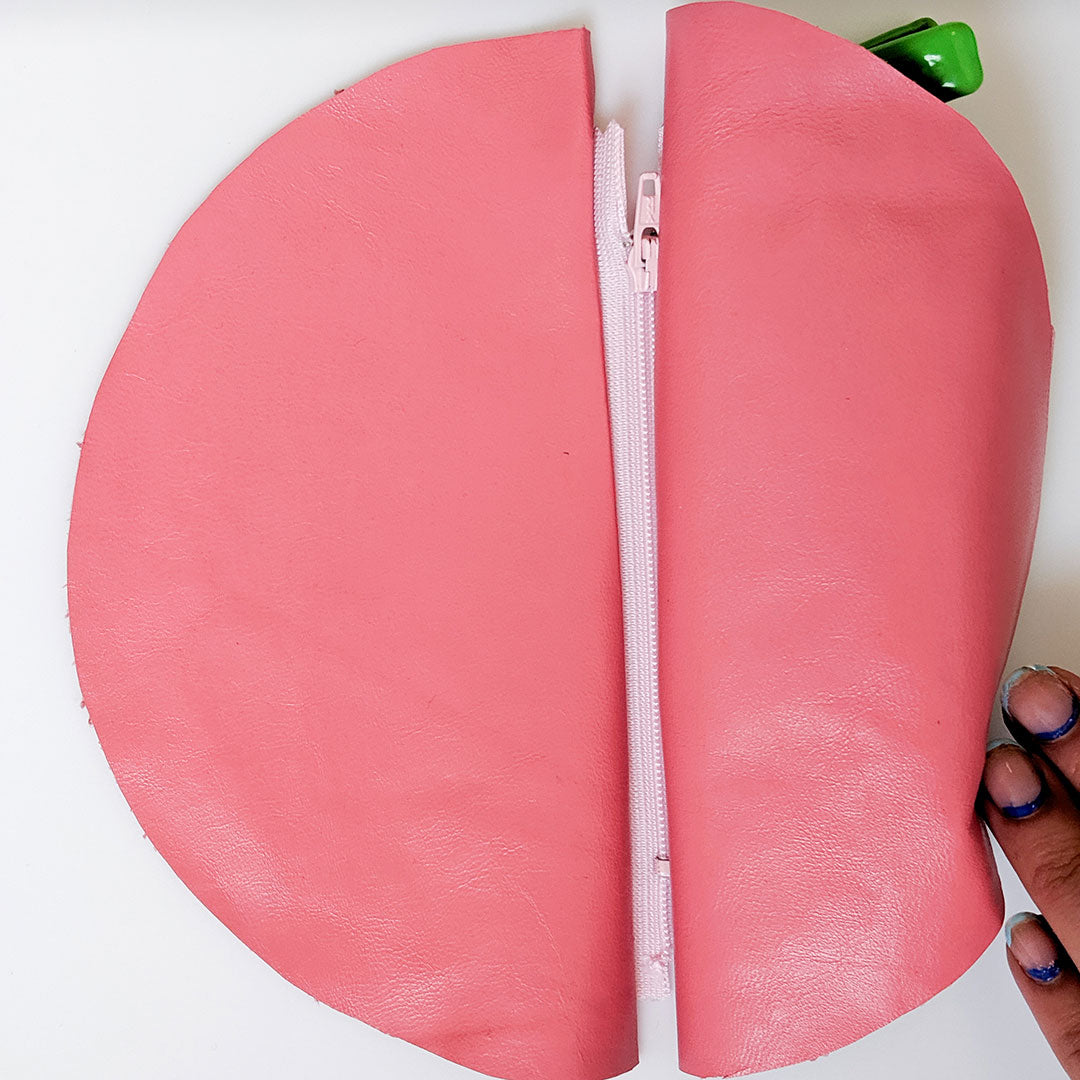
Place the right side of your zipper right side facing down along the straight edge of your other half circle. Clip in place. Be sure to place your zipper at the exact height you placed it at on the other half circle. Pull the zipper closed and flip everything so that the right sides are facing up and double check to ensure everything aligns before sewing. Sew from the start of the zipper teeth to the zipper stop at 1/8 inch (0.32 cm).


Cut two smaller rectangles out of your main fabric. These should be cut at a width of your zipper plus 1/2 inch (1.27 cm) and the length will be based on the measurement from the start of your zipper teeth to the edge of your main fabric plus seam allowance on both edges. As mentioned previously, it's better to cut this longer than you might need as you can always trim it down to size if it is too long. Fold the short edge of one of your rectangles under by 1/4 inch (0.635 cm) and topstitch 1/8 inch (0.32 cm) away from the folded edge. Repeat steps for second rectangle.
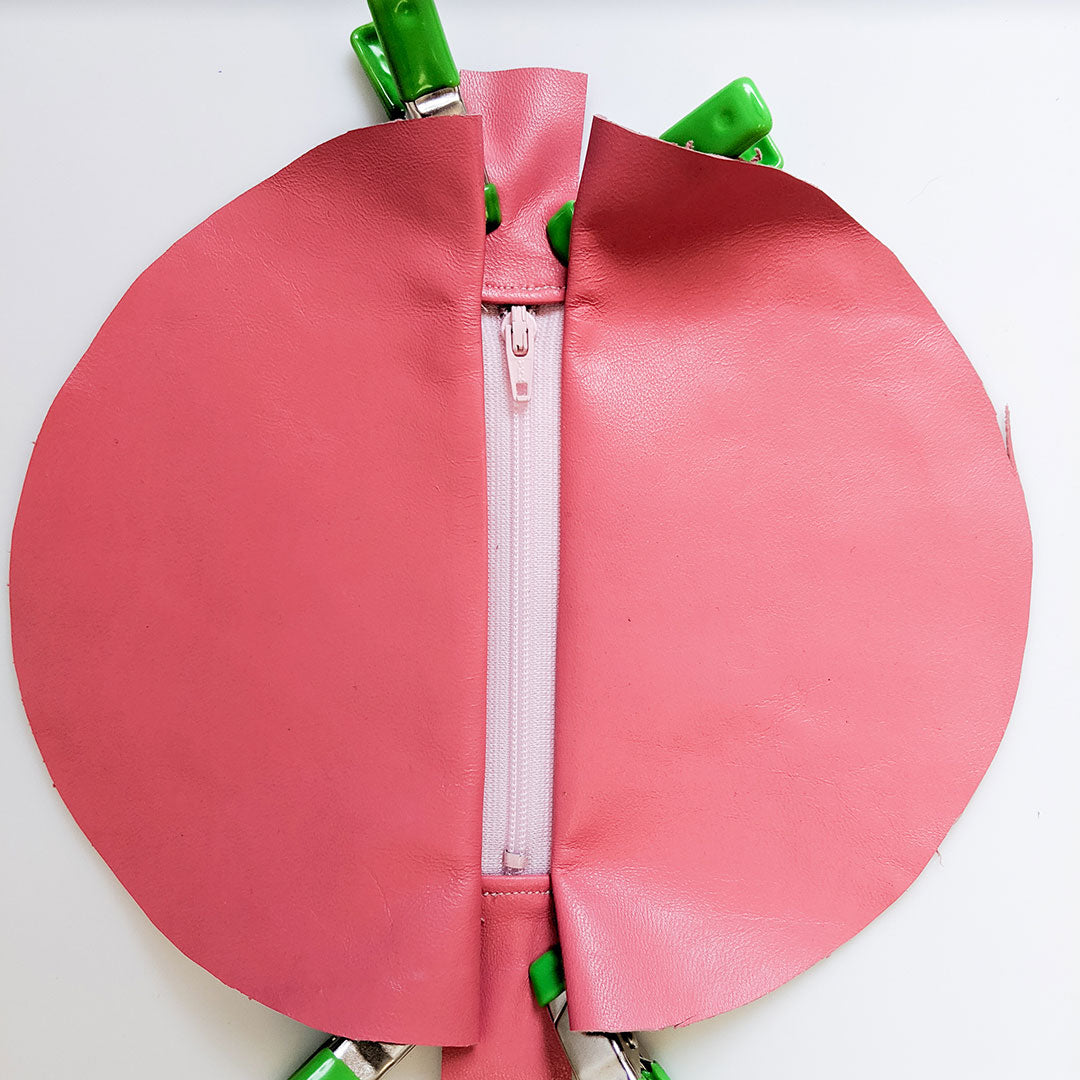
You are now going to attach the two rectangles to either end of your main zippered piece. Starting at either end, clip your rectangle piece to the zipper only. Sew the rectangle to the zipper starting on one side, pivoting at the corner, going across the previously topstitched edge, and up the other side at 1/8 inch (0.32 cm). Repeat on the other end.


Topstitch along both edges of your main fabric.

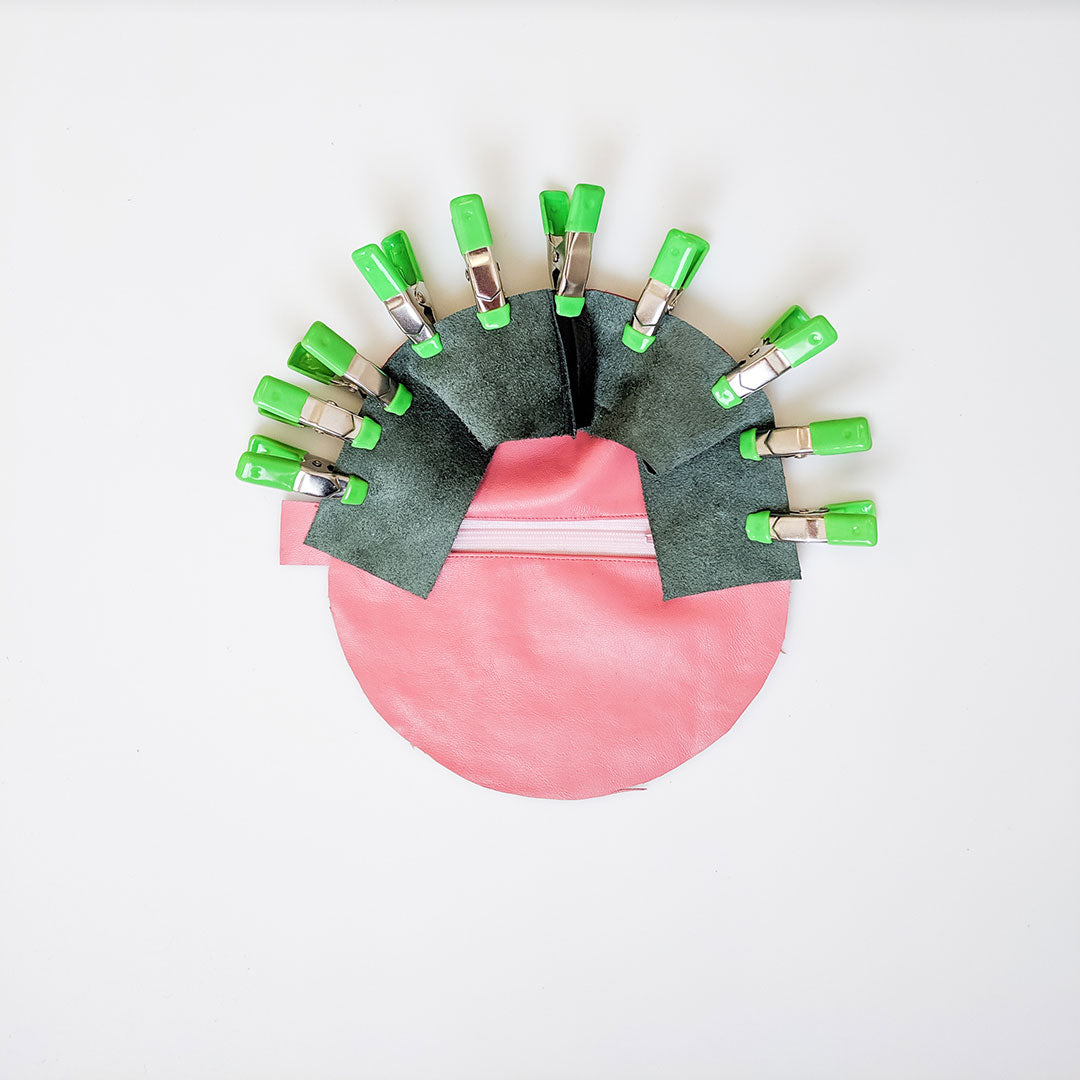
Measure and cut a rectangle in a contrast fabric. The measurements will be determined by the width of your zipper and length of the rounded edge of your main piece plus seam allowances. We didn't have one piece that was long enough so we cut two and sewed them together in order to make a long enough piece. With right sides facing each other, attach the long edge of the rectangle to the rounded edge of the main piece. Align the center of the rectangle with the center of the curve.


Carefully sew using 1/2 inch (1.27 cm) seam allowance being sure to ease as needed to avoid puckers. Pink and clip your seam allowance to create a smooth curve.
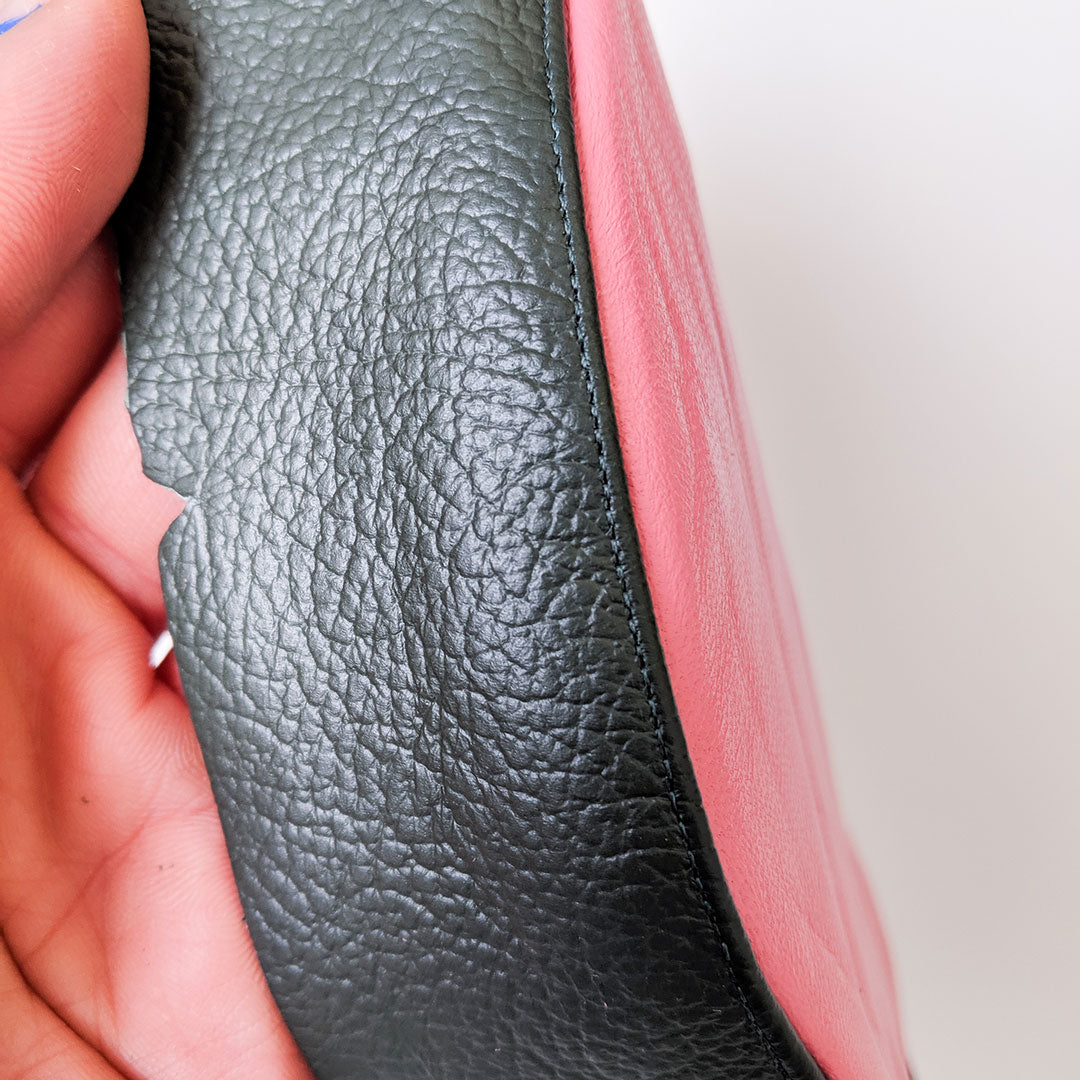

Press the seam allowance down towards the contrast fabric and topstitch 1/8 inch (0.32 cm) catching the seam allowance in the process. Repeat the previous steps to sew the remaining raw edges together. Make sure your zipper is open so that you can turn everything right side out at the end. When you topstitch this second edge you might not be able to sew all the way up to the edge closest to the zipper on either sides due to the limitations of the pouch opening. We recommend starting in the center and topstitching as far as you can up one side and then repeating in the opposite direction.


Turn your pouch inside out and align the top edge of your main rectangle with the top edge of your contrast rectangle. Sew whatever seam allowance you included when measuring both pieces - for us this was 1/2 inch (1.27 cm). Trim, turn right side out, and enjoy your new bag!
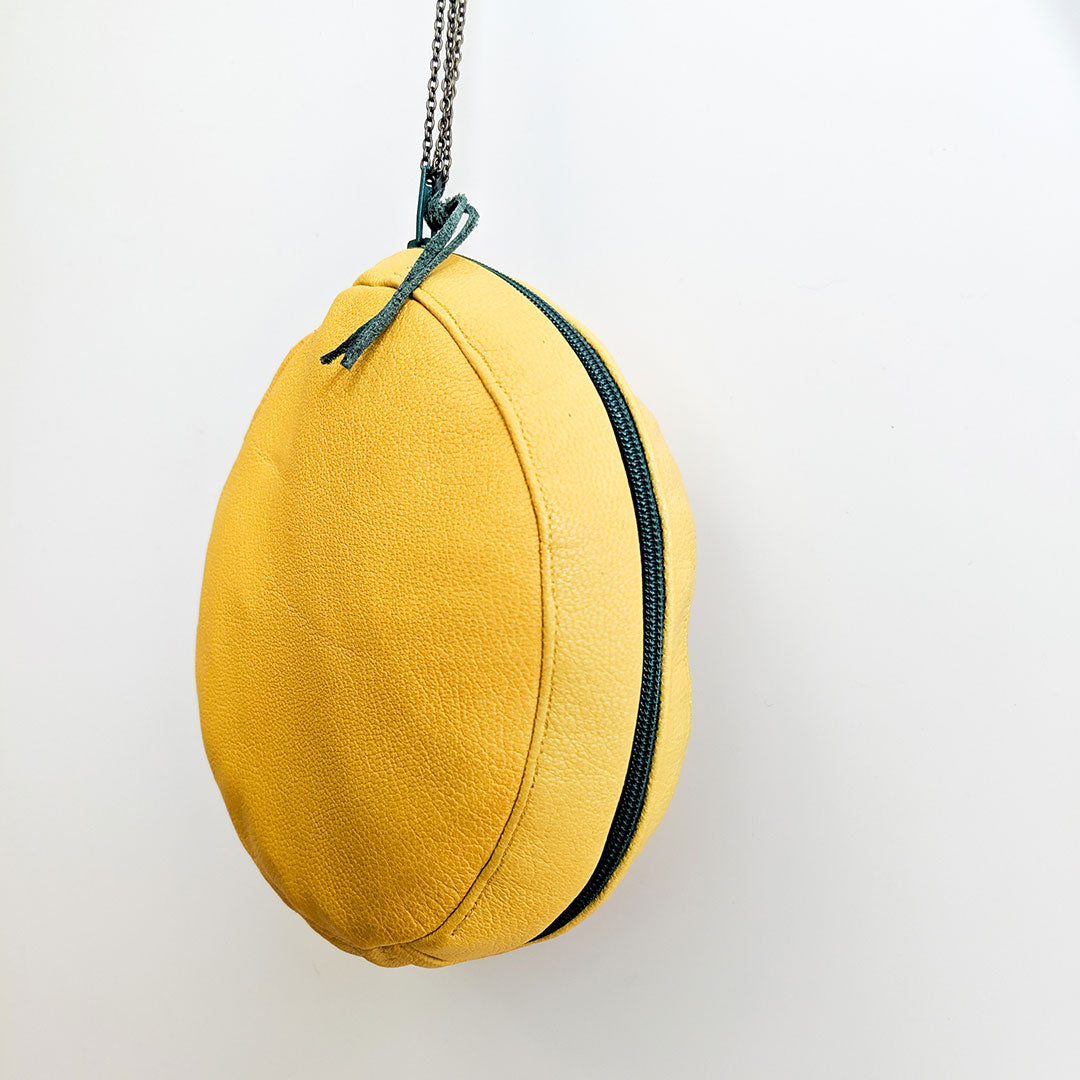
Lemon Fruit Pouch

We can't get enough of this jumbo lemon! The bright color and circular shape make it fun and functional. We're already planning on bringing it to the beach, to summer festivals, and wherever else we end up this summer.


You'll need two circular pieces of fabric, three rectangular pieces that are half the length of the outer edge of your circle and a width of your choice plus seam allowances, a zipper, and thread. Place your zipper along the edge of one of the rectangles with right sides facing together. Use a zipper foot and sew at 3/8 inch (0.95 cm).


Flip to the right side and press. With right sides facing sew the second zipper edge to right edge of your second rectangular piece at 3/8 inch (0.95 cm).


Flip to the right side and press. Grab your remaining rectangle and clip the short edges together with right sides facing. Align the center of the short edge with the center of the zipper.


Sew at 1/4 inch (0.635 cm). Flip and press.


Topstitch at 1/8 inch (0.32 cm) and again at 1/4 inch (0.635). Repeat the previous steps on the opposite side to create your outer rind.


With right sides facing, clip one of your circle pieces to the edge of the loop you previously created. Sew at 1/2 inch (1.27 cm). Pink and clip your seams to create a smooth curve.


Press the seam allowance towards the loop and topstitch 1/8 inch (0.32 cm) from edge. Repeat the previous steps with your remaining circle. Be sure to open your zipper so that you can eventually turn your pouch right side out. When topstitching, the opening of the zipper may prevent you from topstitching around the circle entirely. We recommend starting at a central point and going in one direction as far as you can go and then repeating in the opposite direction.

Feel free to attach a chain or trim a small leather or fabric piece and loop it through your zipper to make pull tab.
