Scrap-Busting: Scrunchies and Hair Bows
Shop this post

Hair Bow & Scrunchies
Way back in 2012, we wrote about the perpetual horror of fabric scraps and our desire to reuse and recycle mindfully. The comments section on that post contain wonderful contributions in the form of ideas, suggestions, and resources for this common struggle and are worth checking out.
Currently, we wait until we have a large accumulation of scraps before dropping them off at a garment and textile collection box at H&M. The desire to personally reuse scraps in useful ways has persisted, and we're running with it! In this periodic scrap busting series we'll be sharing the occasional tutorial or idea related to using up fabric scraps or small remnants.
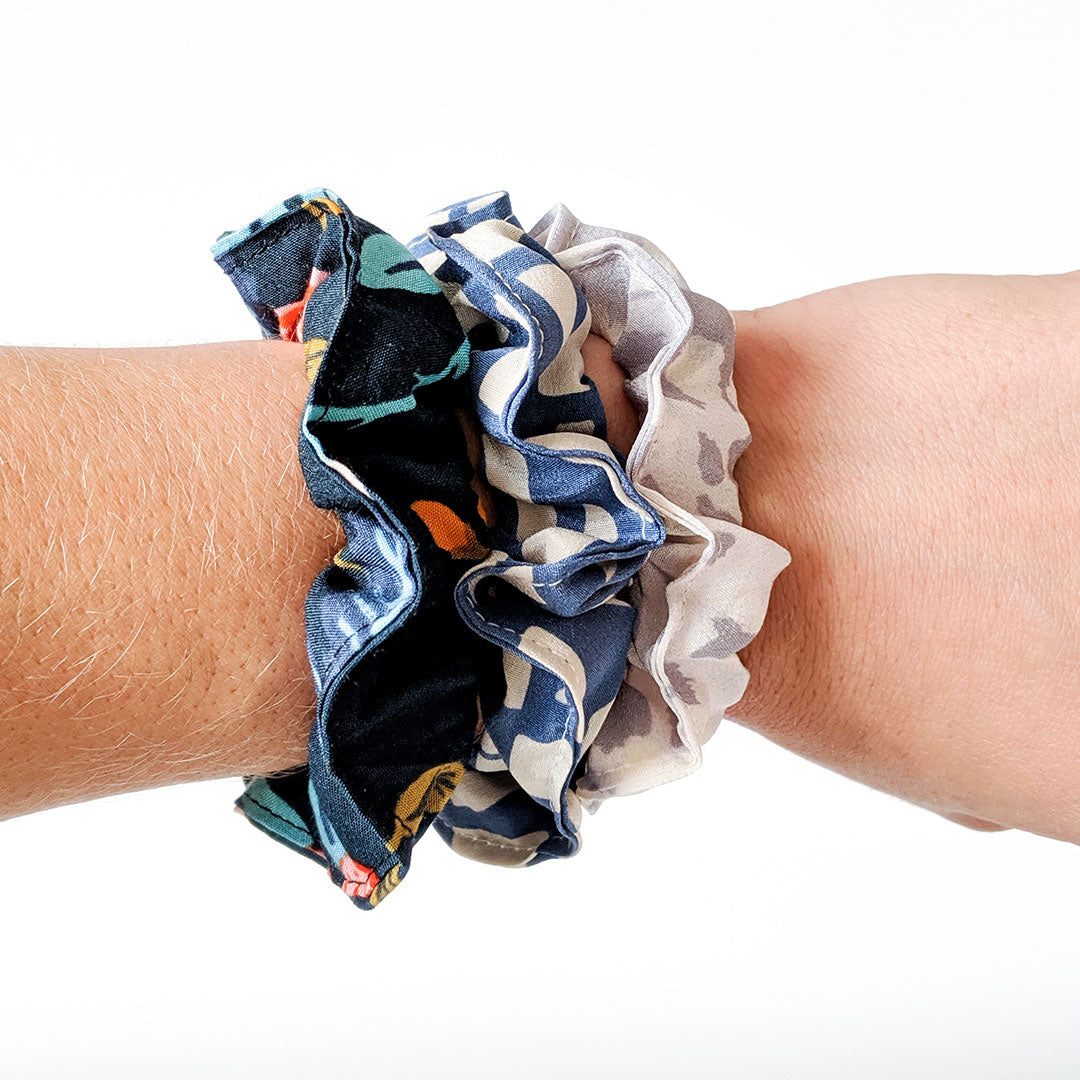
In today's post we're showing you how you can use smaller or odd shaped fabric scraps to make Scrunchies and hair tie bows. This quick and easy project is a great scrap buster, and it's also a great project for newer sewists to build confidence without becoming overwhelmed by multiple pattern pieces and lengthy instructions.

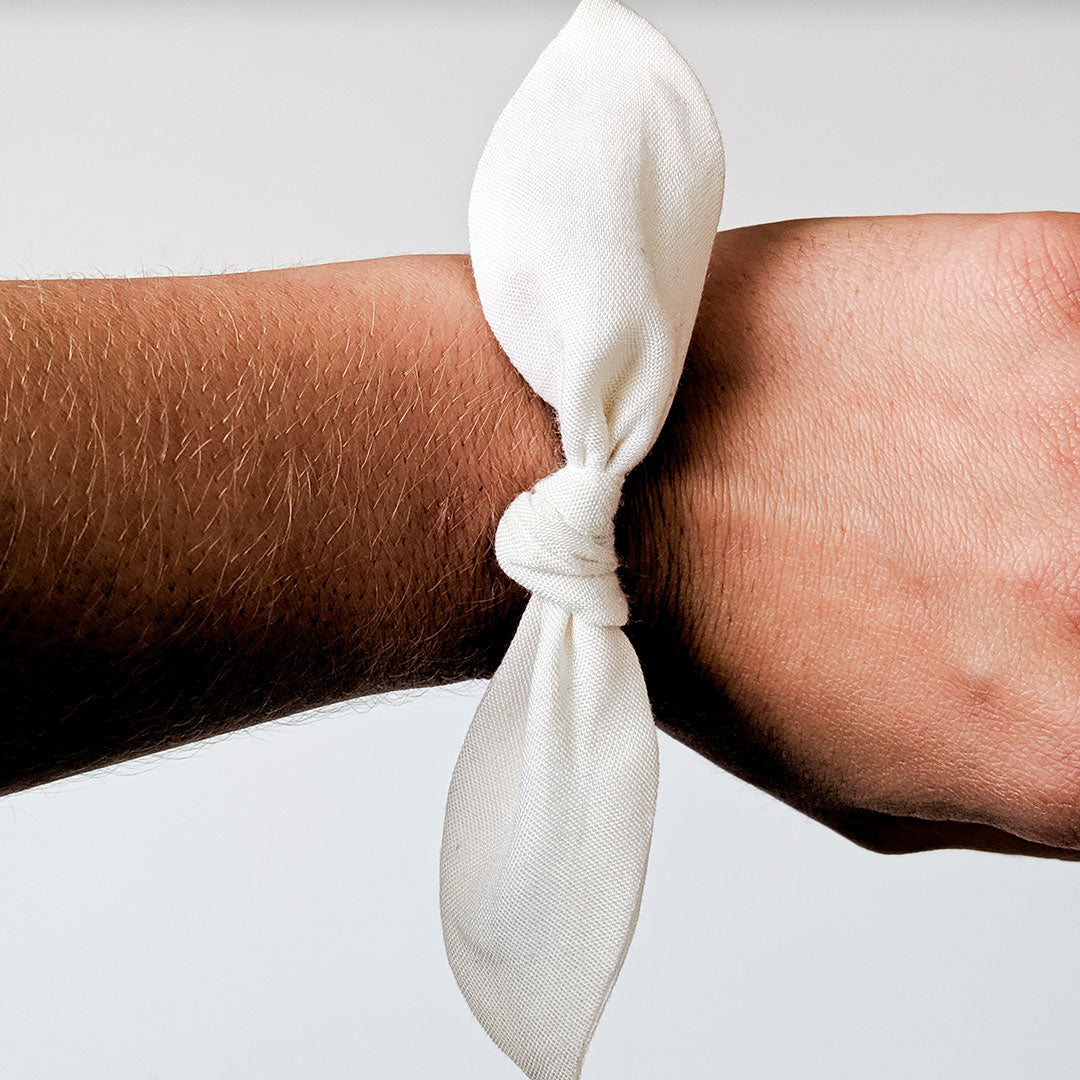
Hair ties are great for pulling and holding back hair, but they can cause damage by pulling, ripping, or breaking hair. First patented in 1987, the Scrunchie, became an alternative to tangle inducing rubber-bands. If you've ever looked back at pictures only to notice a scraggly hair tie around your wrist you'll be happy to hear that these fabric covered bands double as wearable wrist accessories. Lexi was wearing a hair tie bow the day we came up with this tutorial, and we thought it was a great alternative way to use scraps and jazz up a hair tie if Scrunchie's aren't your thing.
To get started grab your fabric scraps or remnants, scissors or rotary cutter, safety pin, thread, seam gauge or ruler, elastic, hair ties, and the Grainline Studio hair bow pattern piece or a drafted pattern piece.
If you're a newsletter subscriber you'll be receiving a link to download a PDF pattern piece for the Hair Tie Bow this week! The piece is fairly simple and easy to draft, but there's also still time to subscribe. Click here if you're interested.
Hair Tie Bow Tutorial
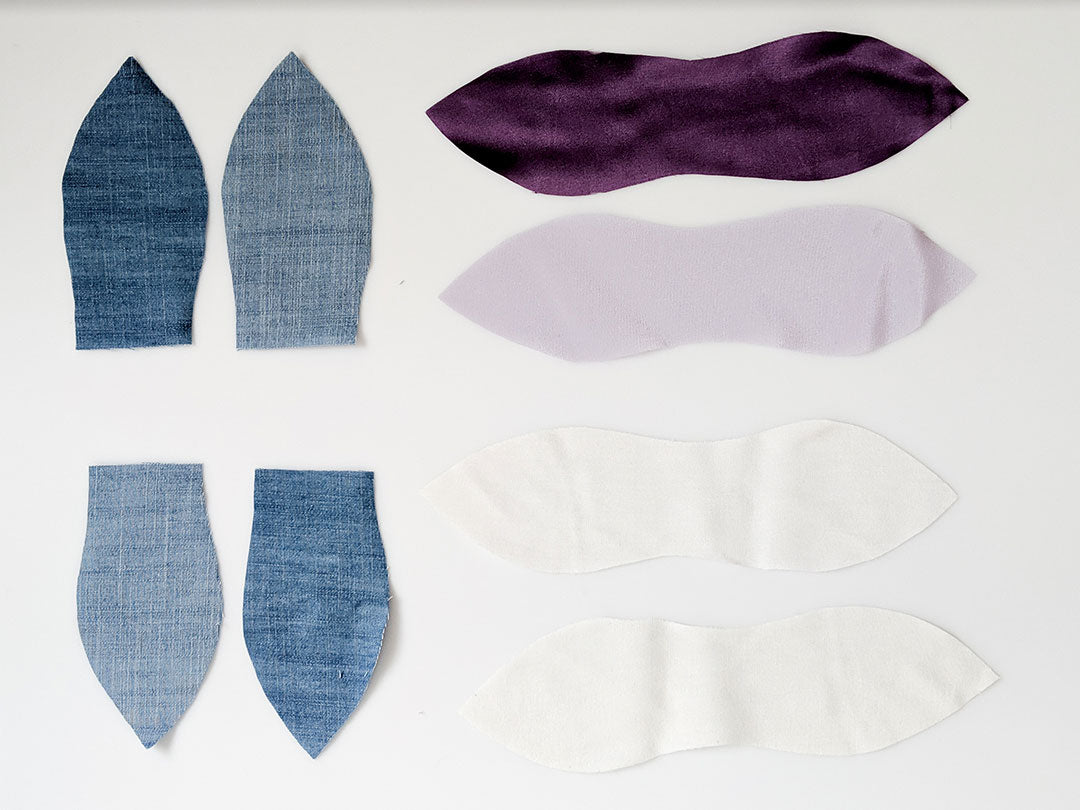

Begin by printing off our Hair Tie Bow pattern piece or drafting your own. Our shape is about 8 inches (20.32 cm) in length and 3.5 inches (8.89 cm) wide at the widest points. If you want your bows to be fuller increase the width of your pattern piece. Grab the fabric scraps you're using and cut 2. If you have smaller scraps you can create patchwork bows, but be sure to factor in your seam allowance.
Sew your pieces together right sides facing at a 1/4 inch (0.635 cm) seam allowance. Leave a small opening between the start and finish of your stitching line.
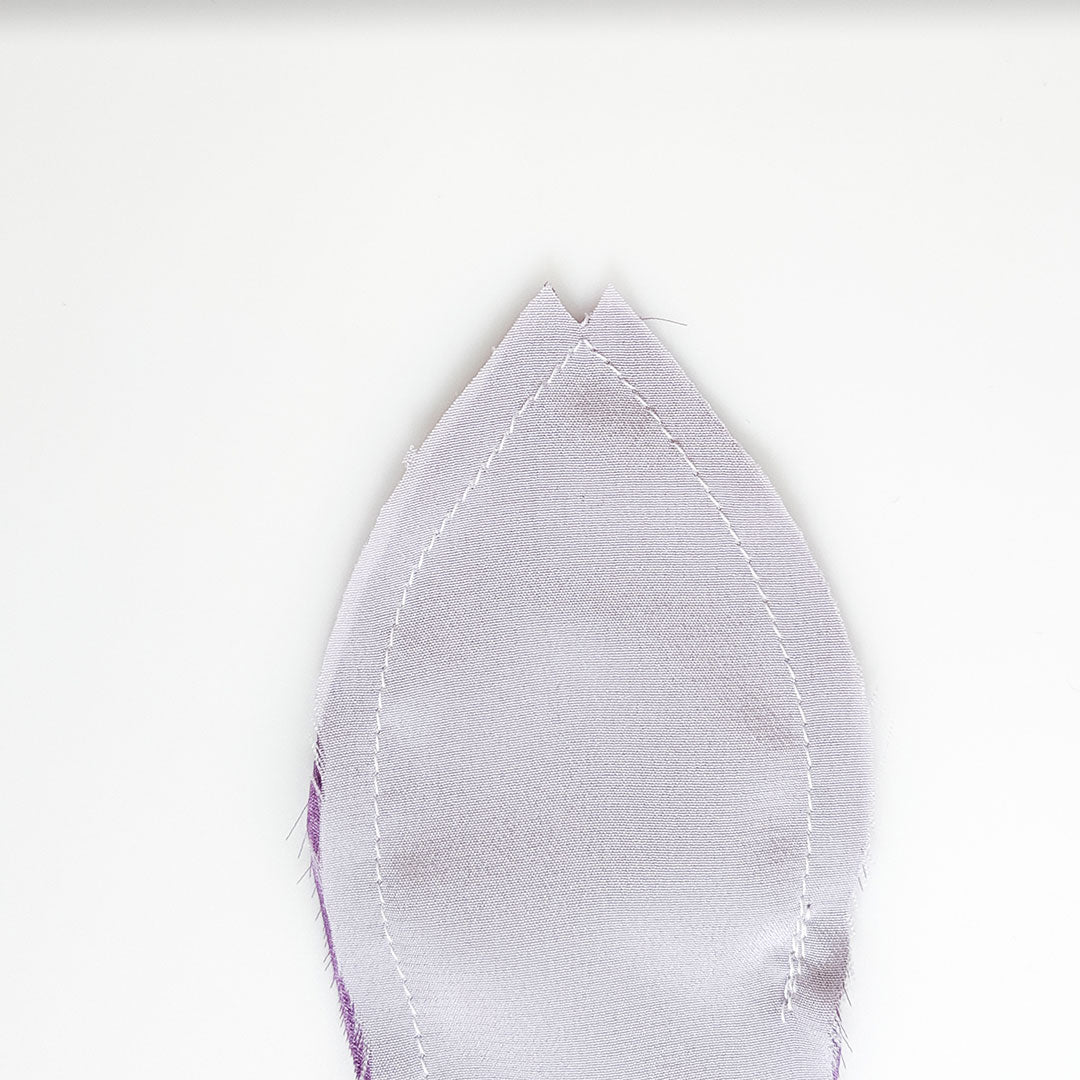
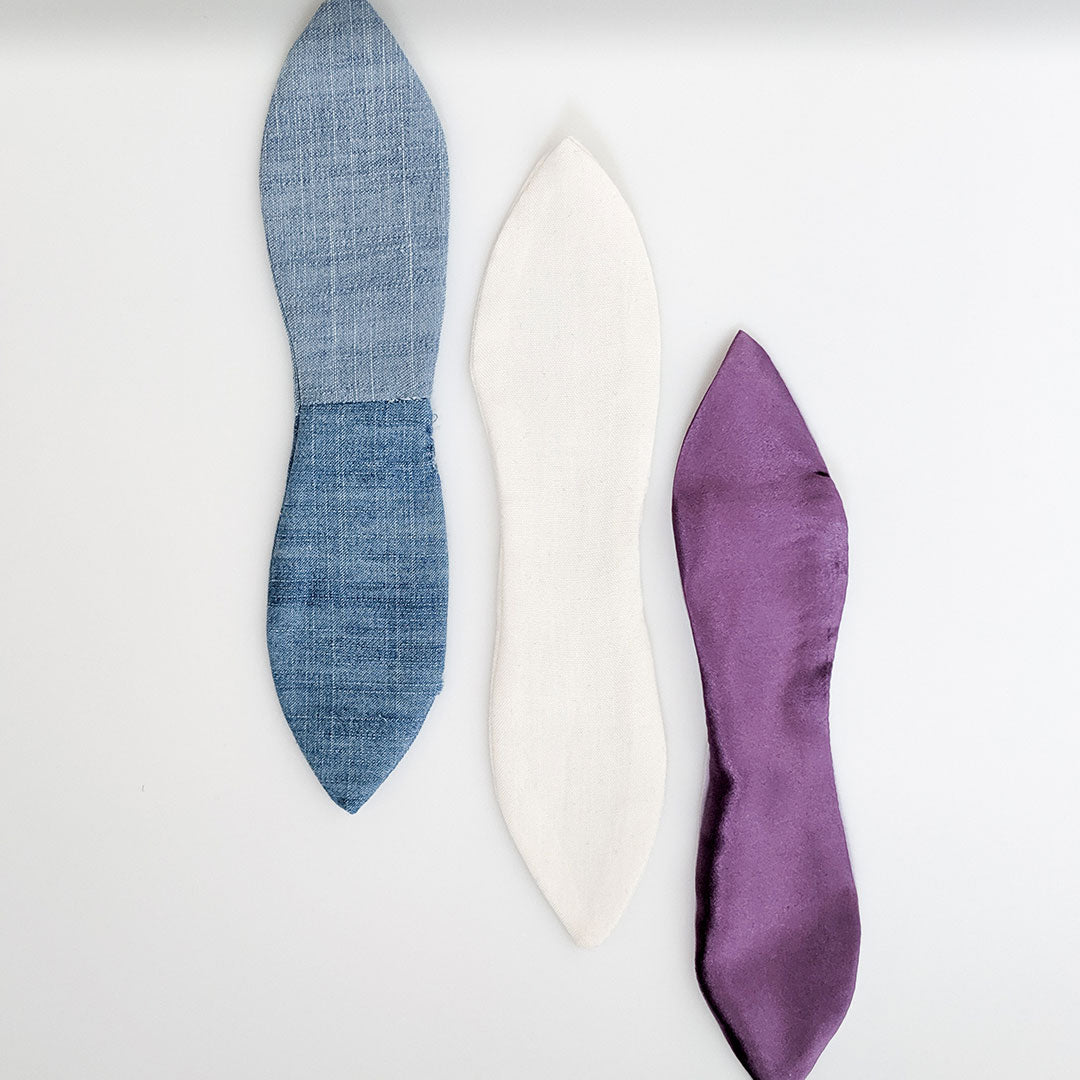
In order to get crisp points on your hair tie bow ends cut a small triangle out of the seam allowance at the point. Get as close as you can to the seam line without snipping through it. Grade your seam allowance if desired.
Gently turn your hair tie bow right side out using the opening in the stitching line. Press and then handstitch or edgestitch the opening closed.

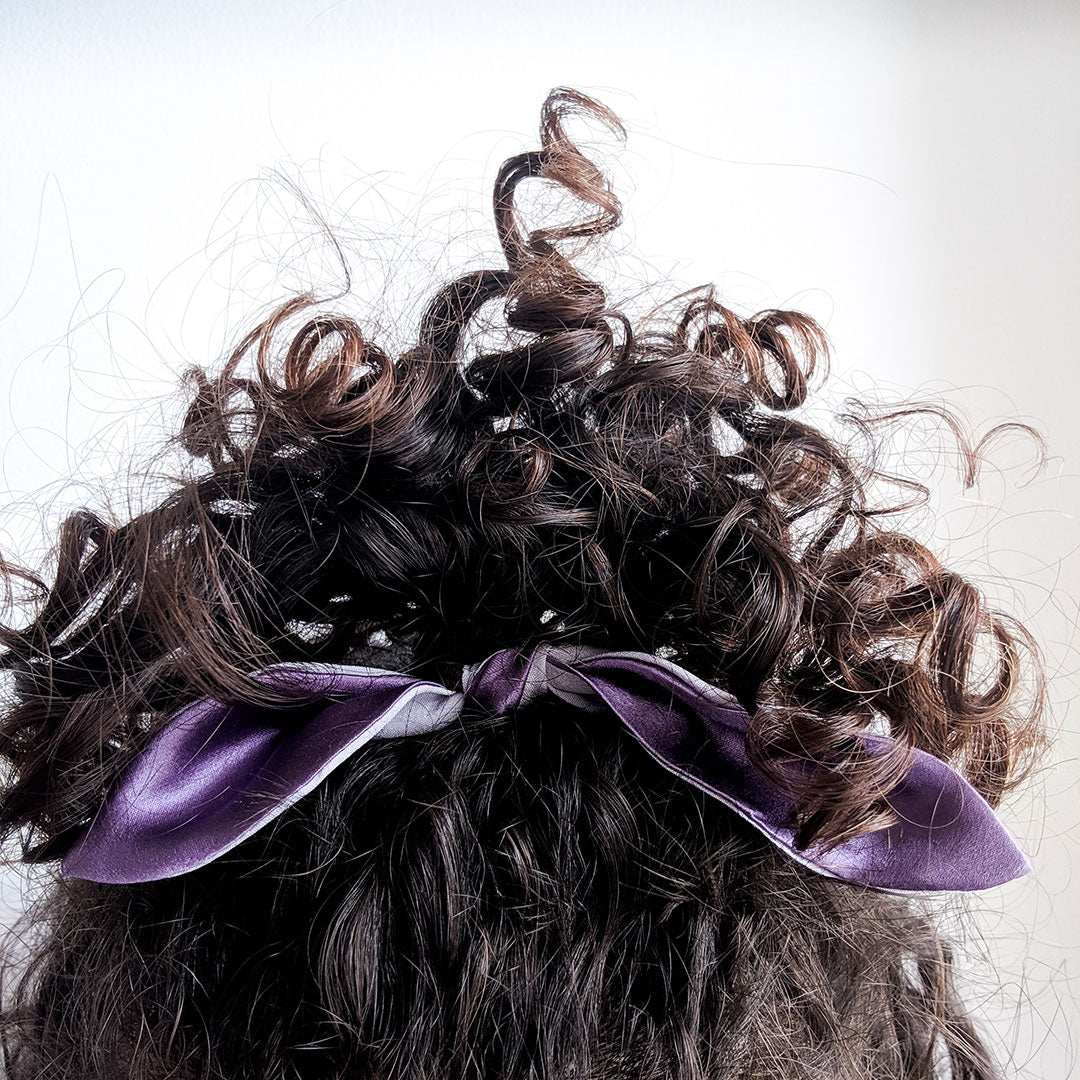
Tie your hair tie bow around an existing hair tie or piece of elastic and wear!
Scrunchie Tutorial
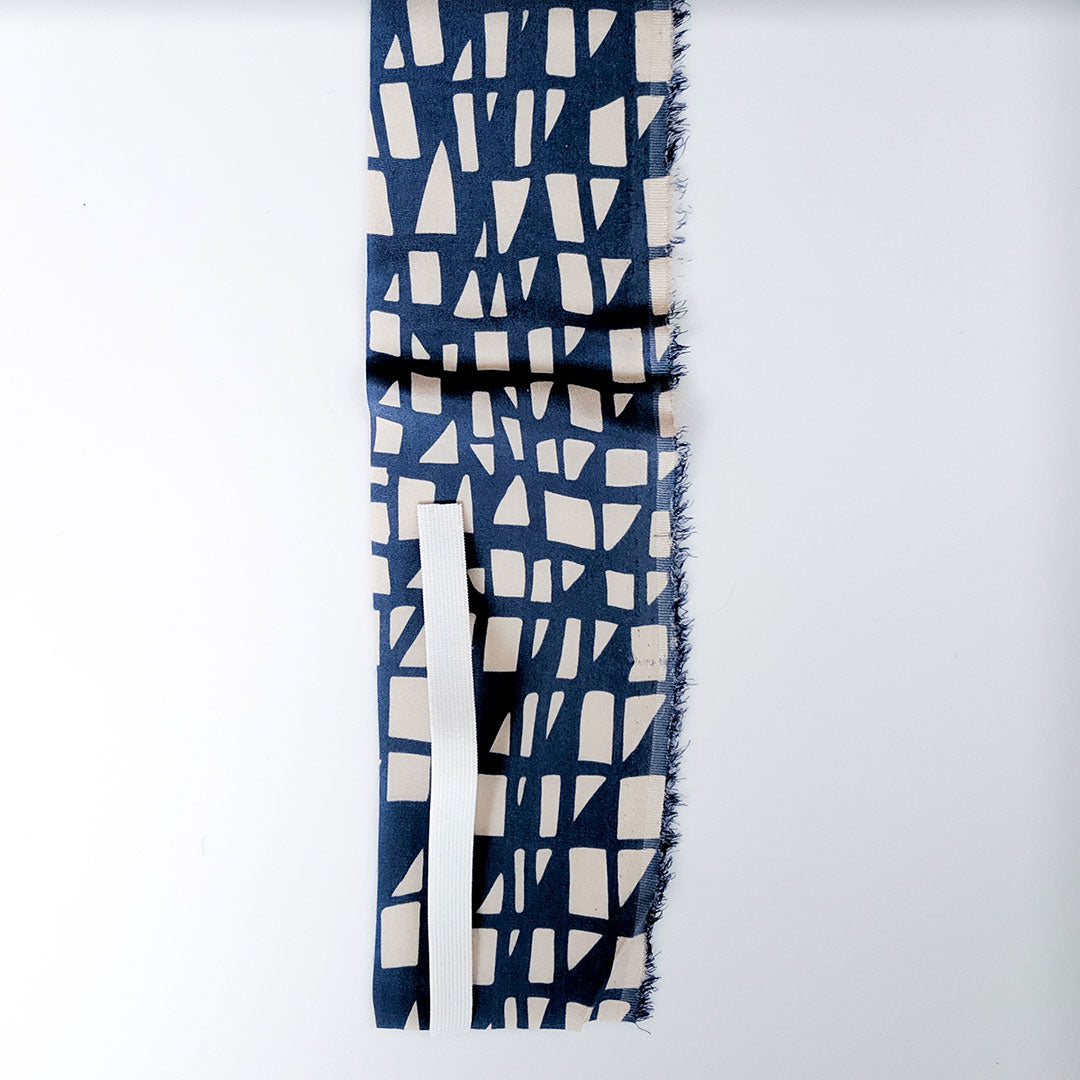

To create the casing for your Scrunchie elastic or hair tie you'll need to start with a rectangular piece of fabric. We cut out pieces that were 4 inches (10.16 cm) wide by 15 inches (38.1 cm) long which resulted in a moderately ruffled narrow Scrunchie. If you want more ruffles increase the length of the rectangle. If you want a wider and larger Scrunchie increase the width of the rectangle.
Cut a piece of 1/2 inch (1.27 cm) wide elastic in a length that comfortable wraps around your wrist. You'll be overlapping the ends together in a later step so you don't want this too tight at this point. Set aside.
Fold the long edges of your fabric in by a 1/2 inch (1.27 cm) and press.


Place the short edges of your fabric rectangle together with the right sides facing. Pin and sew using a 1/2 inch (1.27 cm) seam allowance. Press.
Fold your fabric loop in half with the wrong sides together so that the folded edges align. Press, pin, and edgestitch. Leave a small opening between the start and finish of your stitching line. Attach a safety pin to the end of the elastic you previously cut and thread it through your fabric casing.


Slide your fabric down the elastic being sure to keep hold on the tail end of the elastic. Once the elastic has been threaded through the entire casing, remove the safety pin, overlap the ends by 1/2 inch (1.27 cm), and stitch the ends together. To ensure the elastic edges are securely stitched follow the stitching diagram provided.

Handstitch or edgestitch the opening closed and repeat to make more! As always let us know what you think in the comments below. If you have any ideas you'd like to see included in this series please share them and we'll try to include them in our series.
Featured Products: