Thayer Sew-Along: Buttons & Buttonholes
Shop this post

Thayer Jacket

Thayer Jacket
Today is the last day in our Thayer Sew-Along and we'll be inserting our buttonholes and setting our buttons. In this version we're using jeans buttons but regular buttons work just as well.
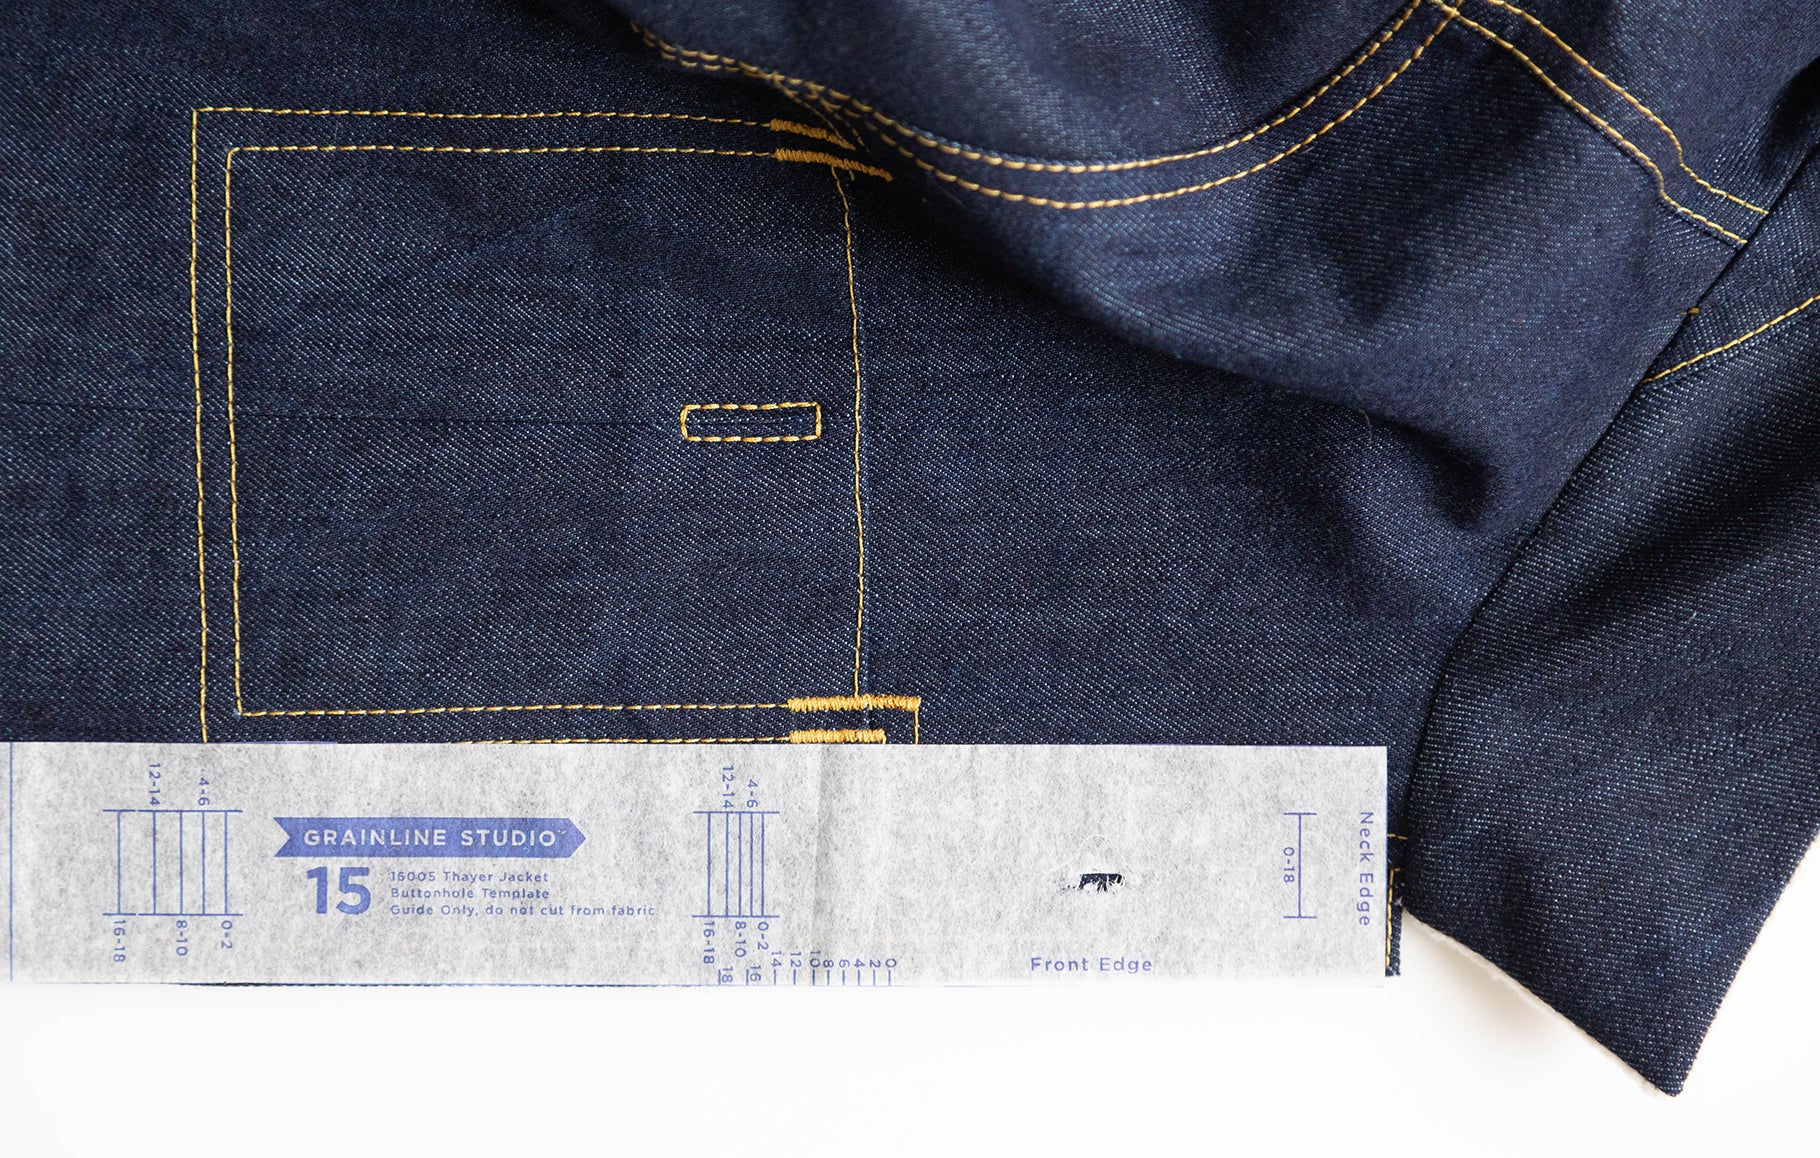
To begin grab your buttonhole guide (piece 15) and align it along the front edge of the right front.

Mark the buttonholes according to the size labels. The space between the buttonholes is graded between sizes so make sure you're marking the right lines! We recommend measuring the spacing after you mark to double check the placement and that the correct lines were marked.

Since you're putting a buttonhole into your finished jacket, the back is potentially a fuzzy sweatshirt material, and there is a topstitched seam allowance just to the right of the front placement, we highly recommend making a small fake front like we did here. You do NOT need to put a pocket on it, we just made this while testing out some topstitching. The important part is to mimic the front edge of your jacket and run that through your machine before you try it out on your jacket.

The other thing we've found useful is using Stitch-N-Tear under the buttonhole so that the feed dogs are running on this instead of the fuzzy lining. We've found the buttonholes just form a bit better this way as you can see below.

Here you can see a buttonhole without Stitch-N-Tear and with. I would not be unhappy with the top buttonhole, but the bottom is just so perfect. It really does make a difference.

If you do use Stitch-N-Tear, place it behind the buttonhole, insert the buttonhole as normal, then just tear the paper off the back of the jacket.

Once you've tested out your buttonhole and made sure your button fits through it, it's time to insert them into your jacket! This will vary based on your machine so we aren't going to cover the specifics of setting up your buttonhole.

Once all your buttonholes are in, trim your threads and double check you're happy with them...the next step is cutting them open!

We prefer to use a buttonhole chisel to cut open our buttonholes. I know this is something people are either strongly for, or strongly against, but just know I have watched people slice through their fabric with a seam ripper, even when there's a pin stuck through the end. The force you need to exert on a thick fabric like this can cause the seam ripper to pivot at the pin and slice the side of the buttonhole open.

With the chisel you simply place the wood block behind the buttonhole, place the chisel tip inside the buttonhole, and press. That's it! You can see why we're sold.

Slice open the buttonholes, it's now time for the buttons!

Place the button template (piece 14) along the front edge of the left side of the jacket and mark the button placement.

We recommend checking the placement against the buttonholes before you finalize your markings to make sure everything is perfectly aligned.

Now using an awl, poke a small hole into your jacket where the jeans button will go. Grab your button and a hammer.

Place the button stud through the hole you made with your awl.

Here's a little animation to show you both sides of the jacket at this point.

Place the stud into top of the button, with the button face down. We're going to hammer onto the stud rather than the button face. We've put down a cutting mat under our button so that it doesn't get marred during this process.

Now give the button a few good hits with the hammer. You want to hammer hard enough so that the button is tight around the fabric, but not so hard that the stud comes through and dents the front of the button. We highly recommend testing this out on your fake jacket front before putting them into your actual jacket.
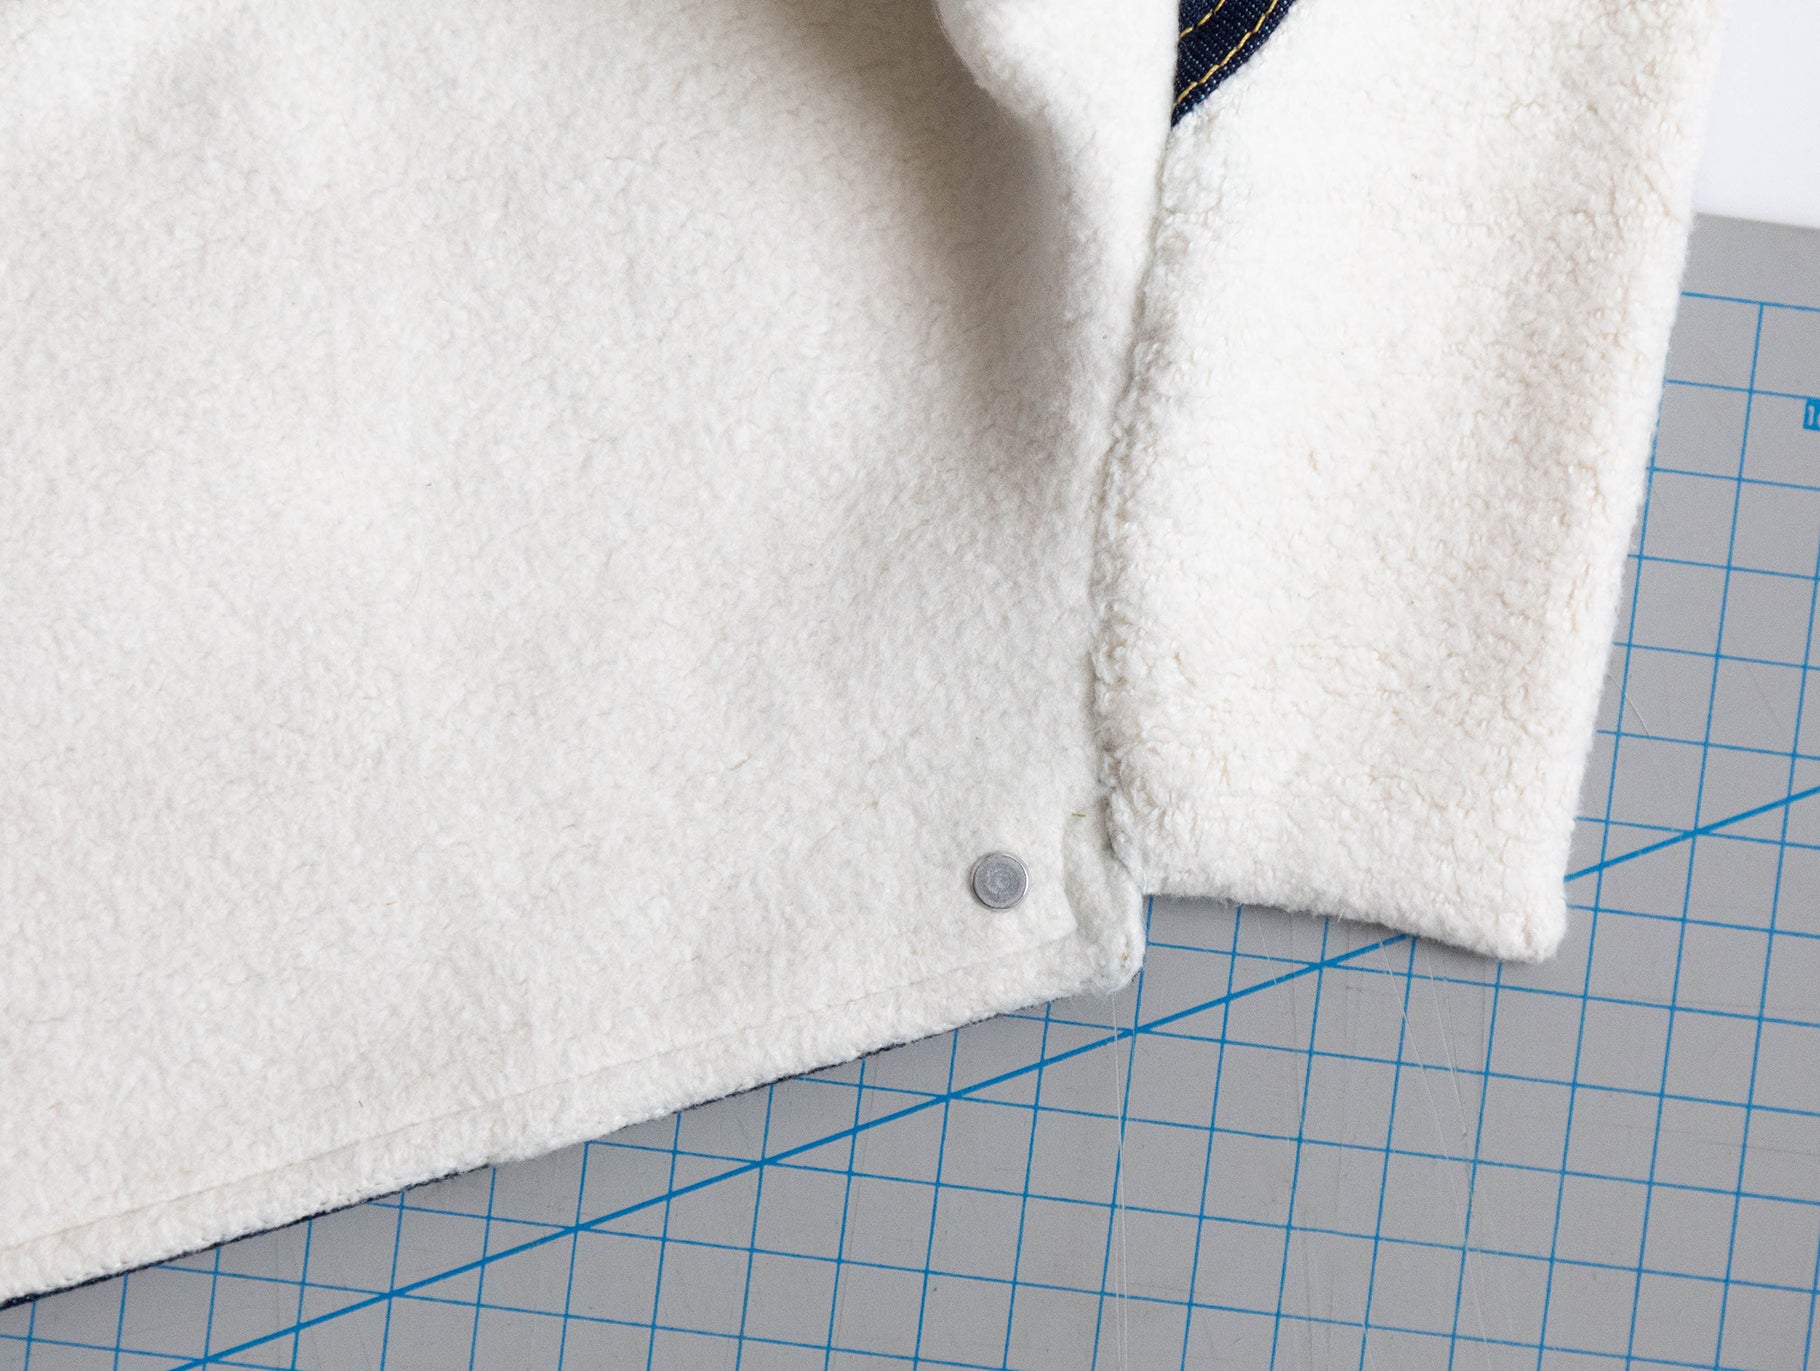
From the back your button looks like this.

And from the front it looks like this!

Continue putting in the rest of the buttons as you did for this one. If you haven't already put the buttons into the yoke pockets, you'll need to do that now as well. All the steps are the same.
And that wraps up the Thayer Sew-Along! Thank you so much for following along with us, I hope we've helped you make a most successful jacket and have answered your questions along the way!
You can check out the rest of the sew-along posts here if you missed anything and if you have any q's on the buttons and buttonholes, let us know in the comments below!
Featured Products: