Portside Dopp Kit: Assembling the Side Panels
Shop this post

Portside Travel Set
Now that we have everything cut, it's time to start sewing our Portside Dopp Kits! Today we'll be assembling the panels that make up the Dopp Kit. We'll start with the top panel, then move onto the sides, then end with the carrying strap. Let's get started!
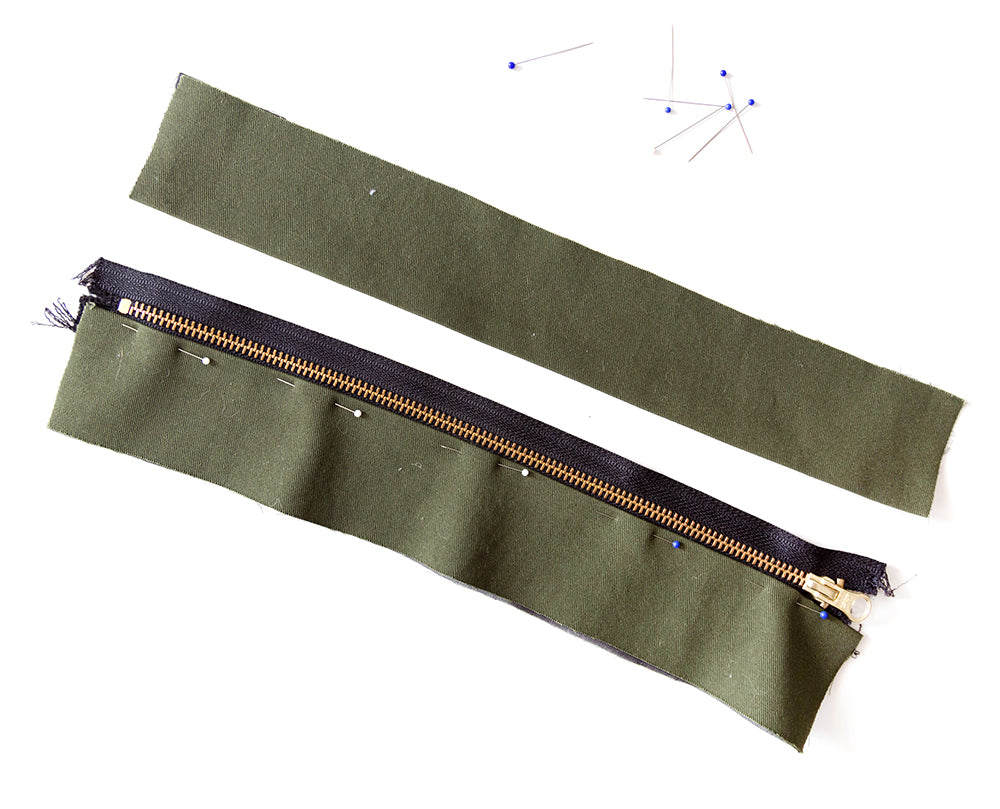
Begin by folding and pressing down the ½″ seam allowance the long zipper edge on each of the top pieces (14). Align one of the folded edges along the zipper tape about 1/16 - 1/8″ from the zipper teeth. You'll want to note that when both top pieces are attached the space for the zipper should measure about ½″ across. Depending on the size of your zipper tape and coil you may need to slightly adjust the amount of seam allowance you fold under as well as the space needed for the coil and zipper pull. The zipper shown here is a metal pants zipper and requires ¾" across for the pull to move smoothly along the zipper without catching the edges of the fabric.

Sew along the edge of the fabric to anchor the top to the zipper tape. Repeat for the other side so both top pieces are attached to the zipper.

With the rights facing, pin one end piece (13) to each side of the top piece you just made as shown above. I like to have the zipper part way open so that you aren't dealing with the pull getting in the way at either end.

Using your ½″ seam allowance stitch the ends to the top. You may want to hand wheel your machine over the zipper area to ensure you don't hit anything and break a needle!

Here you can see the underside of what we just sewed.


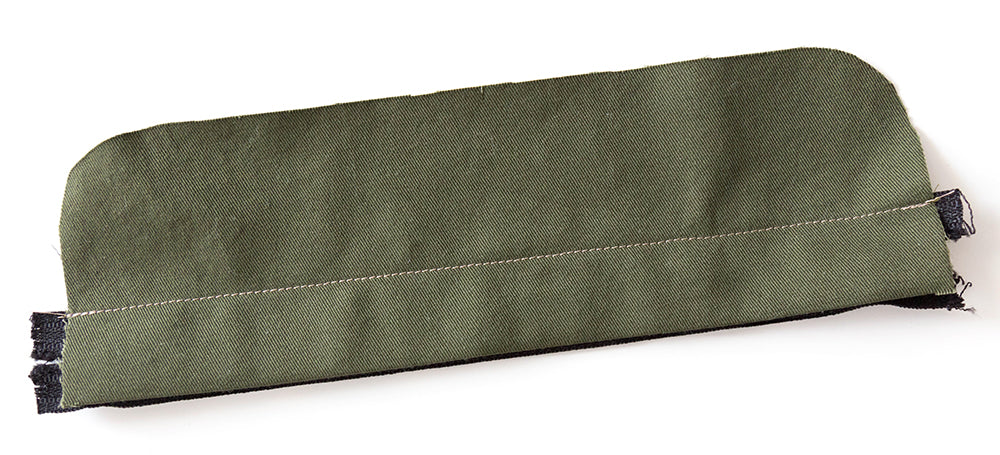
Press the seam allowance and the ends away from the zipper. Since I'm using a fabric that doesn't want to press (the green fabric) I'll be topstitching along my seams. Even though the camo fabric pressed nicely I topstitched along these seams to keep things consistent when we get to later steps. This topstitching step is completely optional.

Again, here you can see the underside of what you have sewn so far. Set this piece aside.

Now we're going to create the front pocket of the Dopp Kit. Grab the upper front (piece 10) and fold the lower edge up along the notches so that the wrong sides meet where folded.

Align your zipper tape with the raw edge you just folded up, centering the two zipper stops equal distance from the edges.

Stitch along the edge of the zipper tape through all layers.
Fold the ½″ seam allowance at the top edge of one lower front. In most cases it would be the non-interfaced lower front, but I fused both of ours since the camo twill was a bit thinner than the green twill.

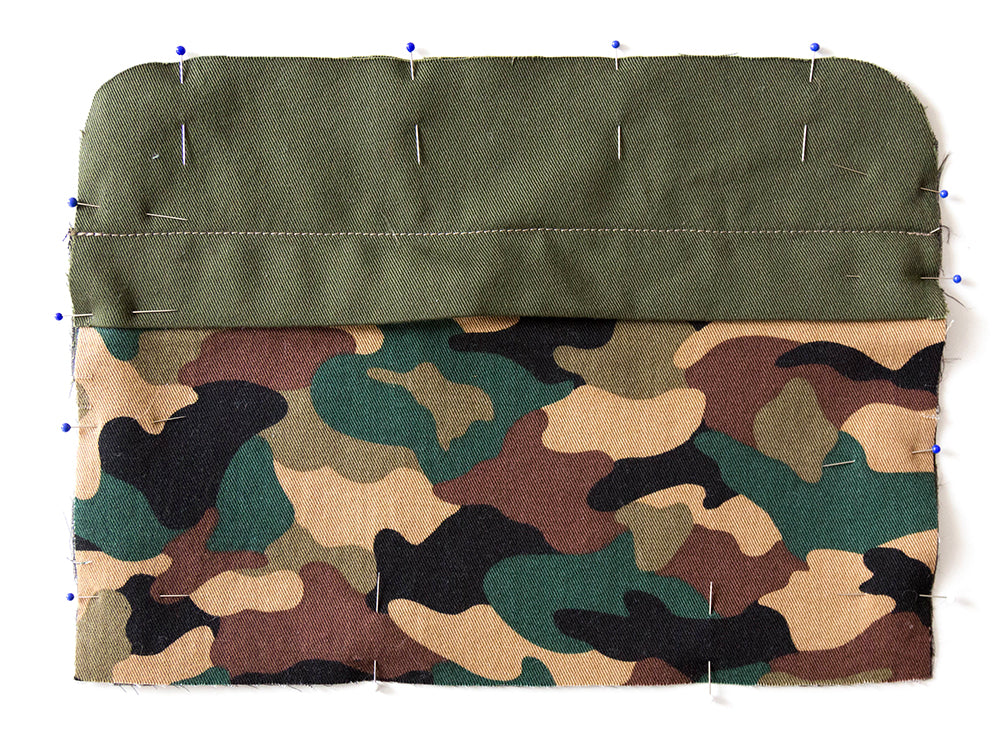
Align the folded edge with the lower edge of the zipper tape, making sure the edges of the lower piece match the edges of the upper piece, and pin in place.

Sew along the folded edge to secure the lower front to the zipper.

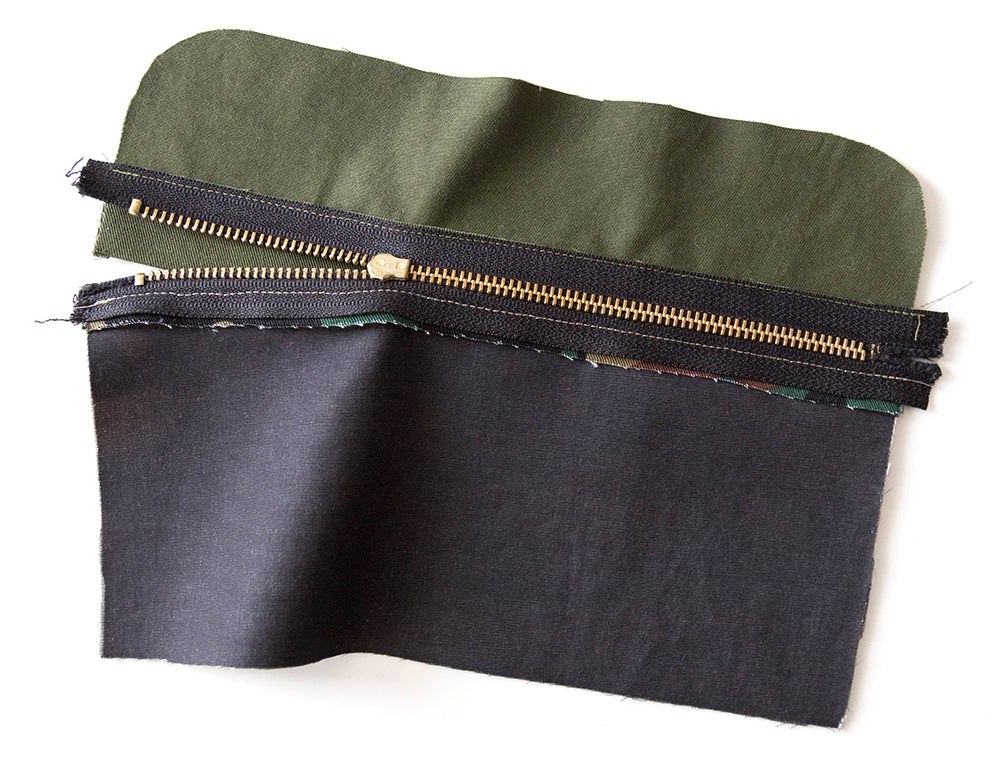
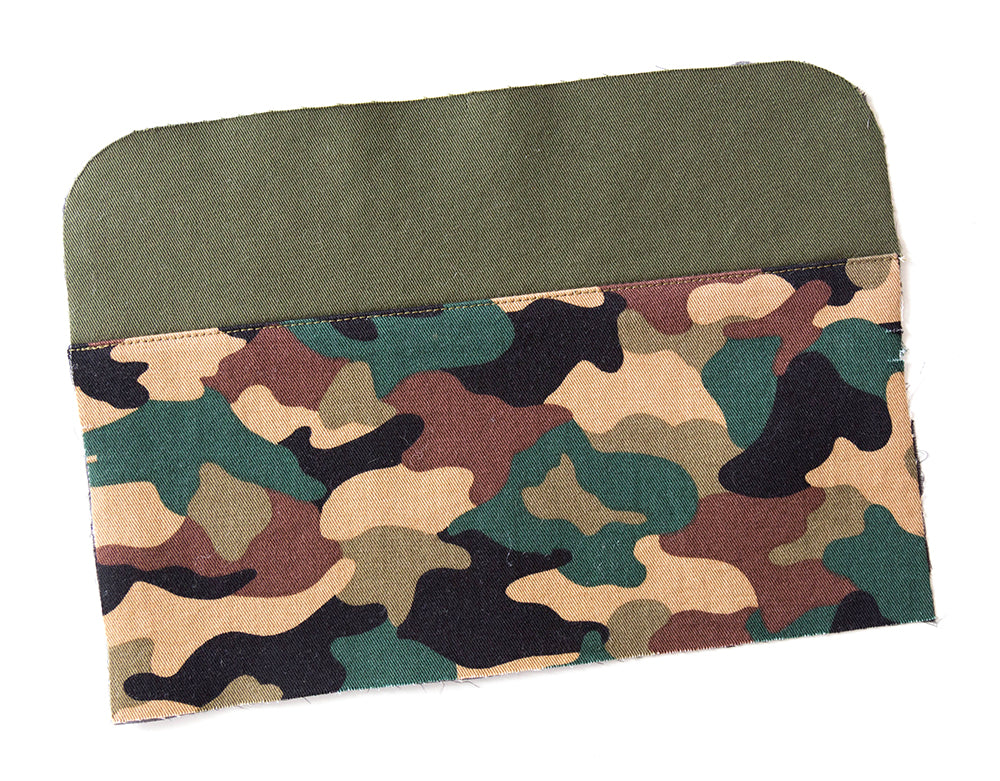
Take the front you just made and lay it on top of the the full dopp kit front (piece 9) with the right sides of both pieces facing up as shown above.

Pin the two pieces together and stitch along the perimeter inside the ½″ seam allowance. Set this piece aside.

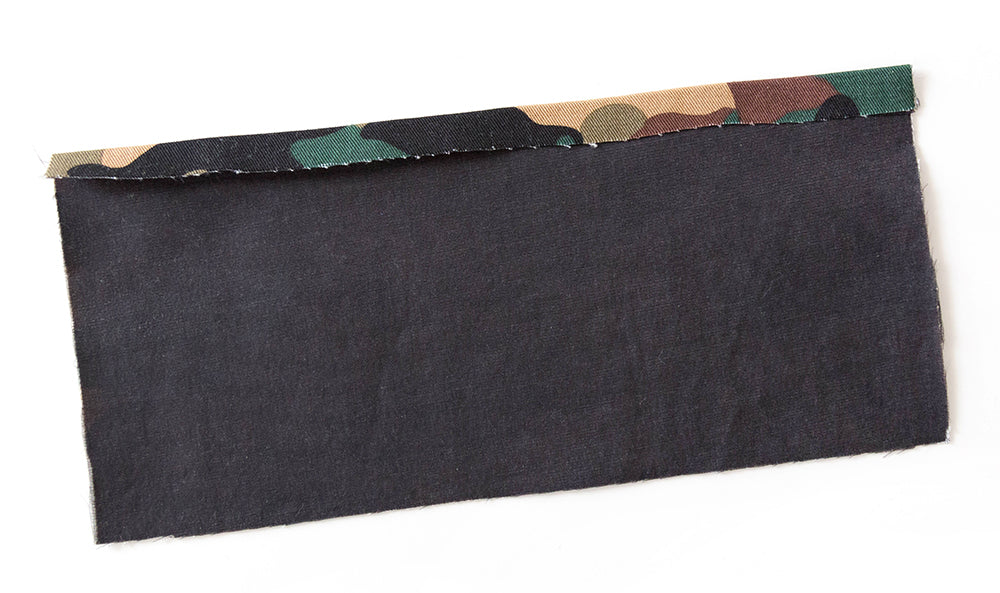
Now we'll be assembling the back side of the Dopp, no zippers so this one is easy! To begin, pin the upper back (11) to the lower back (12) with right sides facing.

Stitch the two layers together using your ½″ seam allowance.

Grade the seam allowance of the lower back.
Press the seam allowance towards the bottom of the bag and optionally topstitch along the seam line.
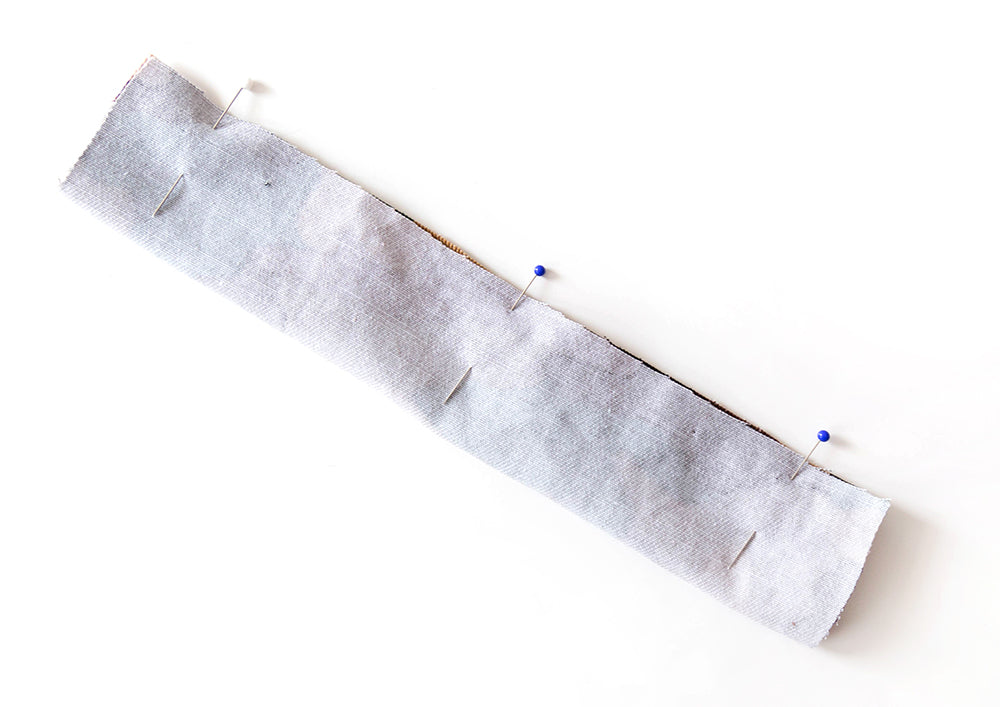
Now we'll make the carrying strap. Start by folding the long sides of the strap together with right sides facing and pin.
Stitch using the same ½″ seam allowance and grade one of the seam allowances.

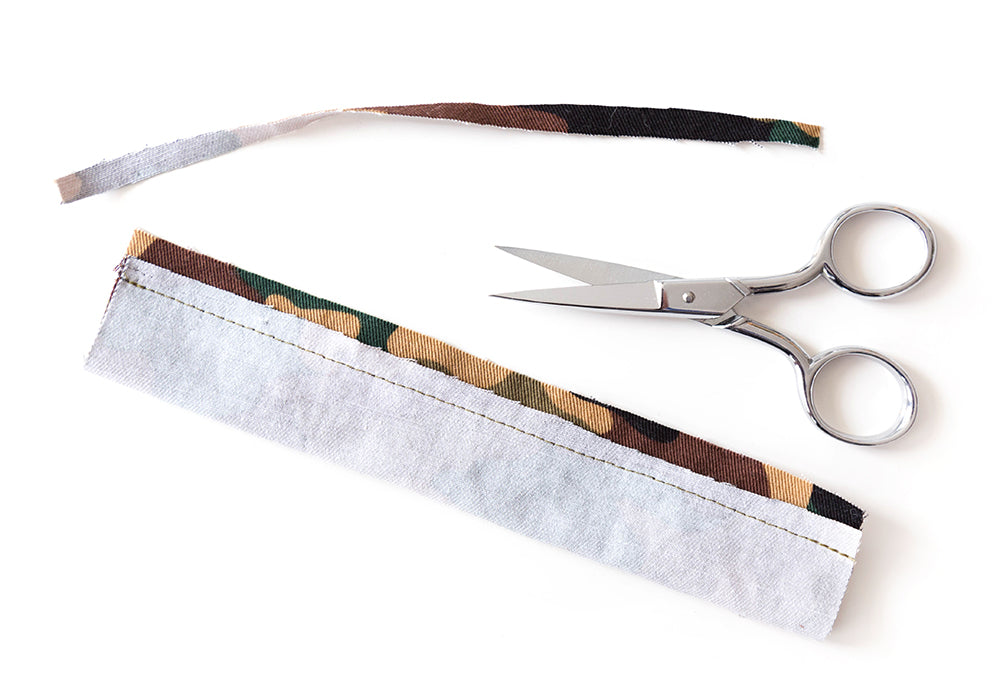
Turn the strap right side out. 
Press the strap and stitch along the long edges to keep the strap flat when it's attached to the bag.
That's it for this post, all the pieces of the bag are assembled and we're ready to start forming the bag. Our next post will be how to create your own zipper since that's a question we get asked a lot in regards to the Portside Travel Set so stay tuned for that.


Featured Products: