Knit Scout Tutorial
Shop this post


Are you guys ready for the knit Scout Tee instructions? I've made this tutorial using a serger for a majority of the construction but if you don't have one, or just don't prefer to use one, you can use a regular machine. If you are using a sewing machine rather than a serger, my recommendation would be to either use a straight stitch with a walking foot and stretch slightly as you sew or use a small zig zag stitch.

Step 1 | Lay out your pattern pieces. For knits, since both the front and back pieces are cut on the fold, I like to fold the selvedges to the center creating two folds rather than the standard folding layout which only creates one.

Step 2 | Mark and cut your pieces. You can use a scissors or rotary cutter, whichever you prefer. Don't cut the bias neckline piece, we're going to use a different method for that a few steps down.

Step 3 | Sew your shoulder seams together, press seams towards the back of the shirt.

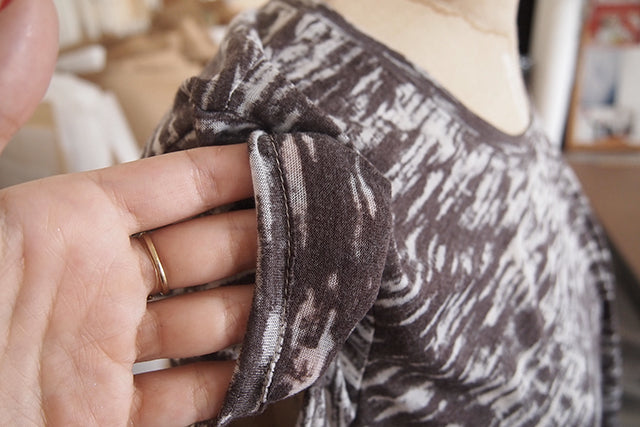
Step 4 | Set your sleeve. I place a pin at both edges and at each notch to make sure the sleeve stays lined up properly while serging.

Step 5 | Side Seams! Line up the sleeve edge and hem as well as the underarm seam and serge along the side of the garment. Press this seam towards the back of the shirt.

Step 6 | Now for the neckband. Unlike the regular Scout Tee pattern, you're going to want a shorter neckband binding that isn't cut on the bias. Cut a strip of binding 1.75" wide along the cross-grain of the fabric. The length will depend a bit on the stretch of your fabric. For fabrics with a lot of cross-wise stretch you'll want the neck band to be around 2/3 the length of the neck edge, for fabrics with less stretch you'll want the ratio to be closer to 3/4 the neck edge. Sew the two edges together to form a circle.


Step 7 | Align your neck binding and serge around the neck edge. Press the seam allowance and shirt away from the binding. You can optionally stitch around the neckline to keep everything in place. On a RTW t-shirt this is where a coverstitch would be used but I just use a walking foot and stretch the shirt slightly as I go.


Step 8 | Press up the hems of the body and sleeves and stitch in place. Again, traditionally you'd use a coverstitch for this but I just use a walking foot and stretch slightly as I go. I also find it helpful to lengthen my stitch a bit longer than I would for a woven.
Step 9 | I like to trim off the extra fabric above the hem stitching but this is totally optional.

Hope you found that helpful! The knit version is a really quick project that gets a lot of wear in my wardrobe. You can find this fabric and the fabrics for all the other Scout Knit Tees I've been making on my Scout Mood board here. Don't forget that the kind people at Mood are offering 10% off your order for my readers until 8/30/13 with the code GRAINLINE at checkout. Perfect for stocking up on those knits!