How I Made It: Jen's Tamarack Society Jacket Alterations

Jen's Tamarack Society Jacket | Grainline Studio

On Monday I shared finished pics of my Tamarack Jacket variation, but today I'm going to talk about how I made it. This isn't really a tutorial, more of a round up of the many supplies I used and changes I made to get the jacket to this point. Here goes!

Jen's Tamarack Society Jacket | Grainline Studio

To begin my jacket process I ordered swatches of a few colors of Robert Kauffman Kona Cotton. Kona Cotton is their high quality quilting cotton and is a favorite with quilters all over. I've used it in a few quilts before and it's easy to work with, comes in a zillion colors, and puffs up so nicely upon washing when the project is complete. I narrowed my selection down to black for the binding and had to decide between Gotham and Charcoal for the body of the coat. After all of the back and forth I ended up ordering a 4th swatch and going with Pepper for the body, which is a bit of a blueish gray. 

For the batting I used Quilter's Dream Cotton Natural Select Loft for my batting as usual. I've used this batting for all of my many Tamarack Jackets, personal and samples, as well as a few quilts. It's great quality and really holds up over time – and you do not need to pre-wash it!

Jen's Tamarack Society Jacket | Grainline Studio

After selecting fabrics, the next thing I needed to do was adjust the pattern. First I lengthened the jacket to my desired length, then split the pattern where I wanted the waistline seam. I added to the width of the jacket and adjusted the armscye and sleeve cap to create a dropped shoulder and the more oversized silhouette. After that I slashed and spread to add the rest of the volume through the coat and create the slight cocoon shape I was after. The final step was creating the double breasted front closure. I made up a quick muslin to test my alterations and was pretty happy with them. Marked in the placement of the welt pocket and I was good to go!

Jen's Tamarack Society Jacket | Grainline Studio

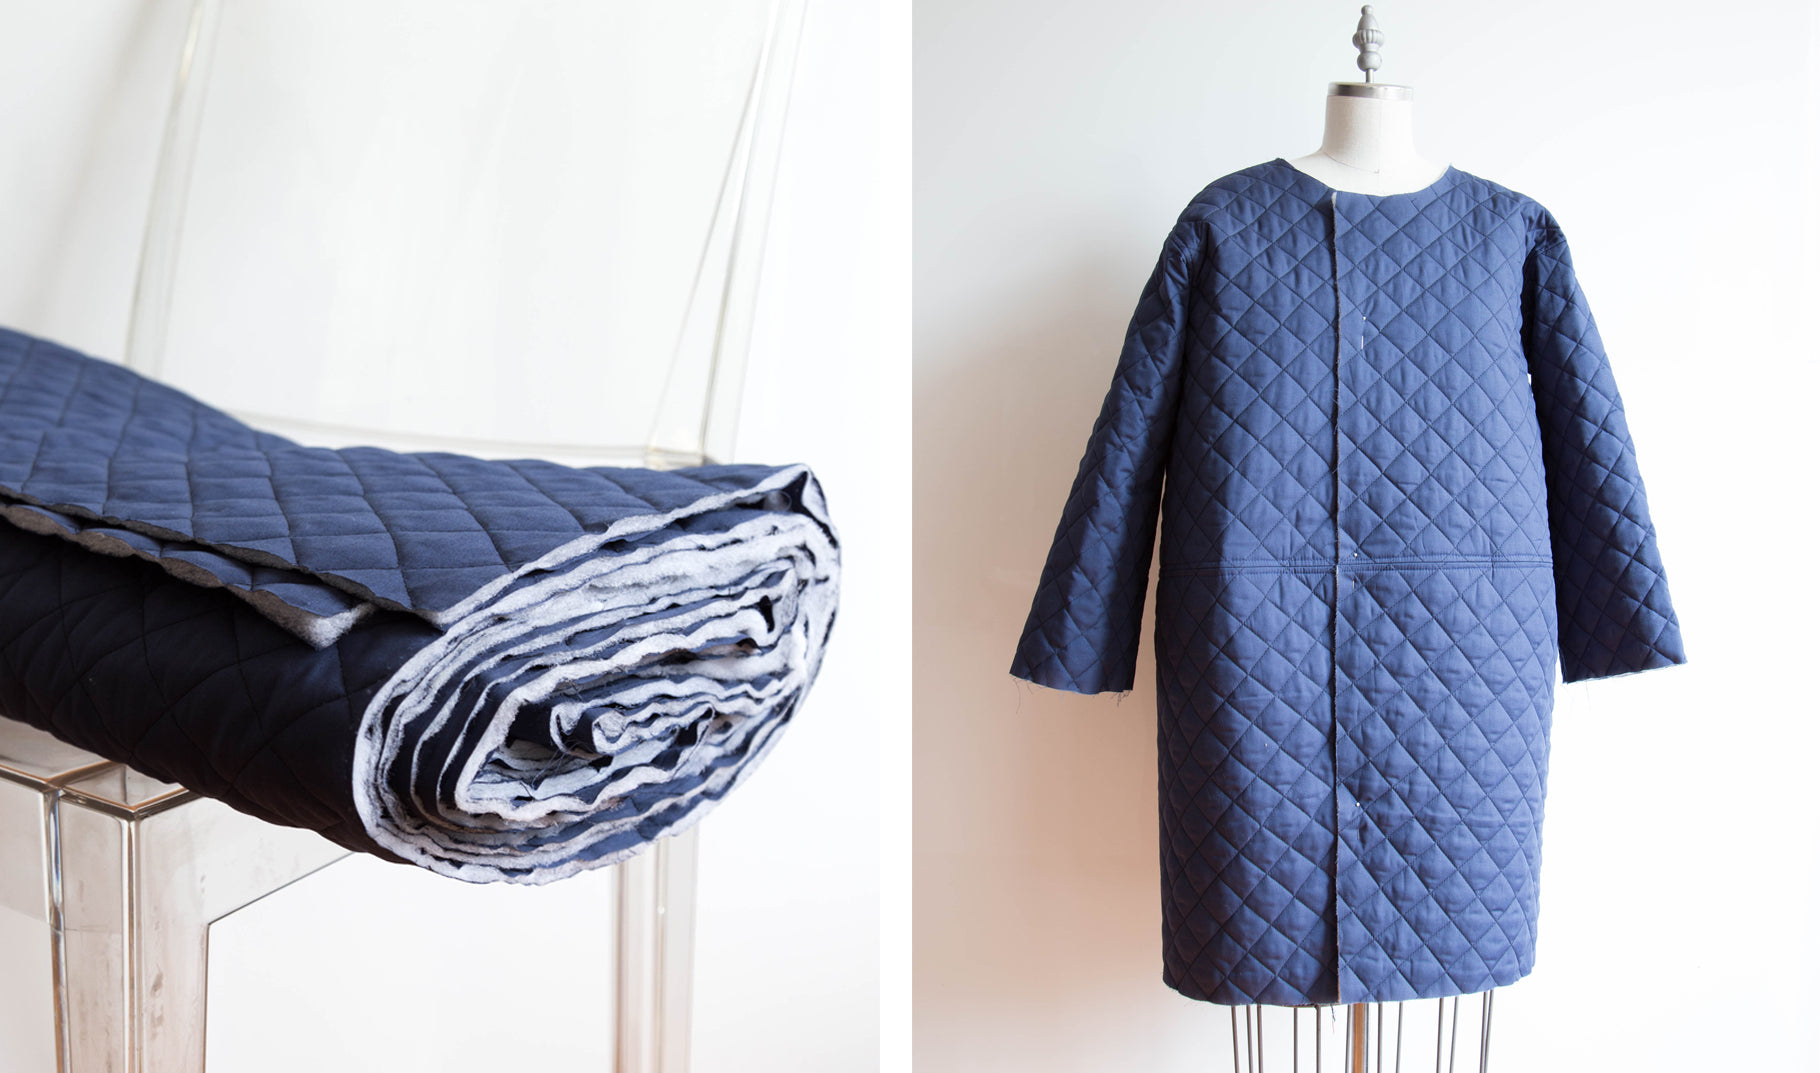
I made a few minor alterations after the first fitting and then used this pre-quilted fabric we had on hand leftover from testing the original Tamarack Jacket pattern to make a quick quilted muslin. I wanted to test that the shape worked in a heavier fabric – even though I could see it in my head occasionally I'm wrong and this felt high stakes enough to warrant not just forging ahead and hoping for the best.

Jen's Tamarack Society Jacket | Grainline Studio

Now that the pattern was squared away it was time to start the actual jacket! The construction method I used for this coat differs from the original Tamarack pattern due to the shape and the continuous quilting around the body of the garment. Rather than quilt each piece and sew them together, matching every horizontal quilting line across the side seams, I decided to sew the side seams of the upper and lower portions, then quilt each in one piece. The sleeves were the same, sandwich and quilt. I hand basted the layers together in a grid pattern to help me arrange the machine quilting accurately.

Jen's Tamarack Society Jacket | Grainline Studio

Here you can see the quilting pattern that I followed for the top section of the jacket – and why I didn't want to try to line up those side seams after it was quilted!

Jen's Tamarack Society Jacket | Grainline Studio

After all the pieces were quilted it was time to sew them together! This is unfortunately where my documentation stalls out and I really do regret that. I think a lot of us are often in a rush to get things done so we can wear them and post them to social media and the process of blogging the process has definitely fallen out of fashion so I'll be illustrating the rest with finished garment images.

Jen's Tamarack Society Jacket | Grainline Studio

Each seam of the jacket was bound and stitched into place so that there are no raw seams visible. I also bound the top edge of the welt pocket and whipstitched it down so that the raw edge wasn't visible there.

Jen's Tamarack Society Jacket | Grainline Studio

Welt pockets were inserted, the edges were bound, and black snaps were fixed to the front as a closure. At this point the jacket was looking pretty stiff and I was mildly worried I had made a cardboard-esque coat. I ran it through the washer and dryer twice and it softened up nicely and got those beautiful puckers you expect from any good quilt. 

Jen's Tamarack Society Jacket | Grainline Studio

Here you can really see the quilting pattern on the back as well as the stitching line at the waist and sleeve underarms from stitching the binding down on the inside of the coat. I really like those details though if you weren't into it you could slipstitch by hand catching only the inner layer of fabric.

Jen's Tamarack Society Jacket | Grainline Studio

I absolutely love how this coat turned out, it's like wearing a stylish quilt out of the house – warm, toasty, and soft – but more stylish than going out wrapped in a blanket. I think at least. I really enjoyed putting this post together and I feel like I should document the process of more of the things I make! 

So that's how I made my Tamarack Society Tamarack Jacket – if you have any q's let me know and I'll do my best to answer them! You can see more finished project photos in this post.

Mentioned Products

  • Tamarack Hood, Collar, & Patch Pockets Variation Add-on 0 – 32 (PDF only)
    Tamarack Hood, Collar, & Patch Pockets Variation Add-on 0 – 32 (PDF only)
  • Tamarack Jacket 0 – 18
    Tamarack Jacket | Grainline Studio
  • Tamarack Jacket 14 – 32
    Tamarack Jacket 14 – 32
  • Tamarack Quilting Design Sheets
    Tamarack Quilting Design Sheets