How To Sew a Slip Stitch

Slip Stitch, a love poem.
Just kidding, though I do have a lot of love for this stitch. In my opinion the slip stitch is the most magical of all the hand stitches because It creates a secure hold and is completely invisible from both the inside and the outside of a garment!
The slip stitch is a great choice for anywhere you need an invisible stitch. For example: hemming garments, finishing bias bindings, enclosing seams like on collars and waistbands, or joining seams you may not want to put through a sewing machine like closing pillows or plush.

The diagram below shows the numbered steps included in the stitch. I'd like to note I have exaggerated the spacing of the stitches to better illustrate how the slip stitch is achieved and not how the final result will look. Following we have step by step photographs to illustrate how the slip stitch is sewn and what the finished seam will look like.
Slip Stitch Photo Tutorial

A few notes before we get started:
- We recommend using a needle with a smaller eye and a single working thread.
- We are including measurements in these instructions but these are just a suggestion and what we used for our sample. Different projects and fabrics require different measurements, so use whatever measurements suit your project best.
- The placement of the entry and exit points of your needle is the most important factor for achieving maximum invisibility.
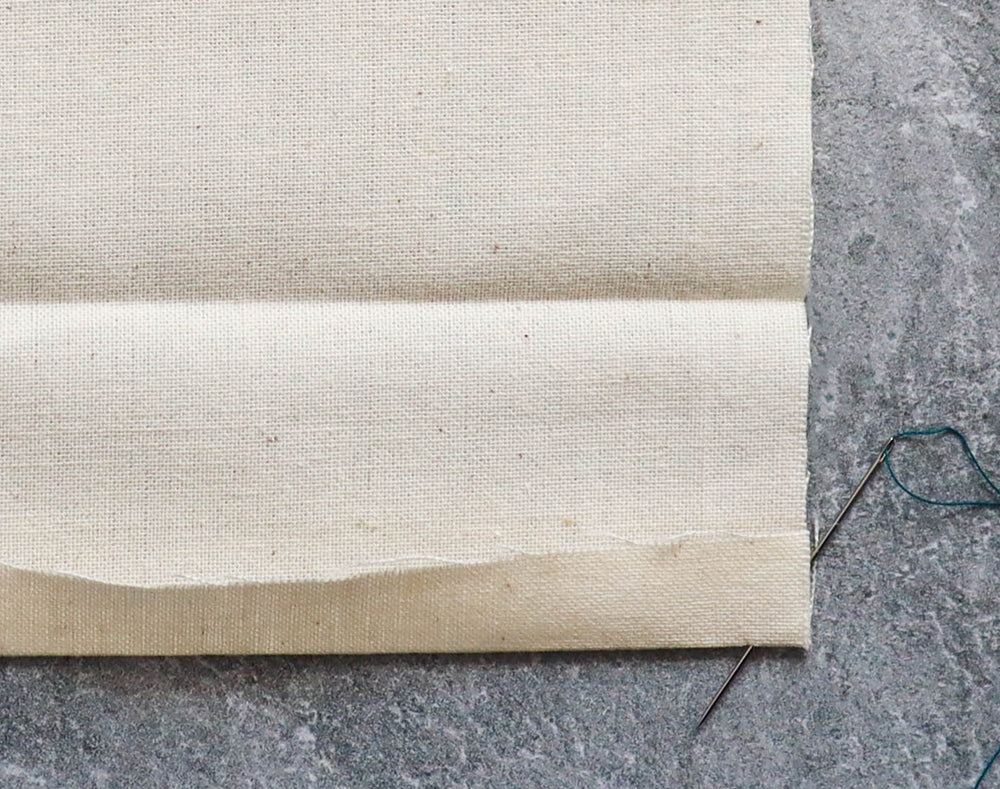
The photograph below provides a visual of the components and terms I will be referring to repeatedly throughout this tutorial.

Hem- is referring to the folded edge that is getting sewn to another piece. In this example we are using a double fold hem that has been folded and pressed to the wrong side of the garment.
Tunnel- is the term I use to refer to the space that has been created underneath the folded edge.
Garment- refers to the flat piece of fabric we are affixing the folded edge to.
Though I'm using the terms "garment" and "hem" in this tutorial, as stated in the intro, you can apply the slip stitch anywhere you wish to join two pieces invisibly.
Alright, let's get started on the slip stitch!
Please Note: We are using a double fold hem for this tutorial, which has been turned and pressed to the wrong side of the garment, first at 1/2" and then again at 1 1/2".*
With the wrong side of the garment facing up, bury the knot behind the first fold of the hem by bringing the needle and thread out through the folded edge. You are now at #1 on the diagram above and ready to slip stitch!

Directly across where you brought the needle out of the hem, working the needle right to left, grab 1-2 threads on the garment with the point of your needle. This is #2 and #3 on the diagram above. Make sure the place where you grab the threads on the garment is hidden just behind the folded edge of the hem when it lays flat.

Insert your needle into the back of the folded edge of the hem as close as possible to your previous exit point. Make sure your needle goes just into the "tunnel" of the fold and not all the way through to the front of the hem. This is #4.

Move your needle through the tunnel, 1/2" to the left, and bring your needle out of the tunnel towards the back of the folded edge of the hem. I specify "to the back" because if you bring your needle out to the front of the fold or even out the top of the fold you will be able to see the stitch. You are now back at #1 and can repeat these steps to continue slip stitching.
It may seem a little confusing at first, but you really only need to remember these easy steps:

Come out of the tunnel - grab a thread or two

Into the tunnel - Forward through the tunnel - Back out of the tunnel - Repeat
*if you've been following along with this hand stitch series you know how much I love to use a seam gauge to make sure my stitches are even and consistent*

Repeat these steps until you reach the end and secure with a knot. This is what the inside looks like when it is finished, completely invisible!

This is what it looks like on the right side of the garment. Also invisible!
That’s all for today! I hope you give the slip stitch a try so you too can marvel at the pride and wonder that comes with creating such a magically invisible stitch. Keep an eye out for upcoming hand stitch tutorials and feel free to check out our other posts in this series showcasing the catch stitch and whip stitch.
Happy hand sewing!