How To: Make Your Own Bias Tape
Whether you're following along with our Stowe Sew-Along or want to make your own bias tape for another project, this tutorial is for you! We'll walk you through the steps involved in cutting and folding your own bias tape as we do it here in the studio. If you have any questions just let us know in the comments below!

To begin, we'll need to cut our bias strips. We'll be cutting along the true bias, which falls at a 45° angle from the selvage. We'll be making bias tape with a ¼″ finished width so we'll be cutting 1″ wide strips. As a general rule you want your strips to be 4x as wide as the finished strip width.

Cut a few strips so that you'll have enough length for whatever you're binding after we join the pieces together.

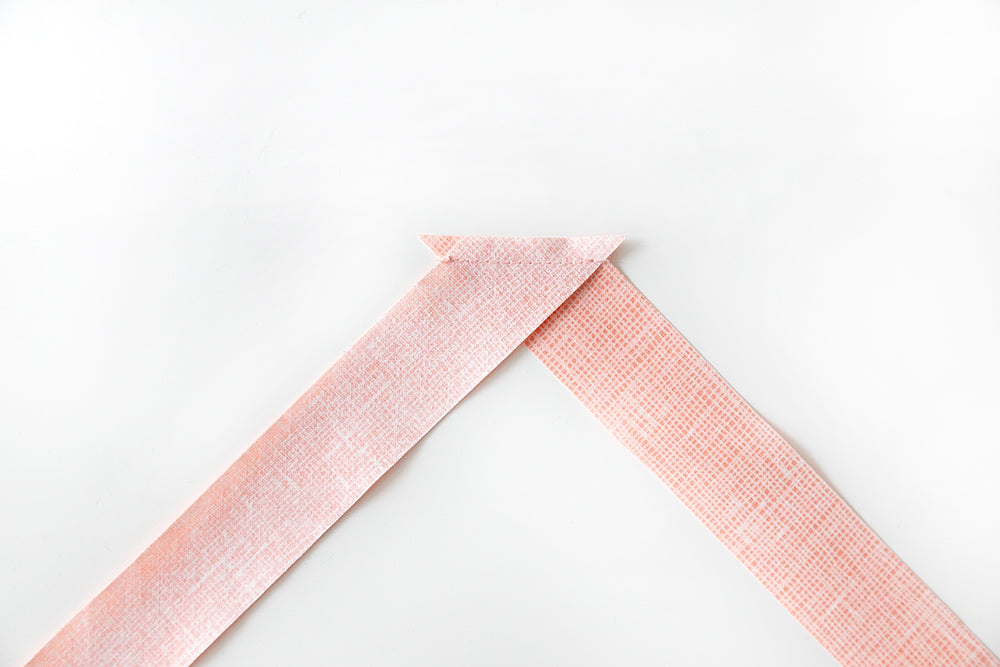
Now we need to join our pieces together. Take the end of one strip and lay it face up, then take the edge of another and lay it face down on top of the first strip as shown above. You'll have angled edges from cutting the bias strips so you shouldn't need to cut those. You can see we have the edges of the two strips matching ¼″ from the raw edge which also happens to be our seam line.

Now we'll stitch across the seam line. You don't need to pin before you sew but if you're worried about keeping the edges lined up along the seam line, feel free to pop a few pins in!


You can see here how the two pieces look once they're sewn together. You don't need to backtack at the edges of the stitching, occasionally if you do it can pull the edge of the binding in since it's a bit of an unstable edge. If you do want to backtack, I recommend doing it one stitch in from the edge.


Now press your seam allowances open.

I like to trim off the triangles of seam allowance that overlap the bias strip, that way it's a bit less bulk in the binding at the seam joins. Repeat these steps to join strips together until you have the length you need for your project.

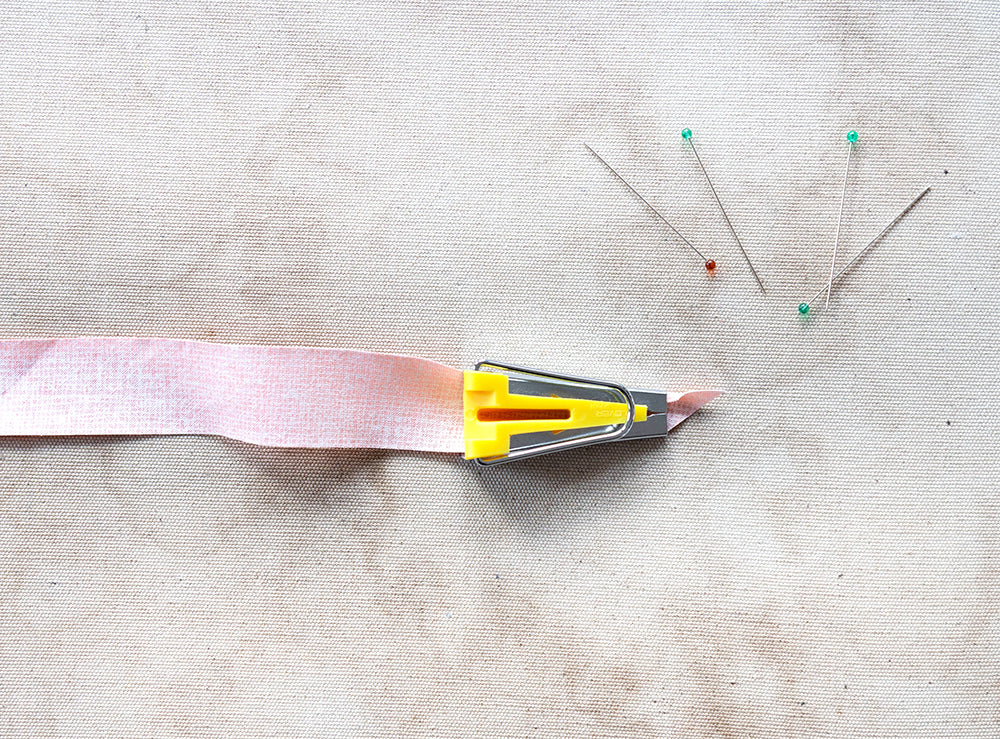
You can apply your binding now without folding it, but it can be nice to have a pre-folded bias strip with creases for stitching lines. You can do this by hand by folding the binding in half, then bringing each edge into the center crease and pressing, or by feeding it through a bias tape maker like the one shown above.

Head over to your ironing board with your bias strip and bias tape maker, grab some glass head pins and plug in your iron.

With the wrong side of the bias strip facing up, feed the end through the bias tape maker. Use a pin to help feed it if it's not going through smoothly.

Pull about an inch through and anchor the end with a pin.

Now slide the bias tape maker backwards as you move your iron forwards over the newly folded fabric to set the folds. Continue till you reach the end of your bias strip.

You now have a single fold piece of bias tape. Next we need to make the second fold.

Fold the edges of the bias tape together and press to create the final fold.

Continue pressing till you reach the end of the bias strip. You have now made double fold bias tape!

You can use your bias tape right away or wind it onto a piece of cardboard to stay neat for later. We used ours for the Stowe Sew-Along bag and it looks so cute! As I mentioned earlier, if you have any questions let us know in the comments below and we'll do our best to answer them clearly!


