Winter Cabin Holiday Ornament
Shop this post

Winter Cabin Ornament

The holidays are RAPIDLY approaching and amidst all the hustle and bustle we wanted to give a reason to slow down and get crafty with our yearly ornament!
On a personal note- This has been a very busy and full year for me. I bought my first house, got married-twice! (once at the courthouse and then later a wedding party), had to get a new car in this wild market, and we’ve been working on LOTS of exciting things here at Grainline! All amazing and good things I feel immensely grateful for, though it came with a lot of stress and a lot of effort. Now that the year is coming to an end, all I want to do is hightail it with my husband (and cats) to a quiet little cabin in the woods where we can unwind, relax, and reflect on all we’ve been through together.
We don't have said cabin, but I still can dream! For this years ornament I wanted to recreate my cozy, peaceful, getaway cabin. This little red A-frame cabin is also inspired by a super cute cabin I saw on the lake this summer when I was visiting Jen up at her family's cabin.

Making the ornaments every year is a true joy for me and I hope you have fun creating your own winter cabin! Grab the pattern here and keep reading for the how-to!
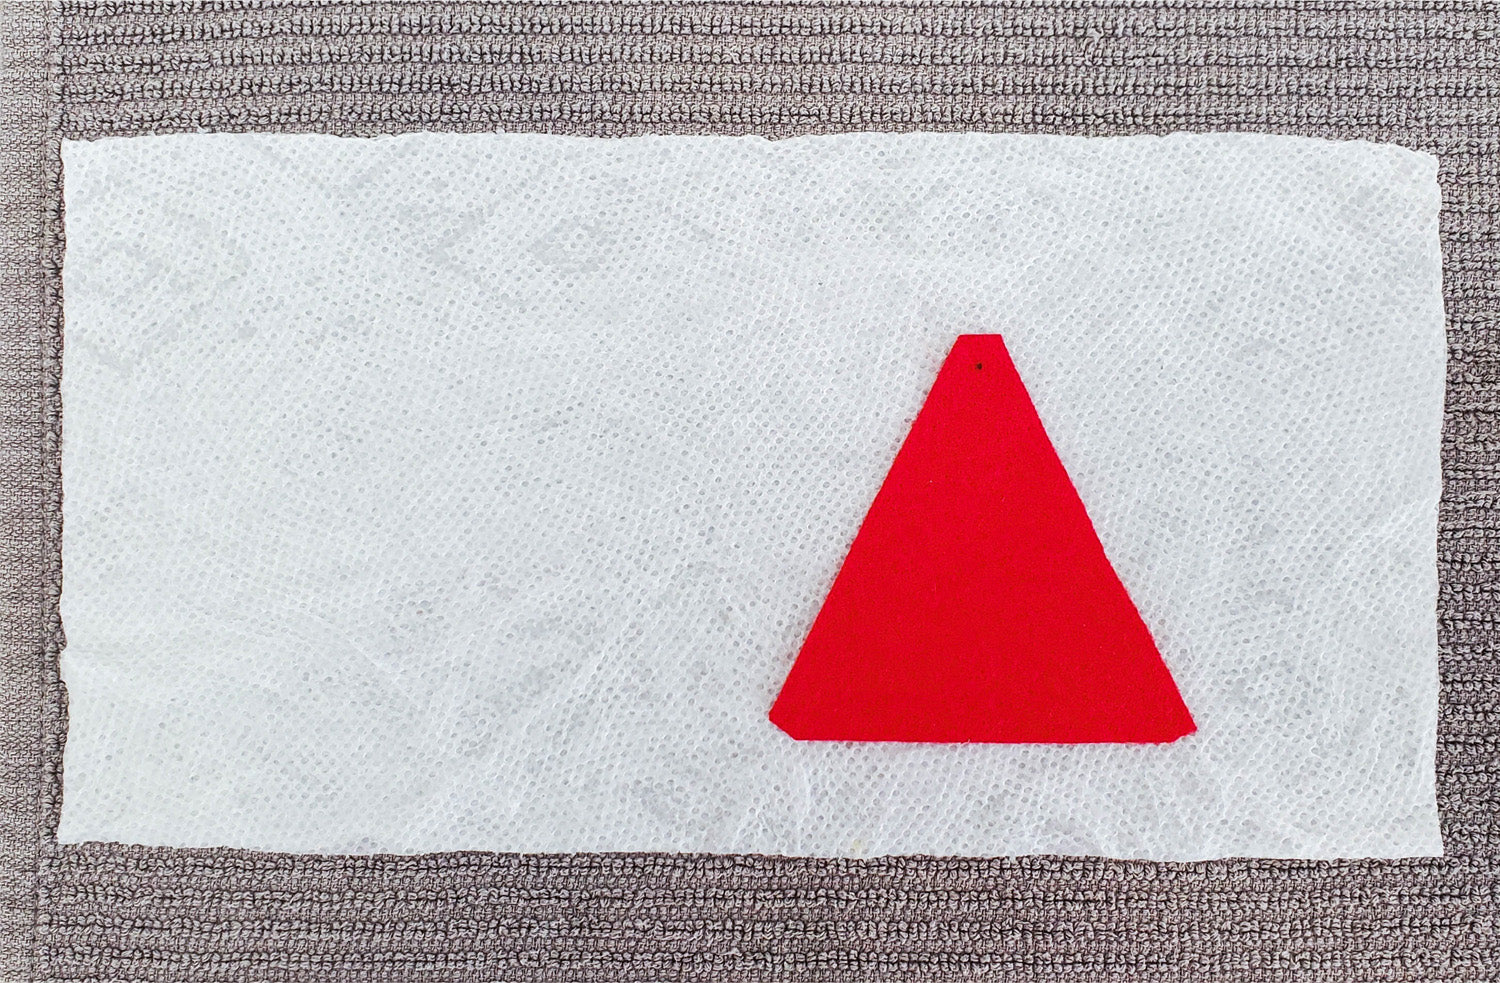
Once you've printed out the cabin pattern, cut out all the pieces and poke holes into the match points for easy marking.
Next, let's gather our supplies!

Supply List:
1. Felt in Various colors.
—Color for exterior roof and shingles ( I used two alternating greens)
—Color for the roof snow ( I used sparkly white)
—Color for the windows ( I used cream)
—Color for the door ( I used the lighter of the greens)
—Color for the main house ( I used red)
—Color for the chimney ( I used a dark heathered gray)
2. Mid-weight bonded iron on interfacing
3. Wonder web interfacing
4. Pins
5. Thread to match the main house, roof, and snow
6. Fabric Shears
7. Embroidery scissors
8. Pipe cleaner for the wreath ( I used sparkly green)
9. Embroidery floss to decorate the front of the cabin ( I used a darker green that matched my alternate shingle color)
10. Fiberfill
11. Hand sewing needle
12. Embroidery needle
13. Marking tool
14. Gift box or heavy cardstock
15. 1/8" wide ribbon
16. Glue gun
17. Glue Sticks
** Not pictured but you will also need a sewing machine and a ruler.

Cut out all the pieces from the corresponding materials listed on the pattern pieces, with the right side of the material facing up, and transfer all pattern markings and match points.
Lay a towel down on your ironing board. Next wet a paper towel or fabric scrap and lay that on top of the towel on the ironing board. Lay the cabin front piece out onto the wet paper towel right side up.

Align the door and window pieces cut from the webbing interfacing onto the cabin front following the pattern template.

Align the door and window pieces cut from the fabric onto the webbing pieces.

Cover with the other side of the wet paper towel and press well. The windows and door are now affixed to the cabin front piece.

Gather both the fabric and fusible pieces of the cabin front, cabin back, and cabin sides.

Following the instructions included with your fusible adhere the interfacing to the wrong side of each piece, aligning match points.

Embroider a plus sign over each window to create the muntin ( grid separating window panes, I just learned this term today! )

Embroider around the windows and door using the stitch of your choosing. I used the stem stitch here because it's fast and I like the handmade character it gives. I used a french knot for the door knob.

Gather your fused cabin front, cabin back, and both cabin side pieces.

With right sides together, align one of the cabin side pieces to the cabin front matching edges and match points. Sew from the match point down to bottom edge using a ¼” seam allowance. Repeat for the cabin back and other cabin side piece.

Press seam allowances open.

With right sides together, align the unsewn edge of the cabin back to the unsewn edge of the cabin side that was sewn to the front in the last step. Matching edges and match points. Sew from the match point down to the bottom edge with a ¼” seam allowance.

Press seam allowances open and repeat for the other side. This last side will want to lay a little funky so be sure to pin well.

With right sides together, align the top edges of the cabin side and pin, making sure to move the cabin front and cabin back out of the way. Sew across from match point to match point using a ¼” seam allowance. Press the seam allowance open and clip the corners.

Turn the cabin right side out. Hand press and fold the seams to create the A-frame cabin shape.

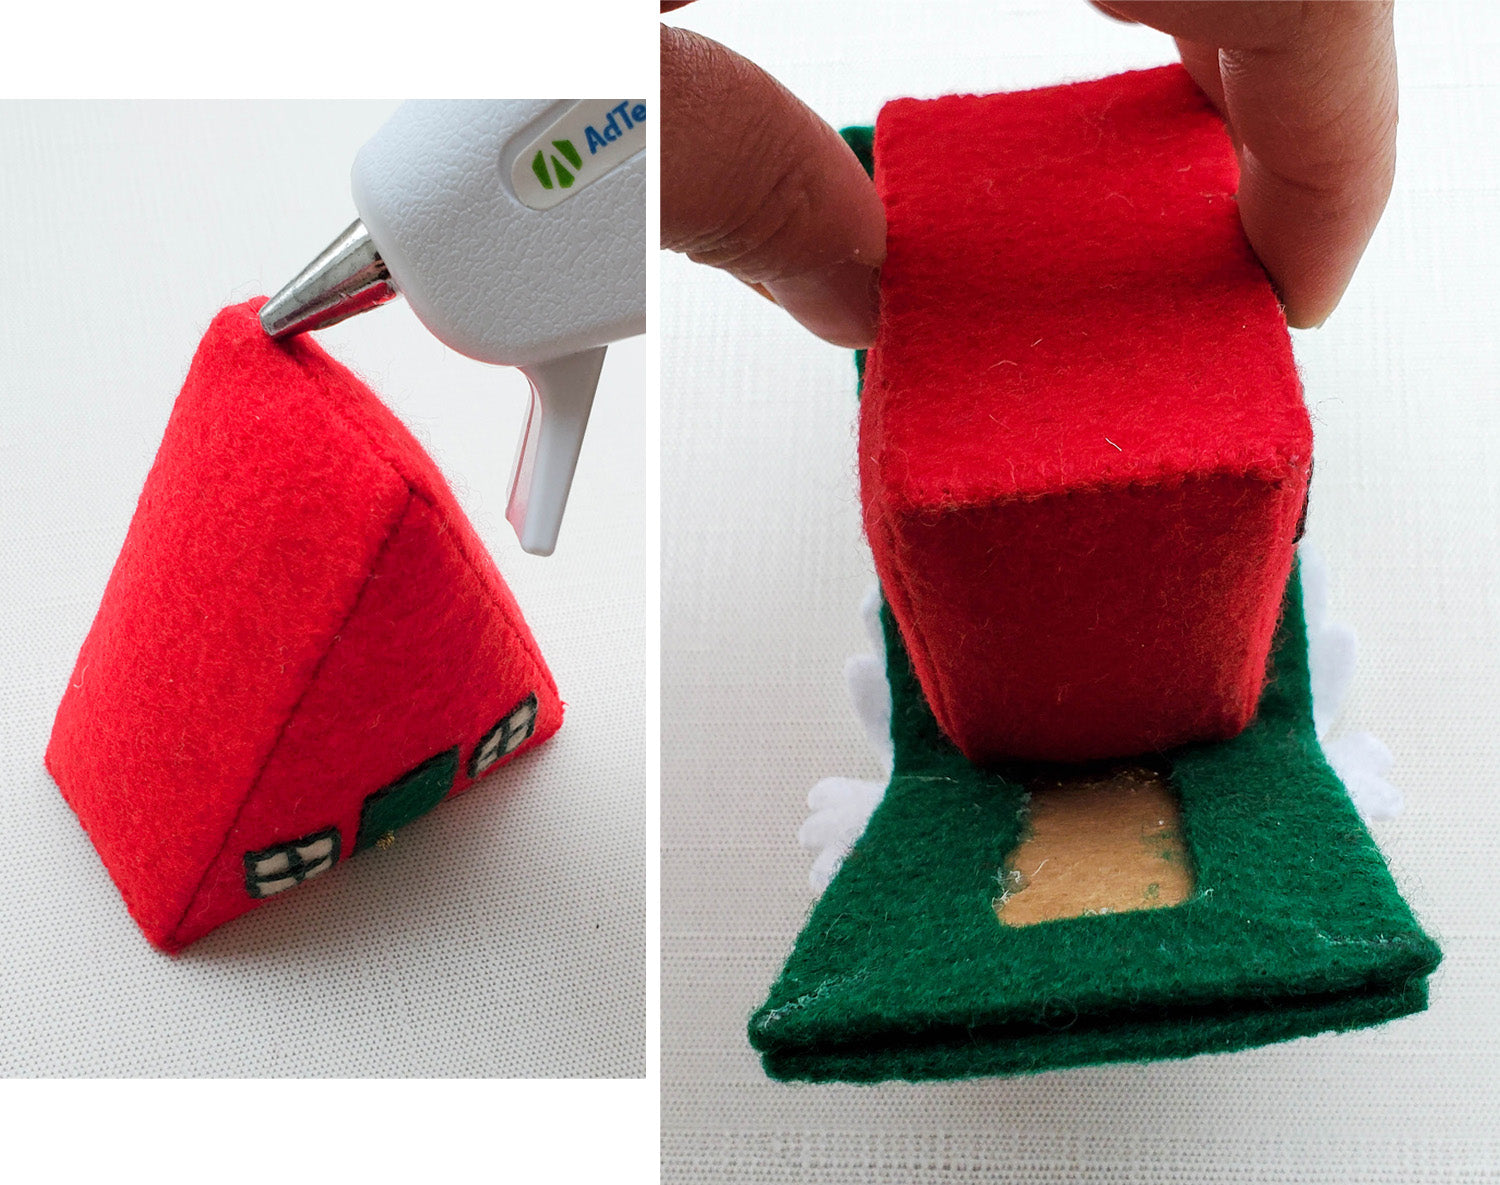
Gather both of the cabin base pieces. Trim the edges of the board piece ⅛” on each side (this makes it easier to sew to the main cabin later)

Apply hot glue to the back of the board piece not the fabric- my board happened to have a red backing. Adhere the board to the wrong side of the fabric cabin base piece, centering it so there's an even border of fabric left around the edges.

Hand sew the cabin base to the cabin with a whipstitch or blanket stitch leaving the front or back open and matching corners of the base to the sewn seams of the cabin. (I left the front open here but I recommend leaving the back open so the front doesnt get distorted when you add the stuffing later.)

Into the opening you left in the previous step, fill the cabin with fiberfill until full and firm. Take care not to distort the triangular shape of the cabin while your stuffing.

Close the opening by hand. The main cabin is complete and now we can raise the roof!

On the right side of the roof exterior piece, align one of the shingles with the first set of shingle placement match points at one end. (I marked my match points in a dark color that is hard to see in the images so I have illustrated the match points here so they're visible.) Edgestitch across the shingle at ⅛” back stitching at each end. Lay the next shingle onto the next set of match points and edgestitch across.
I alternated the colors for each shingle. Repeat this process until you reach the fold line at the center of the roof which is also the final match point. Note: the spacing between the second to last and last match point is a little wider than the rest but thats ok it will be covered by the snow.

Flip the roof exterior and repeat the process starting at the other end and working back up to the fold line.

Pre fold the roof interior piece to create a crease and unfold. Align the roof interior board onto the wrong side of the roof exterior.
Add some hot glue to the center of the roof exterior at the notch and fold it over to match the center of the board. This way you will know your roof is centered and even.

Add glue to the longer sides of the board and fold the roof exterior over and press into the glue. You may need to pull and even stretch to make sure the edge of your shingles line up with the edge of the board. Repeat for the other side.
Add glue to the shorter sides of the board and fold the roof exterior over and press. Use just enough glue so it will stay in place but not ooze out at the angled seam where the long and short sides meet. You will also need to pull and stretch to make sure the edge of the bottom shingle lays flush with the edge of the board, and none of the board is showing.

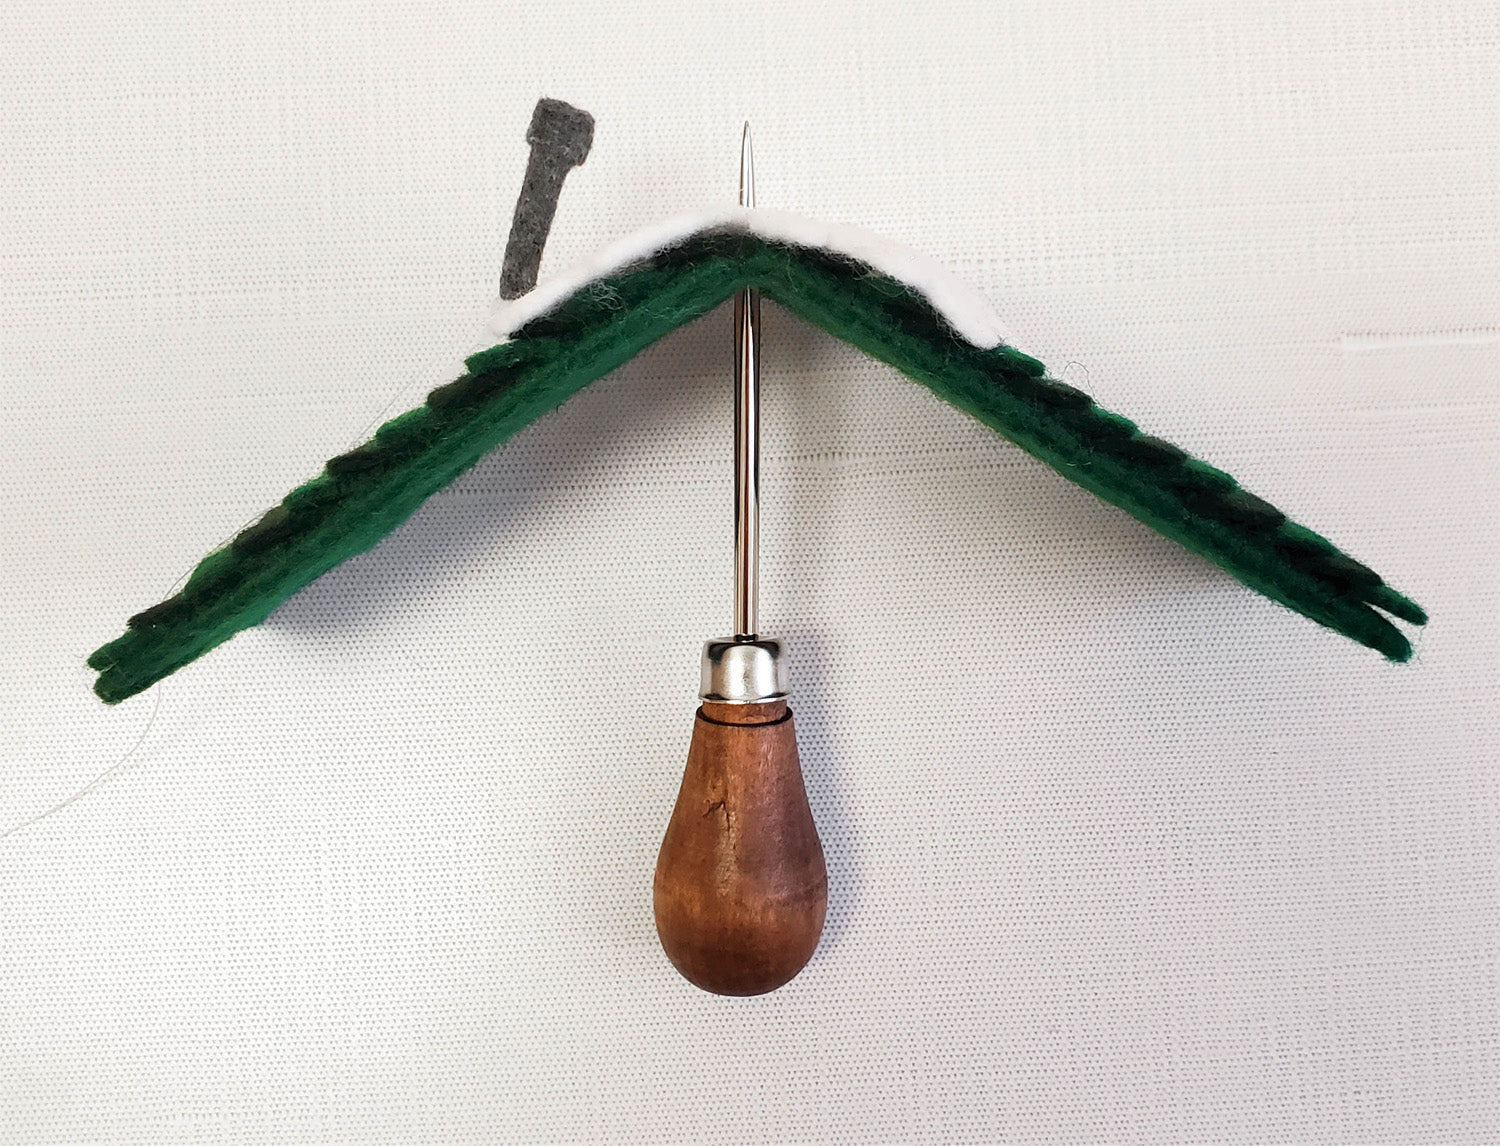
This is what the roof will look like on the right side.

Take your chimney piece and cut a 1” piece of pipe cleaner.
Glue the pipe cleaner along the edge of the chimney piece.
Add a line of glue the same length as the pipe cleaner onto the chimney piece in front of the pipe cleaner but not all the way to the edge and roll the chimney tightly to encase the pipe cleaner.

Apply a line of glue onto the long strip stopping just short of the end, and wrap evenly around the chimney.

Hand sew the free edge of the chimney using a whipstitch or blanket stitch and leaving the unglued bottom free, repeat for the chimney top strip as well. You can alternatively just glue this edge down but sometimes its hard not to get a messy gluey edge on this tiny piece.

With the right side of the roof facing up, measure and make a small mark 1 ¼” down from the fold line, centered on the left side of the roof. Align the base of the rolled part of the chimney to this mark and glue the flat part of the chimney to the roof leaving the rest of the chimney free.

Thread the chimney through the small clip in the roof snow piece. Add a few small dots of glue along the center of the roof to just tack the snow in place for now.

Fold the roof in half to encourage the A-frame shape.

Hand sew the snow to the roof leaving the overhanging edges free for now. You can also glue it in place but again, I like to avoid glue mess and I like the handmade feel the stitching gives.
Mark the center point of the roof and carefully poke a small hole through all layers. I used an awl for this.

Cut a length of ribbon 8” long, fold in half and tie the ends together with a knot.
Thread the loop of the ribbon through the hole from the inside to the outside and pull.

Glue the ribbon in place on the underside of the roof. This does not need to be neat as it will be hidden, just make sure it holds strong.

Apply a line of glue to the top seam of the cabin and center it onto the fold line of the roof. The chimney should be on the cabin's right side (your left).

Apply glue to the side of the cabin careful not to get too close to the edges so glue doesn't ooze out the sides, but close enough that it doesn't pull away from the cabin. Press firmly and make sure the bottom edges of the roof and cabin are flush and the cabin is centered between the edges of the roof.

Next we will address the overhanging snow. You will notice one side has a straight edge at the center fold and one has an angled edge. On the side with the angled edge, apply a thin line of glue along the corresponding front edge of the roof where the snow overhangs and fold the snow over the roof edge towards the front to adhere.


Repeat for the other side but the straight edge will fold over to line up with the angle of other side of the roof. Hand sew the fold over in place. Repeat for the back of the cabin.

Apply a small dot of glue onto the top of chimney and add a very small tuft of fiberfill to create chimney smoke.

Cut a piece of pipe cleaner 2 ½” long and grab your cabin front pattern piece. Using the wreath template on the pattern as your guide, bend the pipe cleaner into a circle to fit the template. Wrapping the ends around the circle to hide and secure.
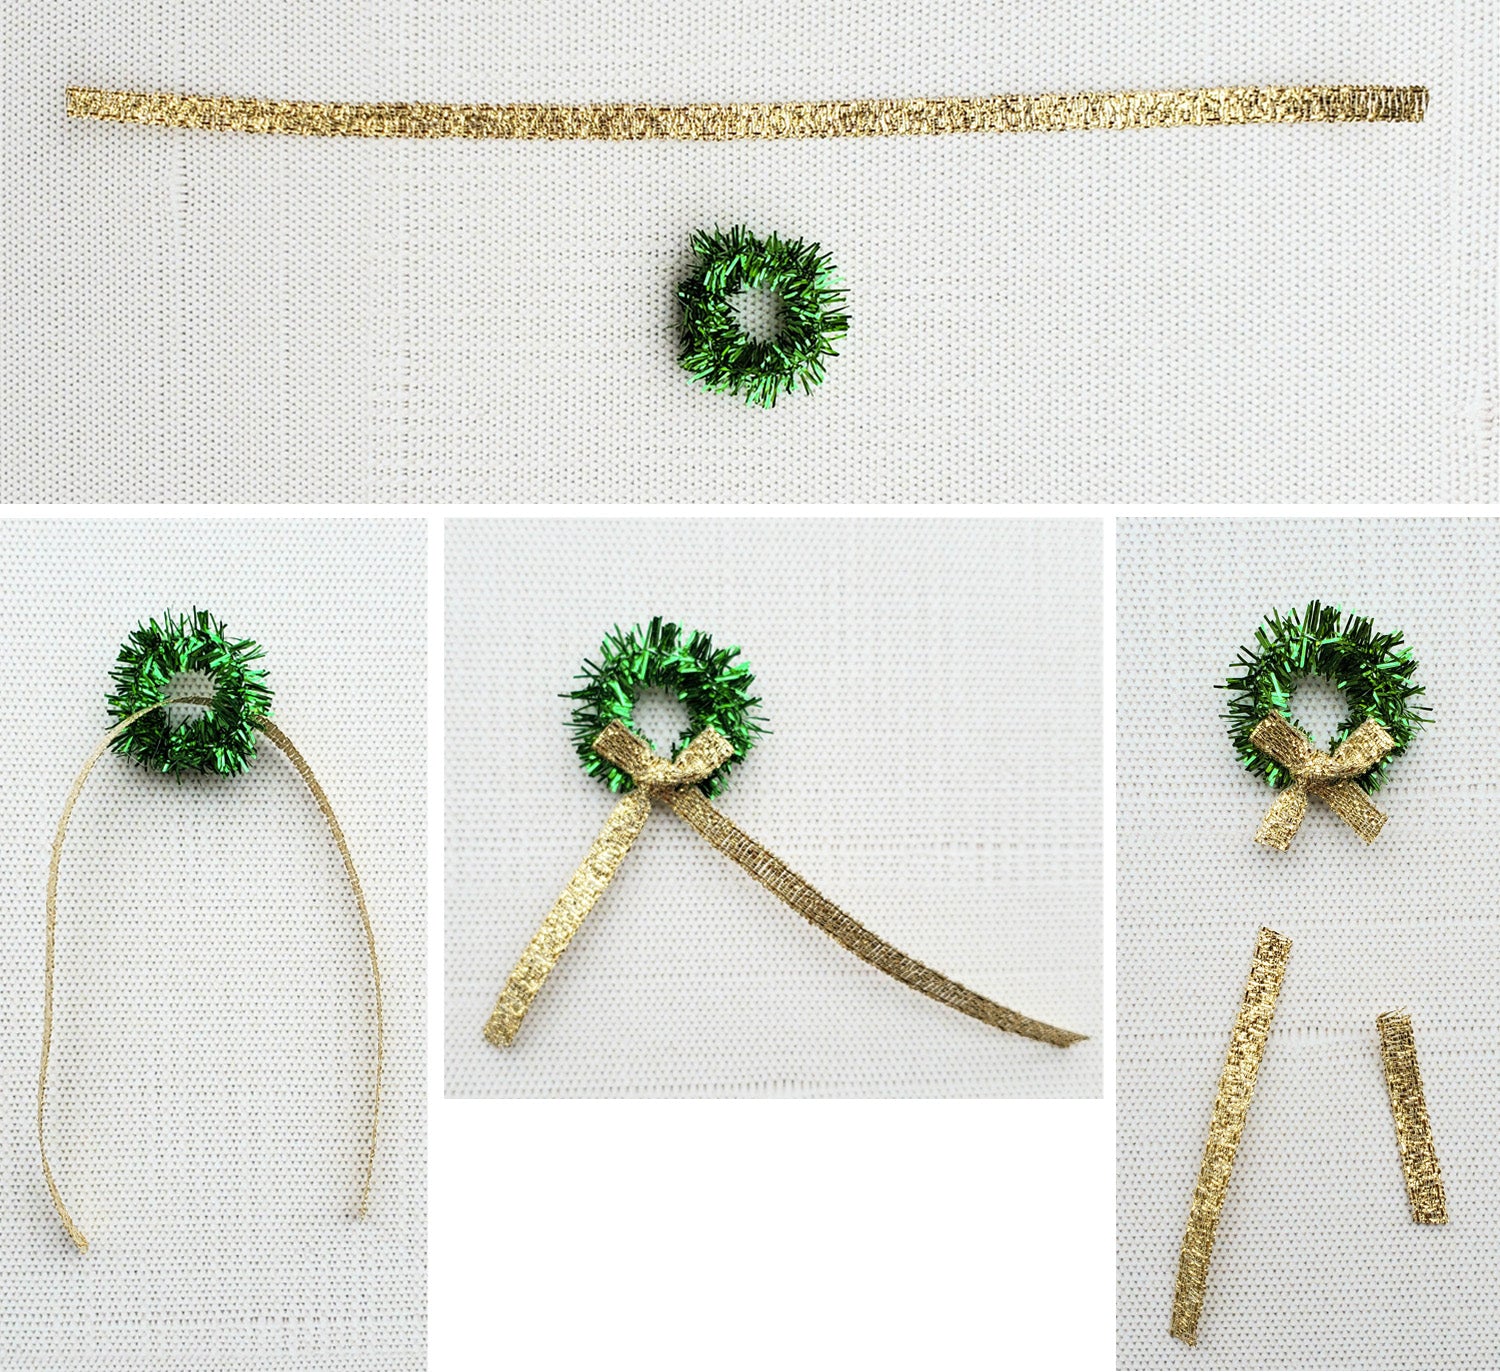
Cut a piece of ribbon 6” long and thread through the center of the wreath. Tie a small bow and trim the ends.

Add a couple dots of glue on the back of the wreath and adhere to the front of the cabin
Your winter cabin ornament is now finished and ready to hang on the tree!

This is the perfect project to work on while watching all those terrible yet amazing holiday movies!
Hopefully you find a comfy, cozy, moment to make your own or to give as a gift! If you do, please tag us @GrainlineStudio so we can share in the holiday cheer!
Wishing you happy holidays from all of us at Grainline Studio!
Featured Products: