Vintage Baubles Holiday Ornament
Shop this post
Vintage Bauble Ornament
Christmas time is here! That means it's time for our favorite holiday tradition- our holiday ornament pattern! This year I was inspired by vintage glass bauble ornaments.

I have always found them to be so special and whimsical with their colors, glittery sparkle, and surprise insets. It was such a fun challenge to pattern the inset and get the iconic shape of the baubles. Though the most fun might be embellishing them with all the goodies!

They are made up in felt with a beautiful ribbon cockade in the center to mimic the unique look of the insets and decorated with trims, glitter, sequins! A great part about these baubles is there's no need to worry about them getting knocked off the tree by a curious little hand or errant tail!
We also have a special gift for you, this pattern is a 2-in-1! Included are patterns for both the cone shape and the round shape bauble. This ornament is a perfect weekend project and we hope it helps make your spirits bright!
If you'd like to make one, you can grab the pattern here, and follow the tutorial down below!
To get started let's gather the supplies:
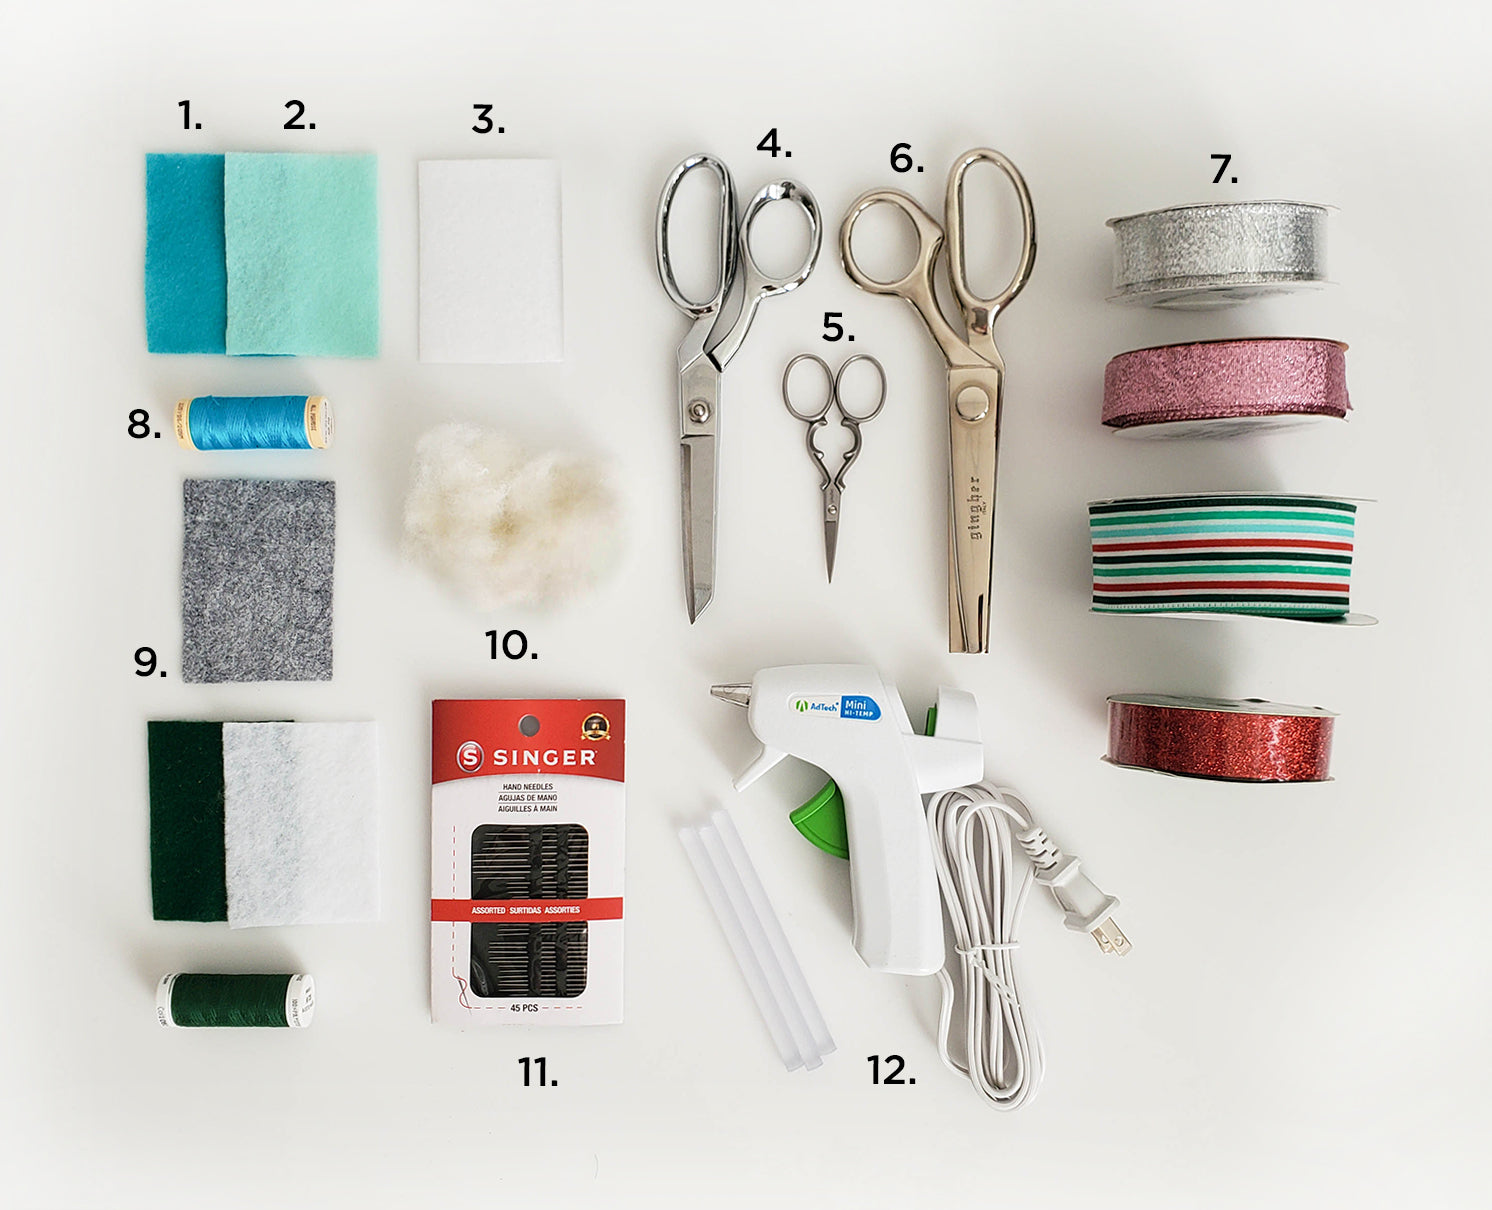
Supply List:
- Fabric 'A' Felt for the main body (one 9"x12" sheet should be enough)
- Fabric 'B' Felt for the inset (one 9"x12" sheet is more than enough)
- Very stiff fusible interfacing (the one we used is just under 1/8" thick)
- Fabric shears
- Embroidery snips
- Pinking shears
- Ribbon- 7/8" or 1" wide for the cockade and you'll need almost a full 9ft spool or 3 yards for one cockade. (I would avoid wired ribbon unless you can easily pull the wires out)
- Matching thread
- Fabric 'C' Felt for the ornament cap
- Fiberfill or stuffing
- Hand sewing needles
- Glue gun (Optional)
Not pictured but also needed decoration materials to embellish the baubles:
- beads
- trim
- buttons
- sequins
- glitter
- really anything you could possibly think of or have on hand!
**You will also need a sewing machine, marking tools, and embroidery floss or thin ribbon for a hanging loop.
Alright! Let's get sewing!

This shows all the pieces you'll need to cut for both bauble shapes. The blue felt is for the cone shaped bauble and the green is for the round shaped bauble.
Cut all your pieces out and only mark (do not snip) your notches onto each piece.
Mark the notches on the fabric side of the interfacing not the glue side.
____________________________________________________________
*Please note that although I am only showing the cone shape in the following sewing tutorial, the round bauble is sewn up the exact same way.*

Take the inset wall interfacing piece and mark the seam allowances on each end. Trim away 3/16" of the seam allowance. Leaving enough to get caught in the seam but eliminating most of the bulk.

Grab your inset wall and inset base pieces and apply the corresponding interfacing to the fabric, following the instructions included with your fusible.

With right sides together, align the ends of the inset wall and sew together with a 1/4" seam allowance. Press the seam allowances open.

Grab the front piece and the pressed inset wall.

With right sides together, place the front piece inside the inset wall and align the inner circle of the front with the wider opening of the inset wall.
Match the bottom notch of the front circle to the seam we sewed in the last step. Match the remaining notches and pin.
Pin around the rest of the circle, aligning the edges. Push your pins all the way down so they don't catch on your machine on the next step.
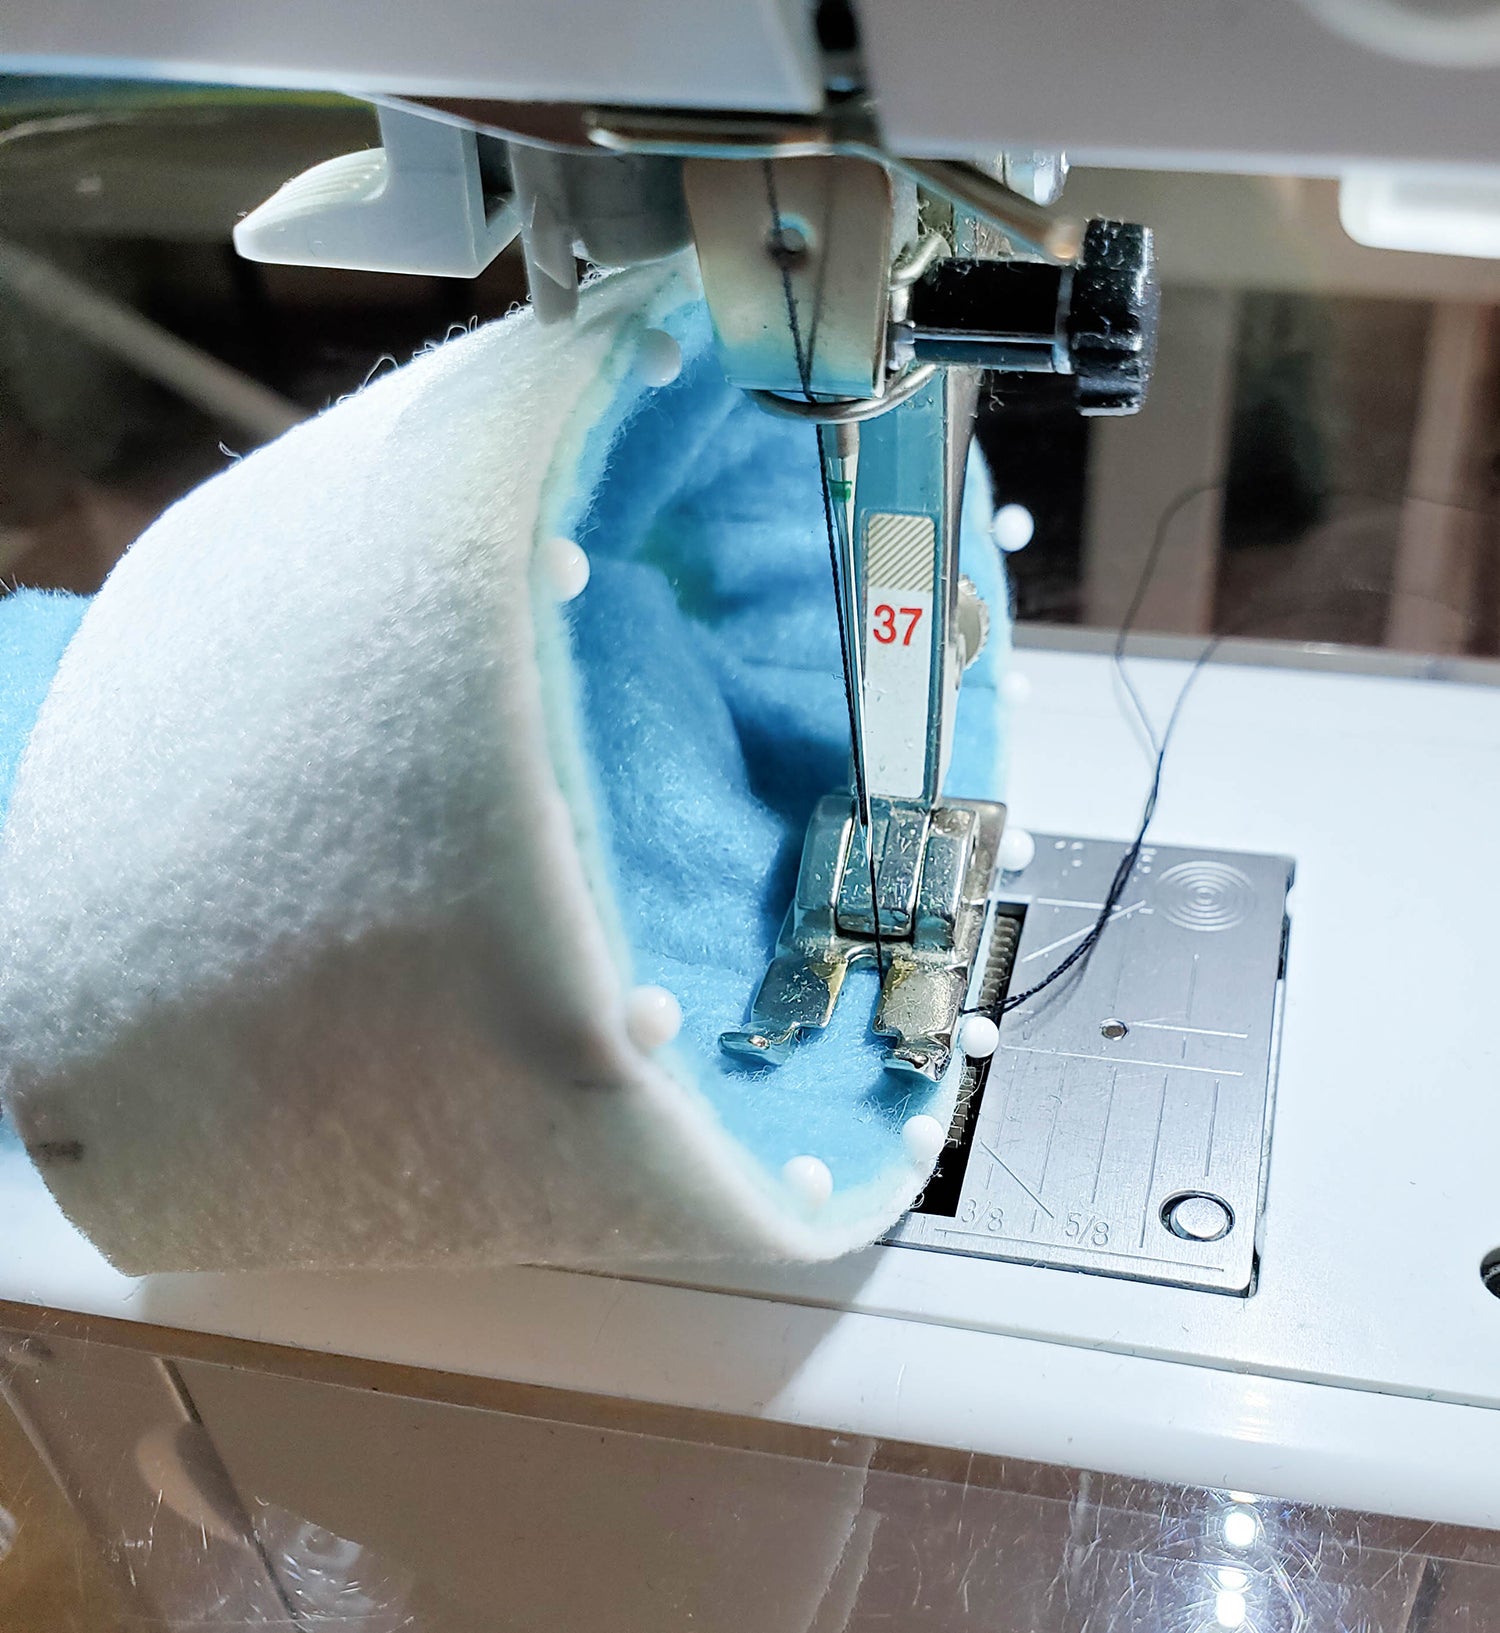
Sew together on the inside of the circle with a 1/4" seam allowance.
I am sewing with black thread here so everything is easier to see in the tutorial but I would highly recommend using matching thread.
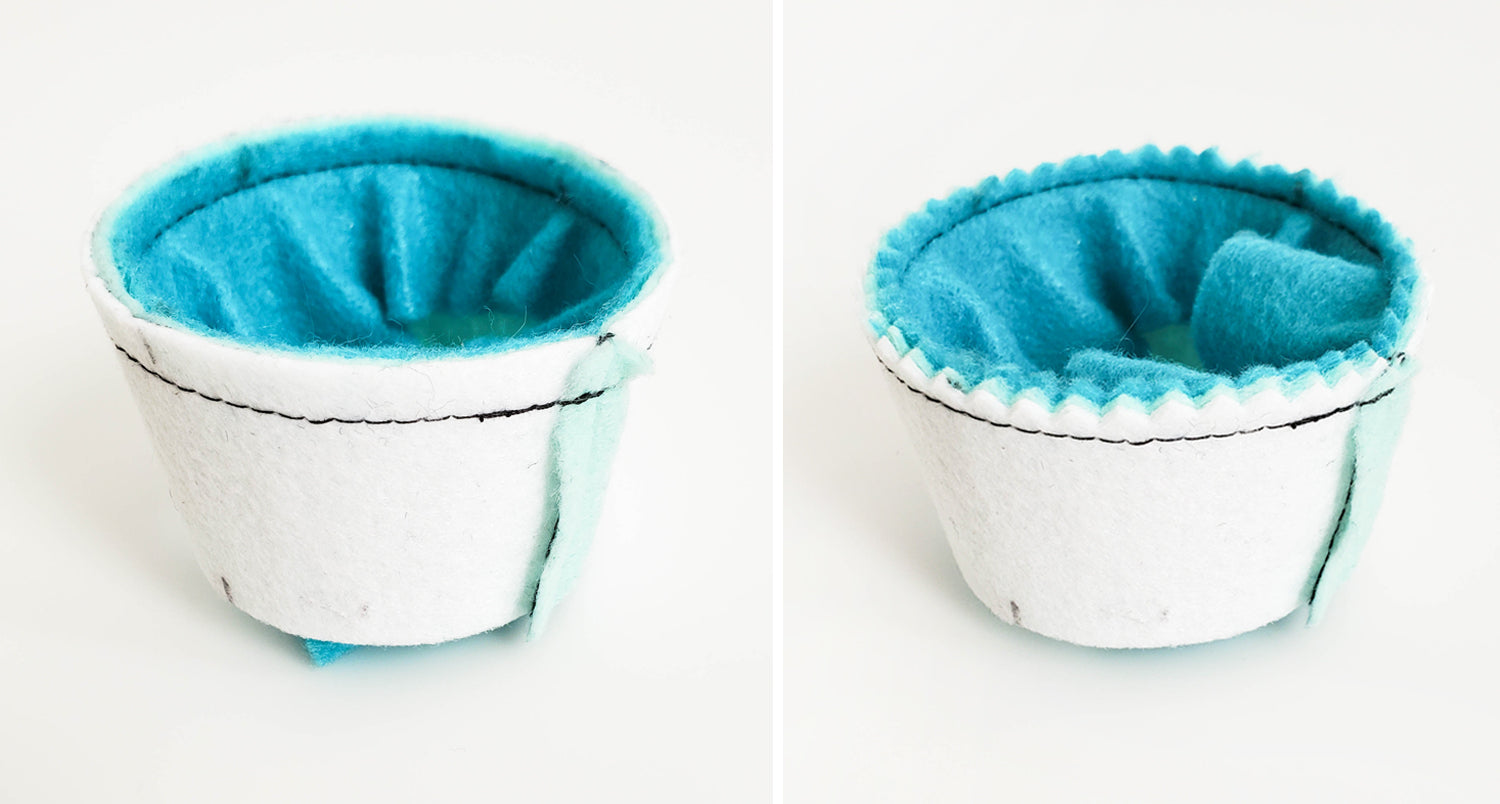
Trim the seam allowance in half with pinking shears. If you do not have pinking shears you can alternatively notch the seam allowance.
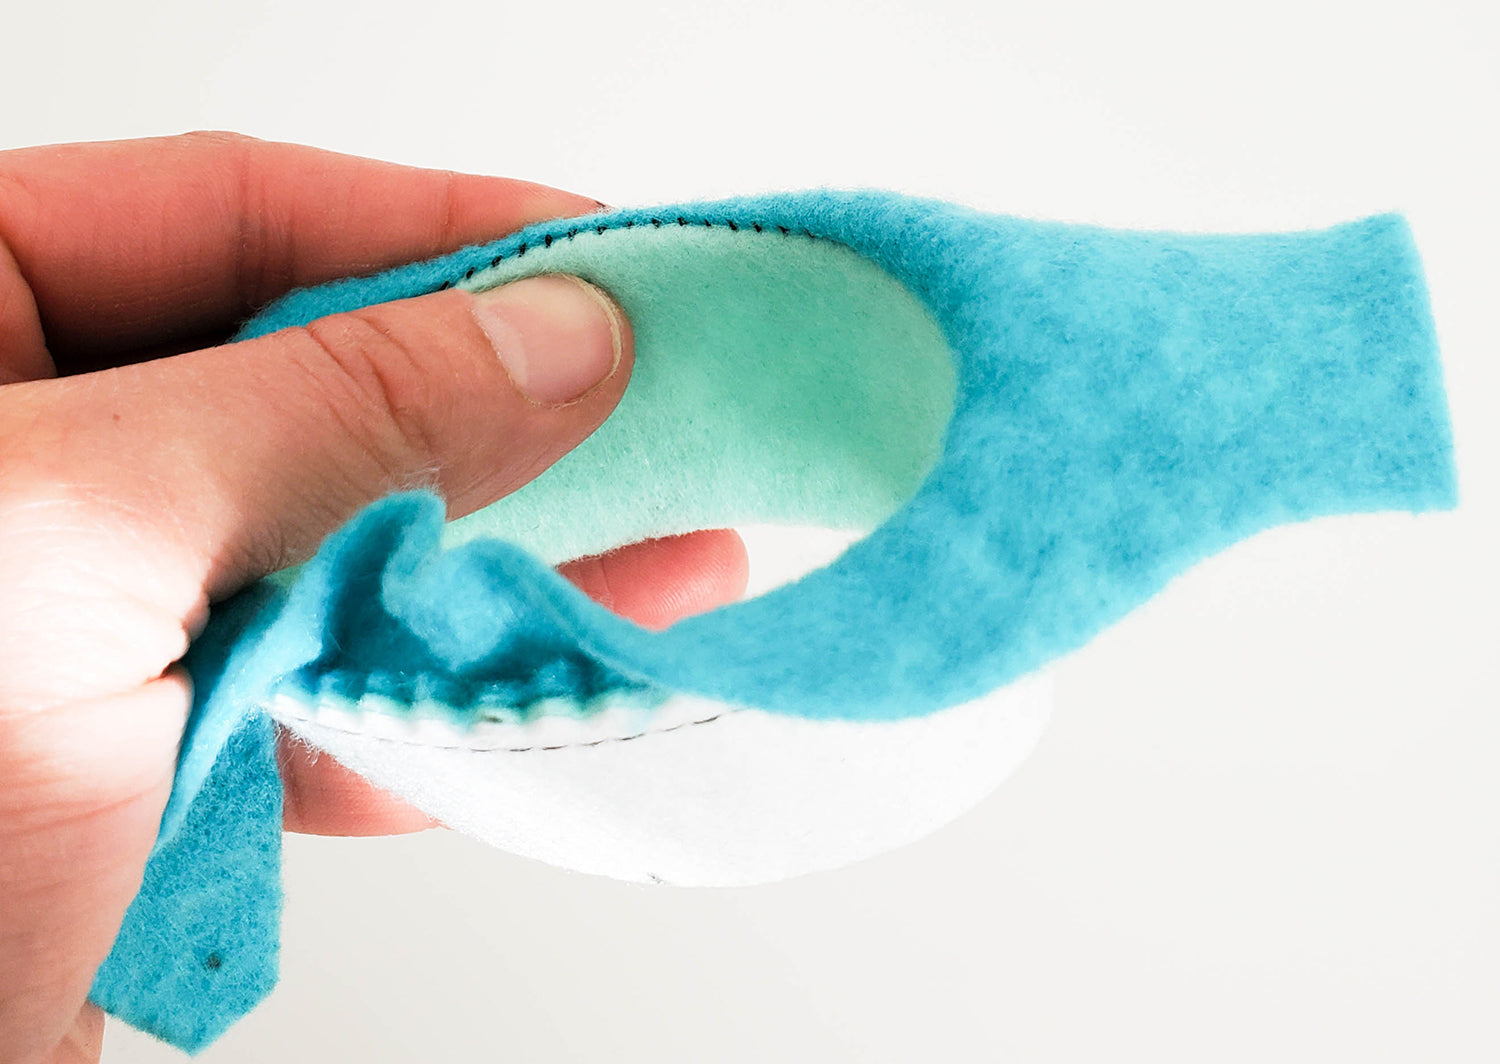
Pull the front out to the right side. Fold the front along the seam line and finger press around the circle to encourage a smooth flat seam.
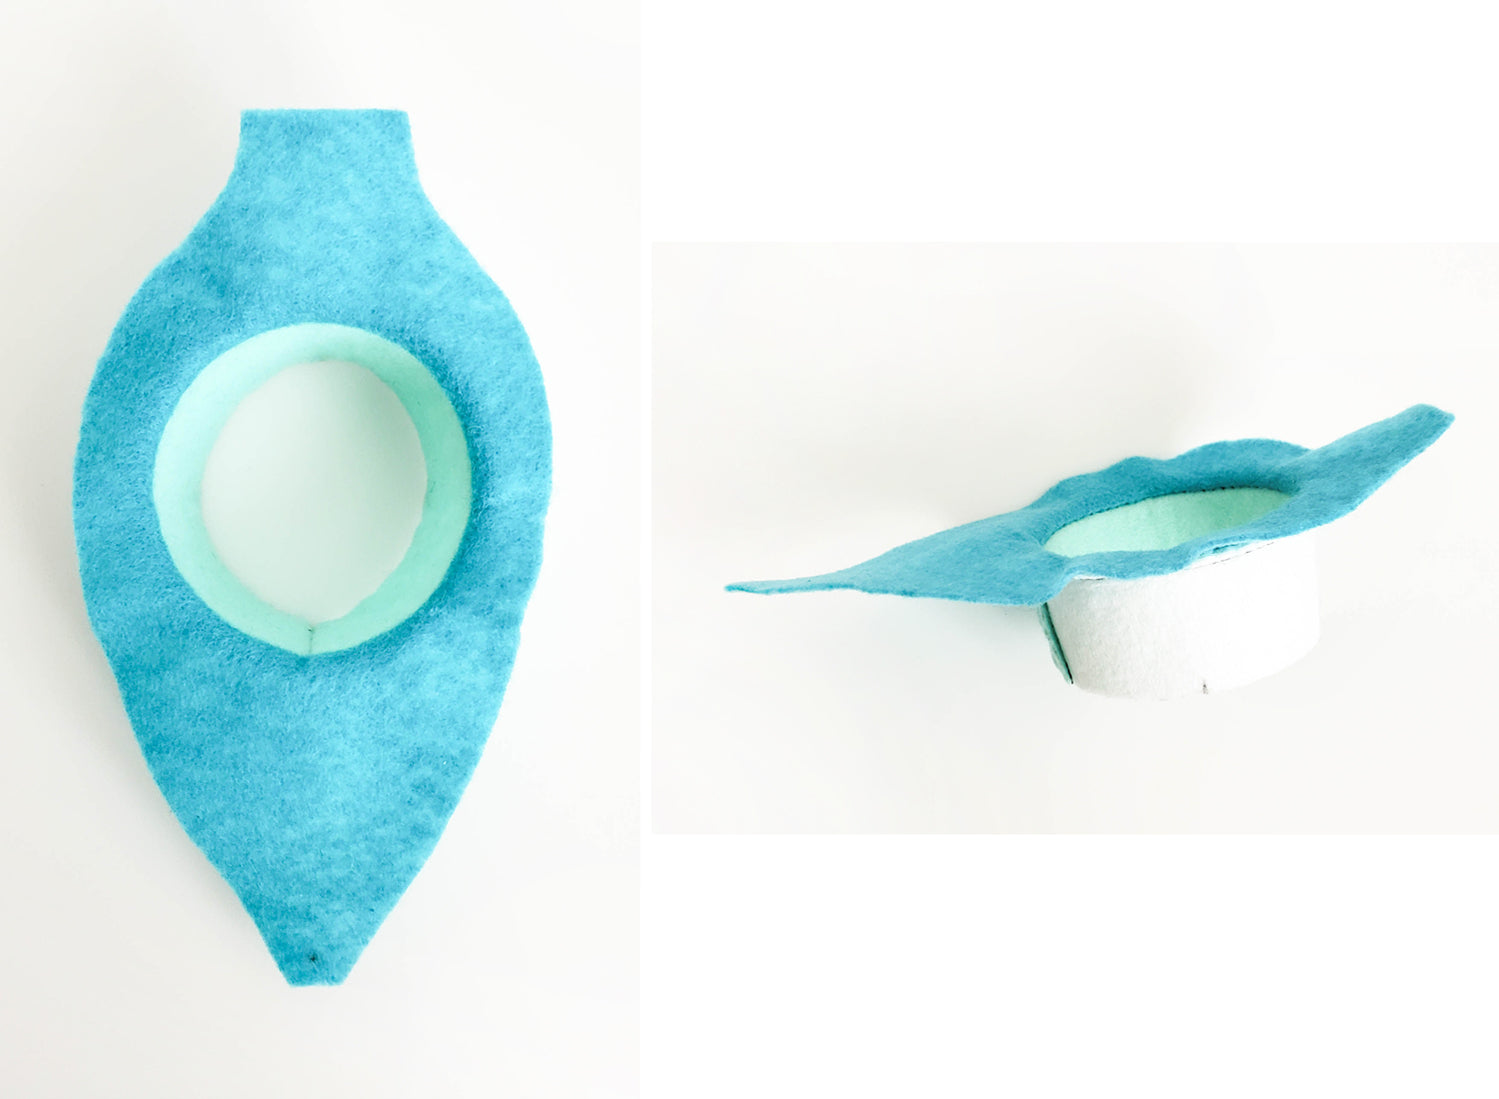
This is what it will look like!

Place the inset base face down on the open end of the inset wall. Align notches and whipstitch together, entering and exiting the needle 1/16"-1/8" from the edge. Secure with a knot.

Grab all the side/back pieces. You'll notice there are two opposing pieces with the notches marked -these will be our back pieces.

With right sides together, align one side piece to the front, aligning edges and the match point circles. It's best to pin and sew with the inset facing up.

Sew together with a 1/4" seam allowance stopping at the circle match point.
The inset is about 1/2" from the edge so you may need to change out your presser foot so it doesn't hit the inset and you can achieve a smooth seam line. I used our 1/4" quilting foot but if you don't have one, a regular zipper foot will work too!

Try not to lose the curve of the 'neck' when sewing!

Repeat for the other side and trim away half of the seam allowance with pinking shears.

With right sides together, align the two back pieces and pin. We will be leaving an opening between the two notches so I like to pin the notches with a special pin so I can remember to stop sewing and this point.
Sew together with a 1/4" seam allowance, leaving the opening between notches and stopping at the circle match point.
Trim away half the seam allowance with pinking shears.

With right sides together, align one back piece to one side piece and pin in place.
With the inset facing up, sew together with 1/4" seam allowance stopping at the match point circle.
Repeat for the other side and trim the seam allowance in half with pinking shears as you did with all other seams.
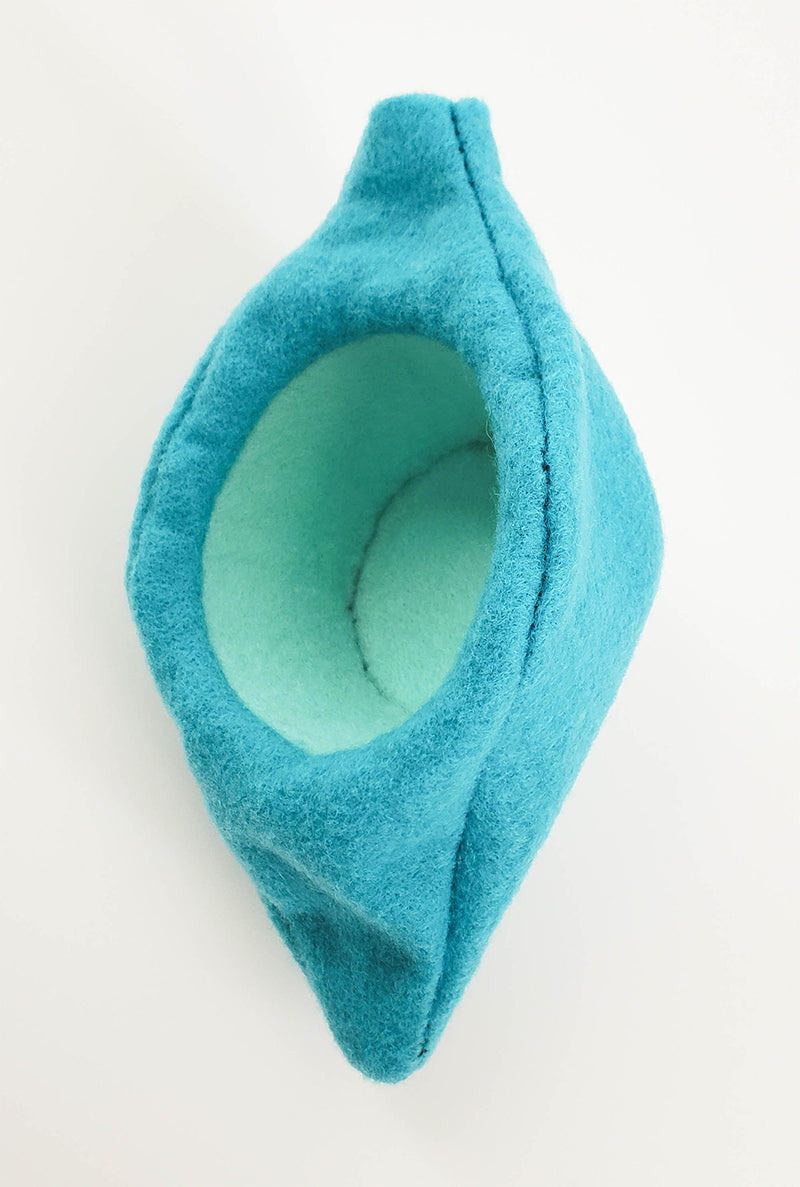
Turn the ornament right side out through the small opening in the back. Be sure to crush the inset as little as possible as you feed it through the opening.
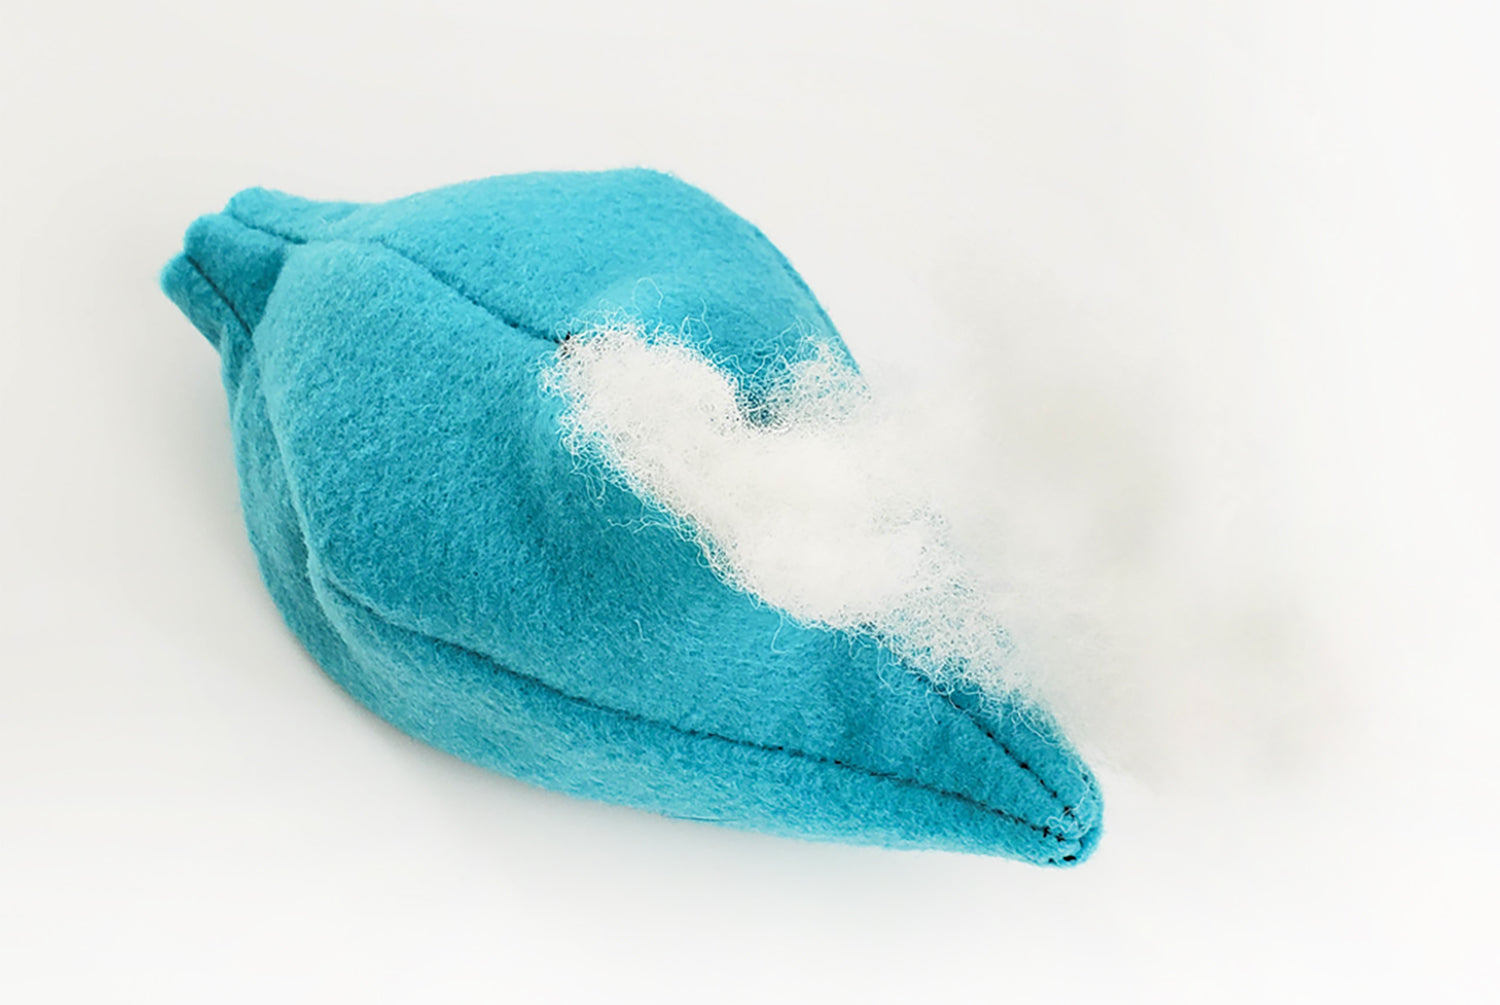
It's hard to tell in this picture, but I have a hot tip for stuffing plush! Before adding stuffing to any plush project, always start by pulling the fiberfill into a snake or rope! This helps create an even fill and prevents lumps and bumps. Stuff the ornament through the back opening, starting around the inset and then moving to fill the bottom, top, and finally the back.

Be sure to always keep one hand inside the inset while stuffing to ensure the fiberfill is not collapsing the inset and to keep the desired shape of the bauble.

Close the back opening using a ladder stitch and bury the knot.

Grab the cap and cap top pieces. Apply interfacing to the cap top following the instructions included with your fusible.

With a hot glue gun, apply the scalloped cap piece around the top opening of the bauble, starting and ending at the back seam. You can also whipstitch this in place rather than gluing.

Whipstitch the cap top to the cap, entering and exiting the needle 1/16"-1/8" away from the edge. I like to stitch the cap on rather than gluing to cinch the pieces together and hide the interfacing.

The bauble is finished and just needs the decoration!

Finished cone shape bauble!

This is how the round shape bauble looks when finished.
___________________________________________________________________
I created a cockade to put inside the inset to achieve the look of the vintage baubles. Cockades are made by folding ribbons in a special way, which is a technique commonly used in millinery.
Making the cockade is the most time consuming part of this whole ornament but the effect is stunning. It's the perfect activity to do while watching some Christmas movies on the couch!
And once you know how to make one, you can use it for anything! They are so beautiful honestly, you could just tie a string through it and put that on the tree!
Let's get to it!

With the wrong side of the ribbon facing up, begin by folding the top corner down at an angle to meet the bottom making sure edges are flush. Press well with your fingers. Add a few running stitches to secure this first fold moving left to right to end with the needle and thread out at the point.

Take the length of ribbon and fold down to create a triangle. Keep a small space in between the edges of ribbon to allow an even fold, otherwise it will roll to one side or the other.
Fold the left point over to the right point and press firmly with fingers.

With the needle and thread, secure the two points together with a stitch, passing the needle through the thread loop as you pull.
Fold the length of the ribbon over to the left, aligning the edge with the triangle above.

Fold the bottom point up to meet the top point and finger press firmly.
Now your back at the beginning! Fold the length of ribbon down to create a triangle.

Just as you did before bring the left point over to meet the right point and secure the two points together with a stitch, passing the needle through the loop as you pull.
You will start to create folded points. Repeat these steps until you have 38-40 folds or less if you are using a thicker ribbon. You need enough so that the cockade fits snuggly and fills the inset. Once you have enough points, stitch the two ends together, trim the excess ribbon, and secure with a knot.

This is what the cockade will look like when finished. Isn't she lovely?!

Grab the finished Bauble and the finished cockade.

Apply hot glue to the inset base.

Place the smaller side of the cockade into the inset and press gently into the glue.

The finished cockade has a hole in the center that will need to be filled. You can fill it with anything from beads to buttons to ribbon to sequins. Keep it simple or go crazy! Or you can forget the cockade all together and fill your inset with miniatures to create a winter time vignette!

Now we need a way to hang it on the tree!
Thread an embroidery needle with a length of embroidery floss or thin ribbon.
Thread the needle in and out 1/4"-3/8" distance in the center of the cap top and pull the thread through. Tie the ends together in a knot to create a hanging loop.
Almost finished, all that's left is the embellishment! Gather any and all supplies you would like to use to decorate your baubles and go to town!

For this cone shape I added trim to cover the black stitching, star sequins, a handmade tassel, and a very special button from Jen's Grandmother's button jar.
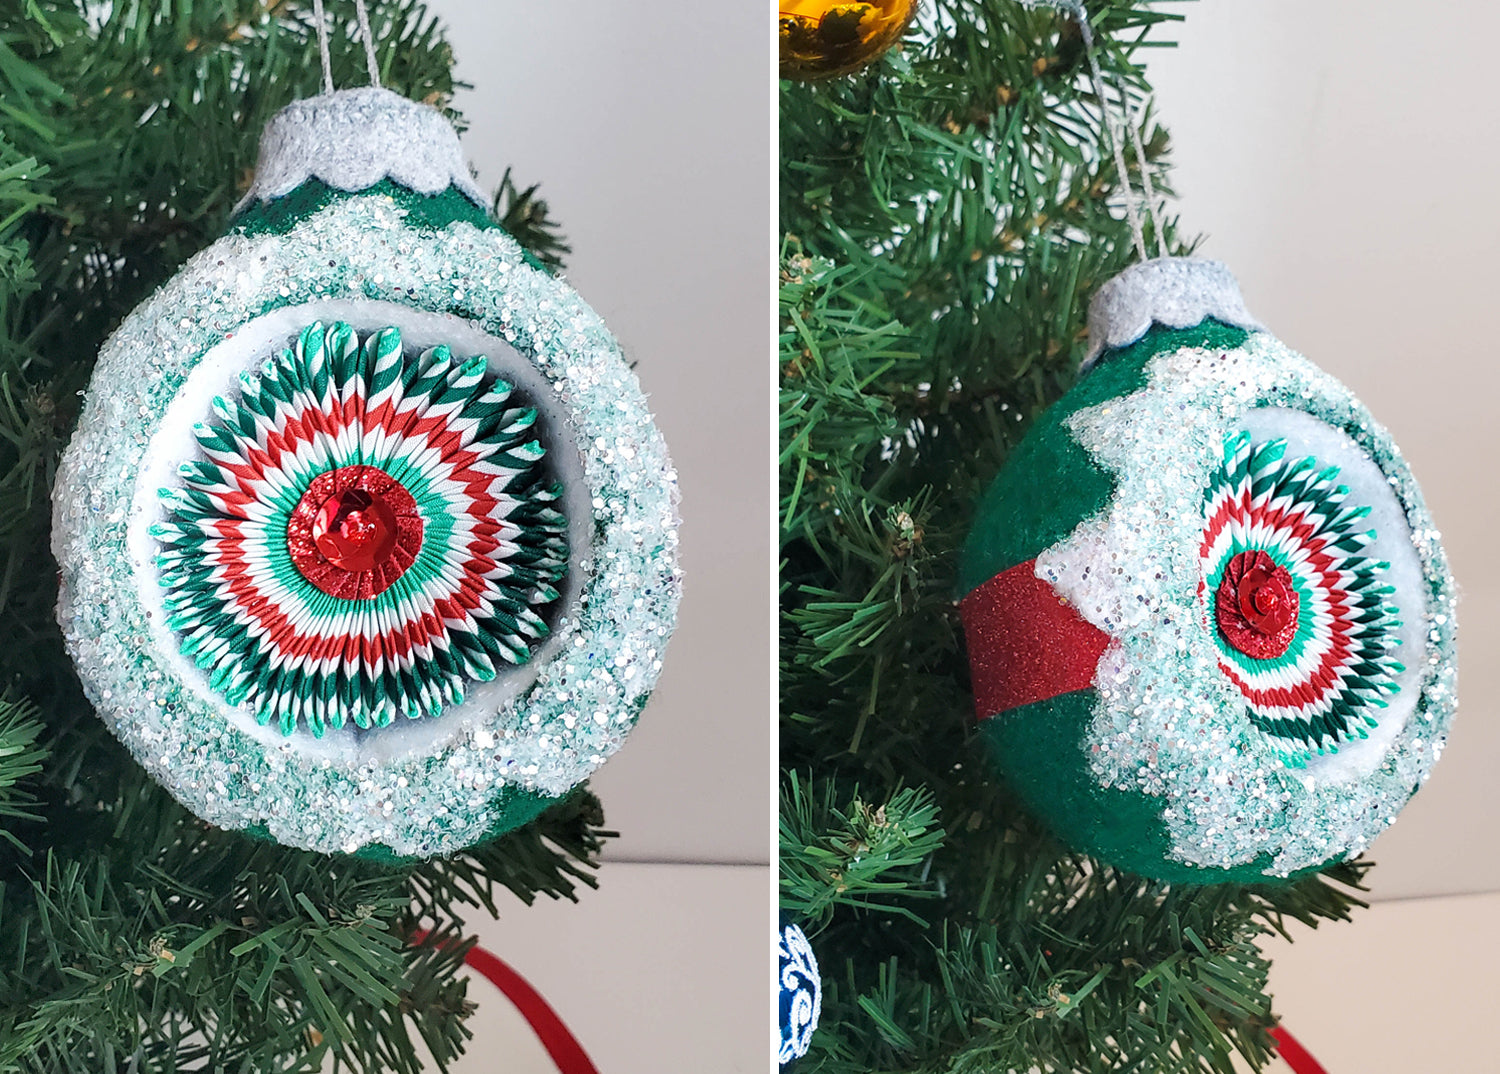
For the round bauble I used a striped ribbon to make this fun cockade, sequins, and trying to mimic the glitter in some of the vintage ornaments I used craft glue and glitter to give it a frosty finish!

Your Vintage Bauble is now ready to adorn your tree!
I had so much fun making and sharing these ornaments. I sincerely hope you give them a try! If you make your own baubles to jazz up your tree, or to give as gifts, please tag us at #GranlineStudio so we can share in the yuletide cheer.
Happy Holidays to you and yours from the team at Grainline!
Featured Products:

