Today's download is a project we made back in 2016 but unfortunately the original post was lost forever in our website update. So we've re-photographed it to bring you today's free apron tutorial! The pattern is available for $5 in our shop but for newsletter subscribers it's free. Just sign up via the form below and check your inbox for your welcome email!
This apron is quick and easy to make and makes a great gift. Use it for cooking, baking, grilling, crafting, or even to protect your clothes while potting plants. I can't be the only one making a mess with dirt all the time!
Supplies

To make your apron you'll need the following:
- 1¼ yds (1.15 meters) of canvas for your main fabric
- ½ yds (.46 meters) of canvas for your contrast fabric
- Thread
- Apron pattern [download the pattern here]
Cutting Layout
We've optimized our cutting layout to use the least amount of fabric, this means that the ties and the apron front are cut from the same fabric. If you want an apron with ours where the ties match the contrast pocket, the ties are 36" long so you'll need just over a yard of your contrast fabric instead of the half-yard listed above.
Sewing Instructions

To begin cut all your pattern pieces from fabric following the cutting diagram above. Depending on your color scheme, your pieces may have different contrast than what we've done above.

Fold the two side edges of the apron over 1/4" and press, then fold over and press at 1/4" again.

Stitch along the free folded edge of both sides to secure them in place. We edgestitched which resulted in our stitching line falling about 1/16" to the edge. Worry less about how far from the edge you are and more about making sure you catch the edge and have a straight line. If you have an edgestitching foot, this is a great time to use it! Your apron is likely to see some messy times so this is a great project to practice.

Now fold the lower edge up 1/4 and press, then 1/4" again and press. Stitch along the free folded edge as you did for the sides.

Now we'll finish the top edge of the apron by again folding and pressing the raw edge over 1/4" twice, then stitching the free folded edge down.

Now take the two facing pieces and fold the short edges at the top and bottom over 1/2" and press.

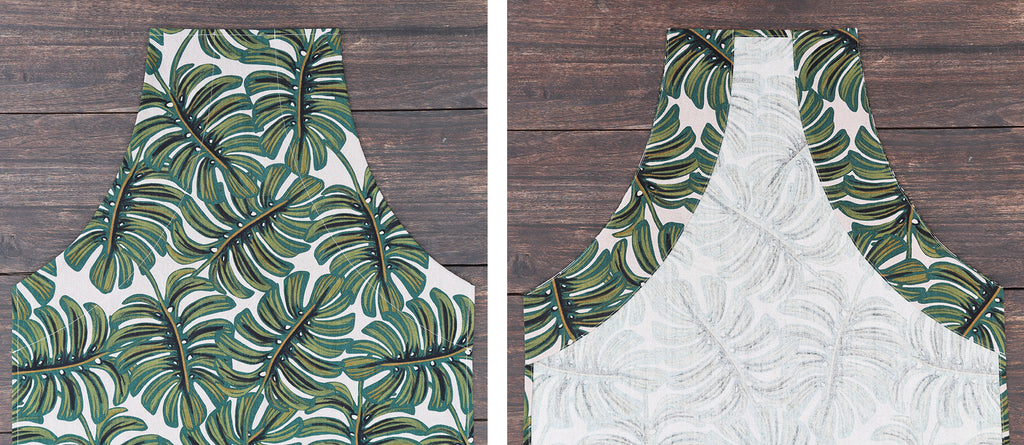
Align the upper curved edge of the facings with the curved edge of the apron and pin.

Sew the facings to the apron using a ½" seam allowance. Grade the seam allowance by cutting both layers in half, then the facing layer in half again. Clip the seam allowance every 1" or so.

Press the facing and seam allowance away from the apron. Understitch through the facing and seam allowance.

Press the raw edge of the facing under ¼" and press. At the two short edges, unfold the previously pressed edge to press the ¼" side, then refold and press the short edges.

Press the facings to the wrong side of the apron, the seam line should fall to the back thanks to our understitching. Pin the facings in place.

Stitch along the pinned edge of the facing to secure it in place.

Now we need to prep the pocket. Start by folding one of the long edges of the pocket over ½" and press, then over 1" and press. This will become the top of the pocket.

Edgestitch along the free folded edge to secure the hem in place. Then fold up ¼" around the remaining 3 raw edges of the pocket.

Align the four corners of the pocket with the pocket placement markings and stitch around the edges of the pocket to secure it in place. I like to put a small triangle at the top corners of the pocket to reinforce that area against wear but that's completely optional. You'll notice I also stitched a line dividing the pocket 4" from the edge. Also totally optional but it's a nice way to divide the large pocket up based on your intended use.

To assemble the tie, start by sewing all 4 of your strips together along the short ends to make one long piece. Then fold each of the four raw edges under ½".

Fold the tie in half long ways and press.

Edgestitch along the three open edges to form the tie and give it another good press to really flatten it out nicely.
Now thread the ties through the openings at the top of both facings. The straps height are adjustable by feeding more tie through the facings!

So that's it for our apron pattern and tutorial! Again, you can download the pattern here, and if you sew one up make sure to tag us in your social media posts using @grainlinestudio, #grainlinestudio, or #grainlineapron. We can't wait to see what you make!


