Felix Sew-Along: Cutting and Fusing
Shop this post

Felix Dress
Today we're going to be cutting our dresses as well as prepping our pieces to sew by applying the fusible interfacing. I love getting that step out of the way all at once in the beginning so you don't have to keep pulling out your press cloth and interrupting your sewing. So with that, let's get cutting!
Cutting Your Dress
Cutting the Felix is pretty straightforward, and you'll need to cut your self fabric (again this is the main fabric), your lining, and your fusible interfacing. If you're using a slippery fabric such as a silk, you may want to cut it between paper, as we show in this tutorial, but for rayon, linen, and cotton you should be just fine cutting normally. We cut our rayon dresses just like we'd cut chambray. Trace the pattern piece out, pin, and cut! A lot of you have asked and no, I don't do any starching or soaking of the fabric in gelatin.

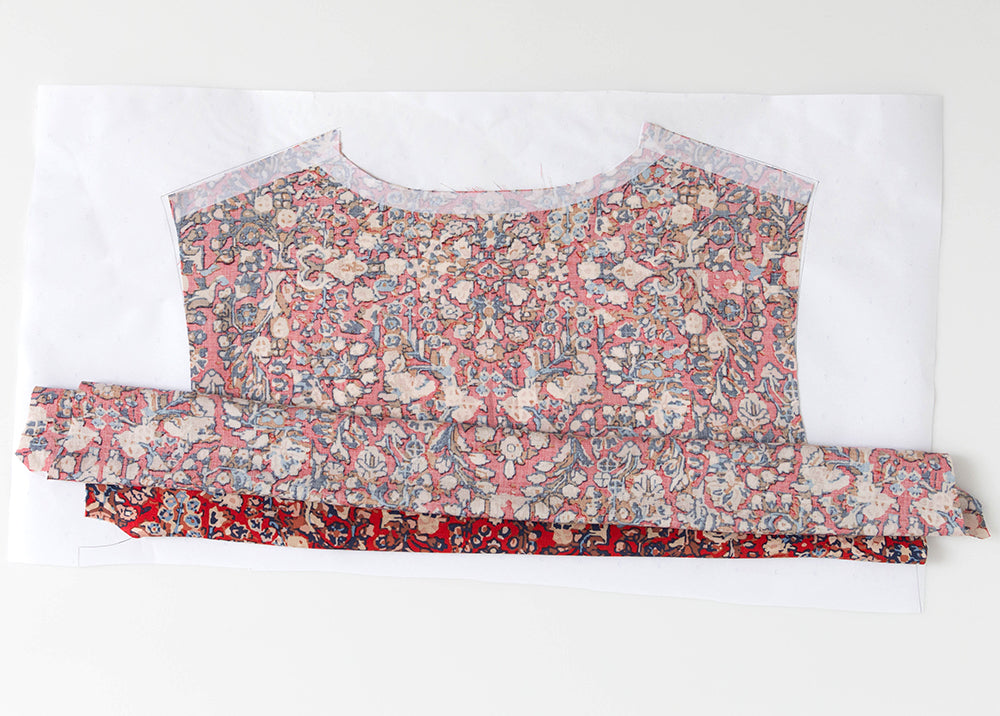
When cutting according to the pattern layouts you'll notice that we have pieces 1 & 2 stacked along with this text in the cutting instructions: Please note you will need to trim piece 2 to size after cutting. In order to cut on the fold and save fabric space we have you cut two of piece 1 during your initial cutting of the pattern pieces.

After you've cut two of piece 1, lay them out and place the pattern for piece 2 on top of the left front. Trim along the center front to create the angled edge. You now have pieces 1 and 2 cut.
Fabric Piece Guides
Because there are so many pieces to cut I've laid out these maps of what you should have for each view after you're done cutting. By double checking that you have everything you need before moving on to fusing and sewing, you can save time by not having to get your fabric out and pressed again later to cut anything you may have forgotten.


Interfacing the Neckbands
Now that everything is cut, we're going to apply the interfacing. When working with slippery fabrics that can shift out of shape like rayon or linen, I often like to use the following method to make sure the pieces stay in shape while fusing.

We're starting with piece 4 here. You'll need to trace one with the pattern piece right side up, and one with it wrong side up. The reason I trace rather than laying the fabric out on top of the pattern piece is that the heat it takes to fuse the interfacing can distort the paper pattern. If you want to use that piece again that's not a great option.

On the left here you can see how easily the rayon wants to shift out of shape. On the right the piece has been aligned to the correct shape inside the traced pattern piece.

Fuse the interfacing to the fabric on top of the paper according to the instructions included with your fusible interfacing.

Repeat these steps for the left neckbands. Remove all neckband pieces from the paper and set aside.
Applying the Interfacing Strips
Since this pattern is cut from shifty fabric and has many seam lines that fall on the bias, we're going to do a bit of extra fusing to keep things from stretching out of shape while you work. In these next steps we'll be fusing the interfacing strips you cut from the remainder of your interfacing yardage in a few select spots. The strips should be 5/8" wide so that they overhang the 1/2" seam allowance by 1/8 of an inch.

Trace the left front pattern piece onto a sheet of paper. You'll be tracing the pattern piece upside down since we're applying the interfacing to the wrong side of the fabric. Align the left front.

Fuse a strip of bias interfacing to the neckline edge of the piece. Then fuse another bias strip to the angled front edge.

Take a strip of interfacing cut on the straight grain and fuse it along the shoulder of the piece. Remove from the paper and set aside.

Repeat these steps for the right front fusing a bias strip to the neckline edge and a straight grain piece to the shoulder. Remove and set aside.
For the back bodice you'll first fuse a bias strip of interfacing along the neck edge, then a straight grain piece on each shoulder seam.

You can optionally apply a piece of interfacing to the skirt and bodice pocket seam. It's not completely necessary, though it may help keep things aligned if you're working with a fabric that has a lot of bias stretch. It won't cause anything to sit away from your body in the way the neckline does if you skip this step, which is why you definitely want to apply the fusible to the pieces above.
That's it for cutting and fusing. There was a lot I wanted to say in this post so hopefully it came across clearly. If you have questions let me know in the comments below and we'll be back here Monday to start sewing!


Featured Products: