Archer Sew Along: Assembling the Back Views A and B
Shop this post

Archer Button Up Shirt

Archer Button Up Shirt
Alright, it's time to prepare our backs, you guys all ready? We'll do View A first because there isn't much to this one. Pleat the two notches in to CB and baste across the pleat to secure. That's it! Unfortunately I lost the photo of the basted pleat in the Great Computer Fiasco of 2013 but hopefully you get the idea.

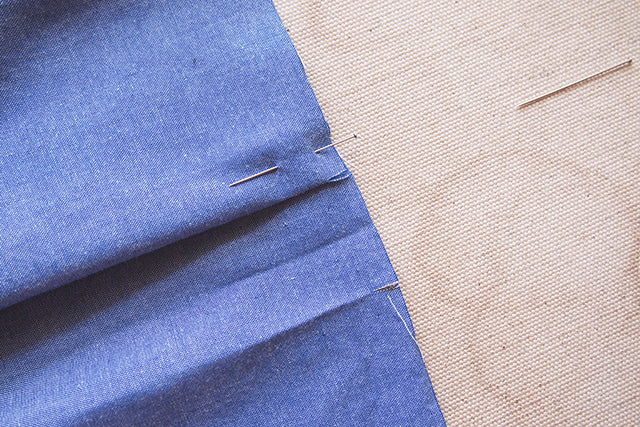
View B is a bit more involved but it's still really easy. Place two lines of basting stitches between the notches on the top edges of the bottom back piece.


Match the notches with the upper back (right sides together) and pin the outer non-gathered edges together. Then pull your gathering threads to gather the center portion together. Arrange gathers evenly and pin in place.

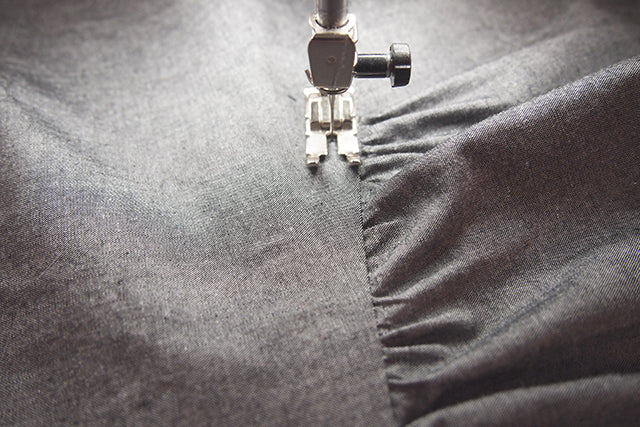
Stitch along the seam. I like to do this with the gathers facing up so you can be sure they're laying straight while you go over them. No surprises.

Remove your gathering threads.

Finish your seam as desired, I serged mine. Press seam upwards.
Topstitch the seam down at 1/4" which both looks fancy and also keeps that seam from flipping this way and that keeping the gathers looking neat and firmly pointed downwards.

That's that! You can trim off those little pointy seam allowances at the edges if you like, or just serge them off when we finish the side seams. Up next - two ways to attach a yoke. Get pumped!
Featured Products: