
Appliqué Linden Tutorial
Shop this post

Linden Sweatshirt
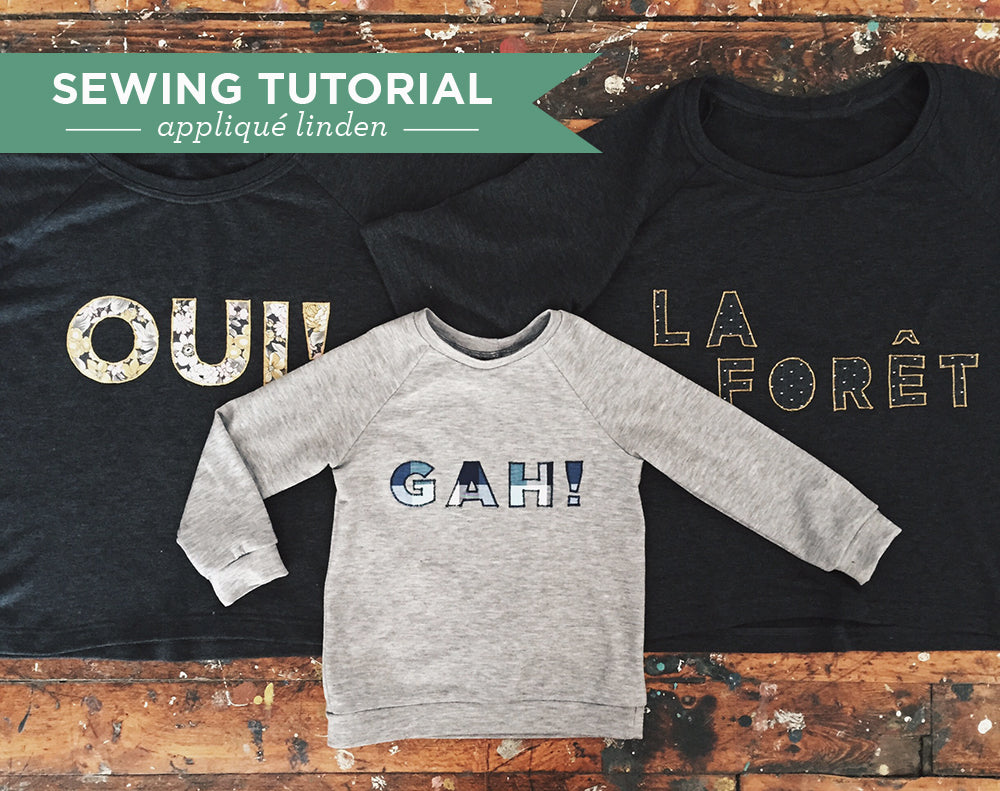
Today I have another Linden Sweatshirt tutorial for you, I'll be demonstrating how to appliqué your Linden with a fun phrase or word. I've been seeing sweatshirts pop up for sale with appliquéd phrases on them, usually either French or funny, but I thought it would be fun to make one of my own! You should have most of the supplies to make this sitting around with the exception of perhaps the fusible and stabilizer but it's a great project for using up great print scraps leftover from other projects. So lets gather our supplies and jump in!
Project Supplies
- Linden Sweatshirt Pattern and Pattern Supplies (listed on pattern envelope)
- Scraps of fabric for the lettering. I used this Robert Kaufman printed lawn.
- Double sided fusible, 1/2 yd or less. Brand names include Heat 'n Bond or Wonder Under
- Tear away stabilizer, 1/2 yd or less, such as Stitch-n-Tear
- Thread, either regular or embroidery
- Computer & Printer to print your text

Start by brainstorming a few words or phrases you might want written across your Linden. Try out different fonts and see what you like. I like to place my text on top of the front of the shirt to test the size, just remember that you have to stitch around every edge of your lettering so simple is best. Although it's cute, something like the bonjour would be a lot of stitching.


After you decide on your text, you'll need to reverse the type and cut it out. You can either reverse it on the computer in an editing program such as Photoshop or Illustrator, or you can cut your letters the right way round and flip them over.


Now we need to prep the fabric you'll be using for your lettering. Press your fabric and cut a piece of double sided fusible large enough for your text. Fuse the non-papered side of it to the wrong side of the fabric according to the instructions included.


Trace your lettering onto the paper side of your fused fabric and cut it out. When you flip the letters fabric side up they'll be the right way around because we traced them out upside down.

Peel the paper backing off your letters and arrange them how you'd like them to appear on the front of your shirt. I find a ruler or two very helpful at this stage. With the paper removed the letters should be just slightly sticky - enough to get you over to the iron to affix the letters. If this isn't the case you can stick a pin through each letter until you're at your ironing board.

Cover your letters with a press cloth and iron the letters to set the fusible. Again follow the instructions that came with your interfacing for this step.


Since were going to be stitching on top of a knit fabric we'll need something to keep the knit fabric from moving around and stretching out of shape, this is where your tear away stabilizer comes in. Cut a piece large enough to cover all your text, I cut mine about 3/4" larger than the block. Place it behind the text and pin it in place.

Our next step is stitching around the letters using a zig zag stitch. Before you start on your shirt, it's not a bad idea to do a practice letter to get your stitch length and with in order, practice turning, and decide on a thread color. I used regular thread for this but if you happen to have embroidery thread laying around you'll get a much finer outline around your letters.


Once you've worked out your stitch, start outlining your letters. When it comes time to pivot, make sure your needle is at the outer corner before you turn your work as in the photos above. This will ensure that you're properly in line when starting the next row of stitching. Continue with this until all letters are outlined.


After you've completed stitching around your letters you'll need to anchor your threads since backtacking isn't a great option when you want a neat and even stitching line. Pull your threads to the back of the shirt, tie them off, then thread the ends through the stitching with a needle. Clip your excess thread tails.

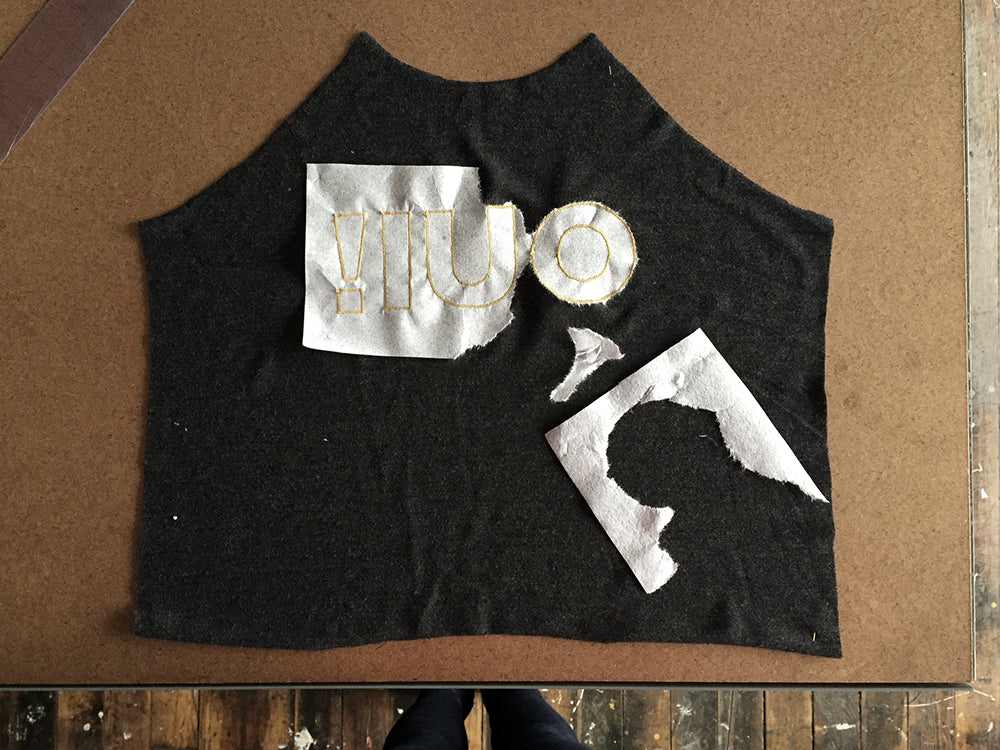
Now it's time to remove your stabilizer from the back of your shirt. It should tear right off, don't worry too much about tearing your threads.

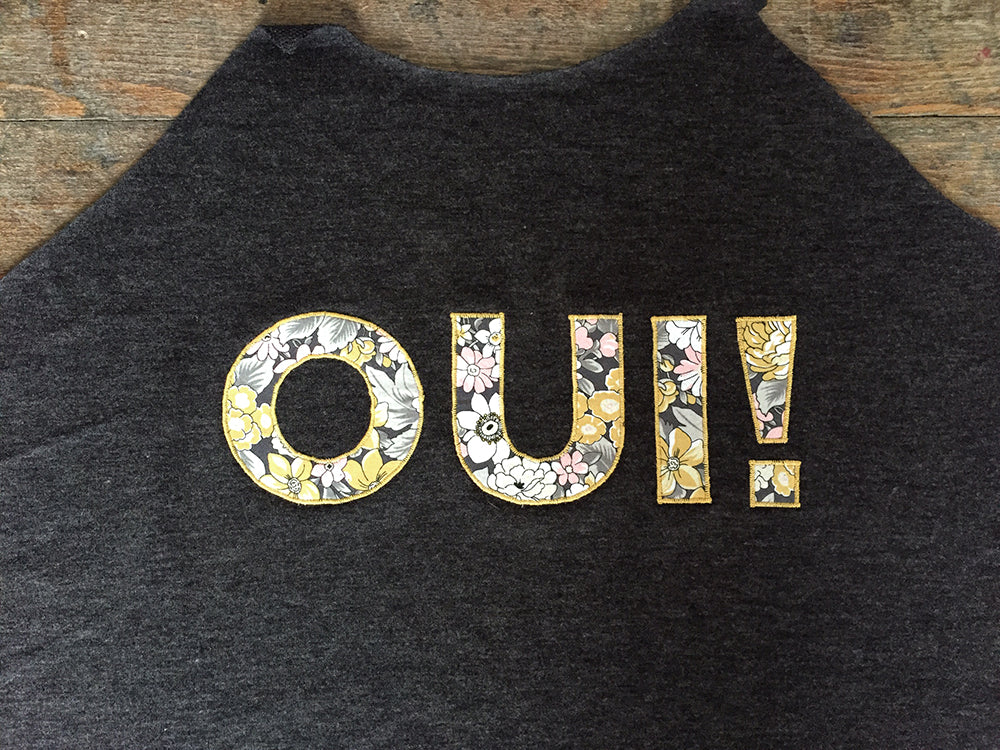

That's it for the appliqué section of the shirt, now assemble the rest of your Linden according to the pattern instructions!
Featured Products: