Alder Sew Along: Assembling Your Button Bands
Shop this post

Alder Shirtdress

Alder Shirtdress

We'll start with the left front button band. Begin by placing your fusible 1" from the edge (between the two fold notches) on the wrong side of the fabric. Fuse the interfacing to the fabric using the instructions included with your interfacing. Don't forget to use a press cloth to avoid getting glue on your soleplate.
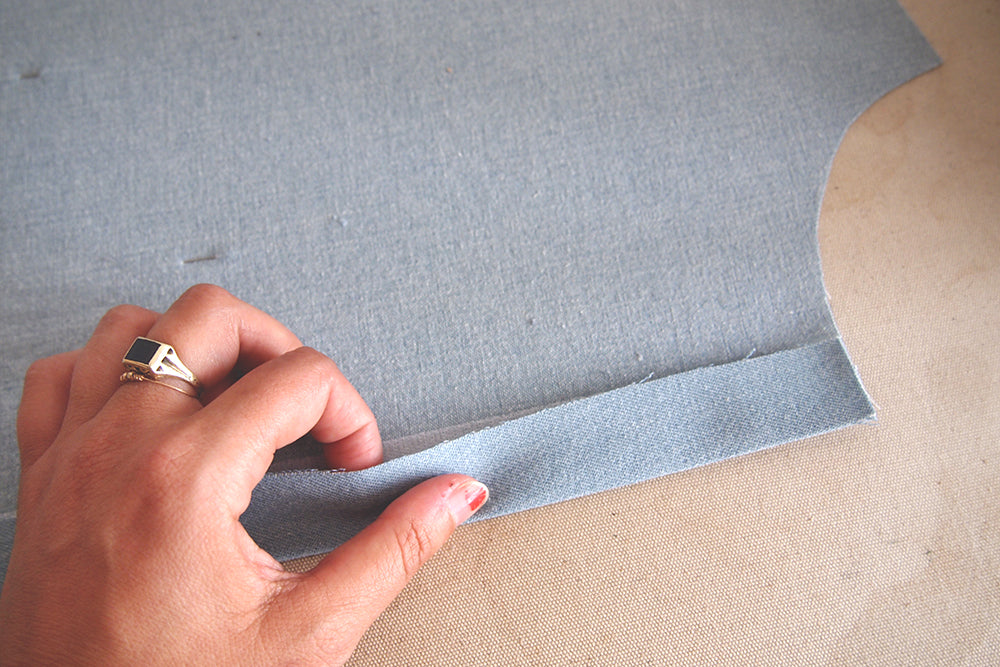
Fold the center front along the first set of notches and press.

Fold the band over again along the second set of notches to conceal all of the raw edges inside of the button band and stitch as closely to the edge of the inside fold as possible. I stitched at about 1/16" or the center mark of my machine's 1/4" foot.
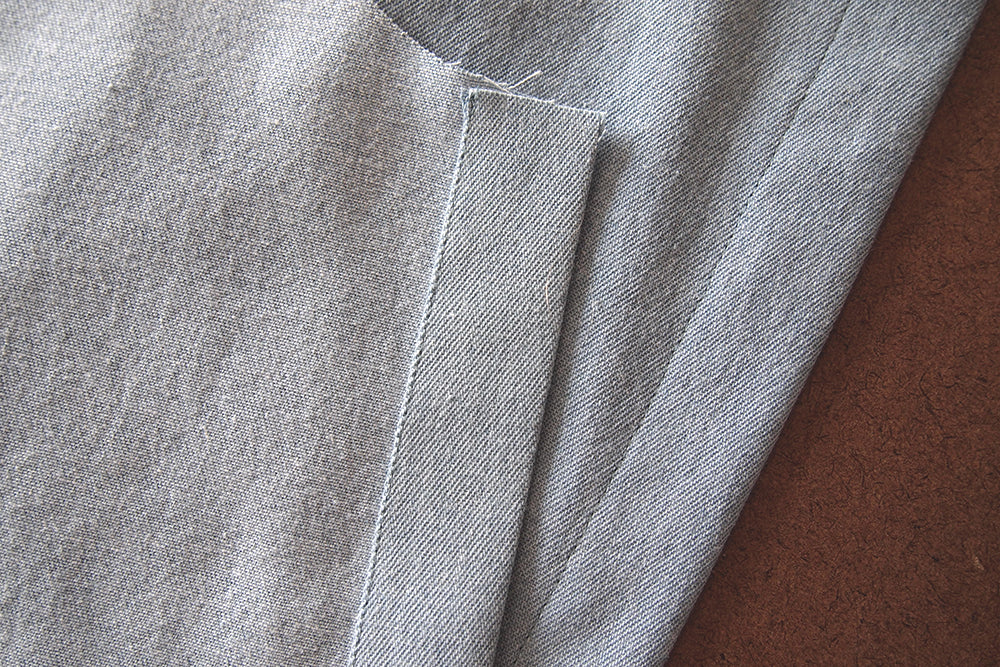
Your left front will now look like this. Give the button band a final press and set aside.

For the right front begin by applying your interfacing to one side of the right front button band. Since the band is symmetrical it technically doesn't matter which side you're fusing it to, though if you've marked your buttonholes on the top of the fabric already you'll want to fuse to that side.

At this point I like to press a crease into the center of the fabric so that I have the line for reference when I'm folding the button band over. Just fold the two raw edges together and give the fold a light press. The steam from my iron made this photo a bit blurry but I think you can still tell what's going on here.

Pin the interfaced side of the button band to the right side of the right front piece and stitch in place along the 1/2" seam allowance.

Grade the seam allowance. This reduces bulk and allows the piece to sit more smoothly.


Press the button band towards the center front, the seam allowance should also be towards the center front so that it becomes enclosed in the button band. Fold the button band over along the edge we lightly pressed earlier and give it a good press.


Fold the seam allowance of the button band under making sure that the fold of the fabric either meets or just covers the stitching line from attaching the button band. This will ensure that your topstitching catches the underside of the button band. Pin in place.

You’re now going to stitch the seam in place while simultaneously topstitching along the front edge of the button band. Stitching from the right side of the fabric ensures you're getting a super straight line along the front of your garment, and since when you pressed the seam allowance under you made sure it was touching or just overlapping the stitching line, you'll catch it on the backside of the button band without trouble. Again I like to stitch 1/16″ from the edge.

Stitch another line down the center front edge of the button band to match. This part isn't mandatory but I think it adds a nice touch to the front of the garment.

Featured Products: