
Tamarack: Inserting Welt Pockets
Shop this post

Farrow Dress

Farrow Dress
Are you ready to insert some welt pockets? This is hands down the most requested Tamarack tutorial; I think a lot of people are a bit scared of welt pockets. Nothing more frightening than cutting a hole through the middle of your garment piece I suppose. Like everything else in sewing though, don't stress, take things one step at a time, and remember to breathe - you'll be just fine. Let's dive in!

To begin you'll need to mark the placement of the welt pockets. I recommend hand basting rather than marking with chalk in this situation because there are so many layers of fabric involved.
Your first line will connect the two pocket placement lines, extend each side 3/4" beyond the placement marks. Then baste a line the same length both 1/4" above and 1/4" below the first line. Finally, at each end of the pocket opening, stitch a line perpendicular to the pocket openings through the pocket placement marks to indicate the width of the pocket. These lines should also extend 3/4". You want to extend the markings so that you can see your starting and stopping points as you stitch with the pocket pieces attached.

Prep your welts by first fusing your interfacing to the wrong side of the fabric. You will then fold the welts in half lengthwise with the right sides facing and stitch the two ends together. Grade your seam allowance, clip your corners, and turn the welt right side out. Press and baste the opening of the welt closed so that it acts as one piece while attaching it.

Now align the welt pocket along the center line of the pocket markings between the two edges. The welt will be facing towards the bottom of the jacket. Baste the welt in place.

Align the upper pocket with front of the jacket, the right side of the pocket should be facing down. The upper pocket should fall 1/2" below the lower basted pocket marking and should extend over each side by 1". Pin your pocket in place.

Flip your jacket so that the inside is facing up. Starting in the center of either long edge, stitch in a rectangle exactly following the basted markings. Make sure to pivot at exactly the corners. Make sure that the stitching on the short edges falls just to the outside of the welt. Too far away from the welt and you'll have a gap on either side of your pocket, too close and you won't be able to flip it to the inside.


Next you need to slice your pocket open. Take extreme care not to cut through your stitching when doing this as that will be a slightly difficult repair. Starting at the center cut out towards each edge stopping 1/2" away from the end. From this point clip into the corners cutting to, but not through, the stitching. Not clipping far enough can cause puckers, but clipping too far will ruin your pocket. You can always clip further during the next step if you're worried. Also keep in mind that since we have 2 layers of fabric and 1 layer of batting it will be impossible for the pocket to lay perfectly flat.

Pull the pocket and welt gently through the hole you just cut. Press the pocket piece flat; the welt should be facing up on the outside of the jacket. If your corners are very puckered you can clip slightly further into them.

The outside of your jacket will look like this.

Now fold your welt back and stitch along the top edge of the pocket opening, approximately 1/8" from the edge, through the jacket, seam allowance, and upper pocket. This will help anchor everything in place and make for a neater finished pocket.

To attach the lower pocket, align the lower pocket over the upper pocket so that the edges match as shown above.

Flip the jacket so that the outside is facing up and fold down the bottom of the jacket to reveal the pocket seam allowances. Stitch along the dotted line shown above exactly following the existing stitching line. Make sure not to extend your stitching beyond what was previously stitched.

Now fold the lower pocket down and press.

Fold the upper pocket down so that the sides and lower edge meet. The top edge should cover the seam allowance at the top pocket edge. We'll stitch that down later to enclose the raw edges.

Flip the jacket so that the inside is facing down and fold the edge in. At the side of the pocket there are these tiny triangles - stitch over them along the existing stitching line just from one edge of the base of the triangle to the other. This will anchor the edge of your pocket.

Stitch along the pocket edge at 1/2". Finish your edge as desired. In this sample I'm using bias binding, but you can easily serge or zig zag the edges.

Slipstitch the top edge of the pocket down to just the inside layer of the jacket to enclose the raw edges along the top of the pocket.

Flip your coat over and remove your basting stitches.
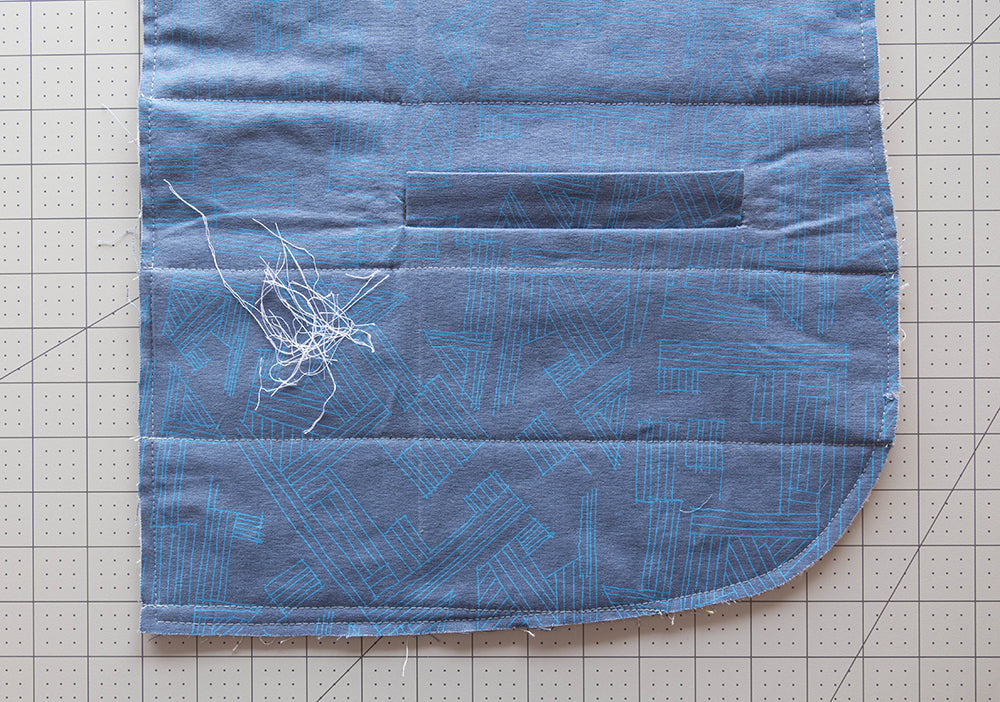
Finally, slipstitch the edges of the welt to the pocket to secure them in place. Repeat these steps for the other side. And that's it! You've inserted your welt pockets, congrats!
Featured Products: