Stowe Sew-Along: Making & Finishing the Handles
Shop this post

Today we'll be covering steps 6-12 in the Stowe instruction booklet, making and finishing the handles! If you're making your own bias binding and need help with that, you might want to wait until tomorrow's post, but I wanted to get this one up for anyone using pre-made bias binding before I walk you through making your own binding. So grab your pins and bias tape and let's start sewing!

To begin, cut the binding for your handle sides. You'll need approximately 13″ for each small bag and 25″ for the large bag. If you're into cutting after you've pinned like I am, my trick is to start at one end and make sure that the first fold of the bias (where you'll be stitching in this step) hits the edge of the handle as shown above. I then pin around the handle edge, ending back at the same place on the opposite handle side. I then trim my bias and you can see that both handles will be completely covered from edge to edge with binding. When placing your bias, you'll need to stretch slightly to get around the curves, but make sure you aren't stretching the bias so much that you end up gathering your fabric. It's a find dance!

Step over to your sewing machine and stitch in the fold of the bias tape, this is approximately ¼″ from the edge.

Your binding is now attached like so and you can see that its already wanting to turn to the wrong side. This is good!

Now we'll head over to the iron for pressing. If you have a ham I find it easier to work on the binding of the small bag over one. Fold the binding along the second fold as shown above.

Now fold the binding over the edge of the bag handle. You want the binding to *just* cover the stitching line left from sewing down the front, as you can see in the image above, it's not a huge overlap.


Work your way around pressing and pinning the binding into place until the entire handle is ready to be sewn down.

Now you'll stitch through both layers of the binding to anchor the back binding into place. I like to use an edgestitch foot and sew with the front of the bag up. It's what I'll be seeing when I use my Stowe so I want it to be the neatest side. As long as you just covered the stitching line when you pinned your binding into place you shouldn't have to worry about catching it.


Your bag handle is now bound and should look like the images above. If you happened to miss any of the back you can seam rip that spot and re-stitch, or just secure the small part you missed into place with a quick hand stitch.

Repeat these steps for the side of the other handle. We're really cruising now!

We're now going to form the complete handle. Align the two top edges of the handles as shown above and pin.

Stitch across both seams with a ½″ seam allowance.

Press both seam allowances open, I find this easiest when using a sleeve roll but you definitely don't need one. Now we're going to create the handle fold that makes the side gusset possible. Try not to overthink this, a lot of people do.


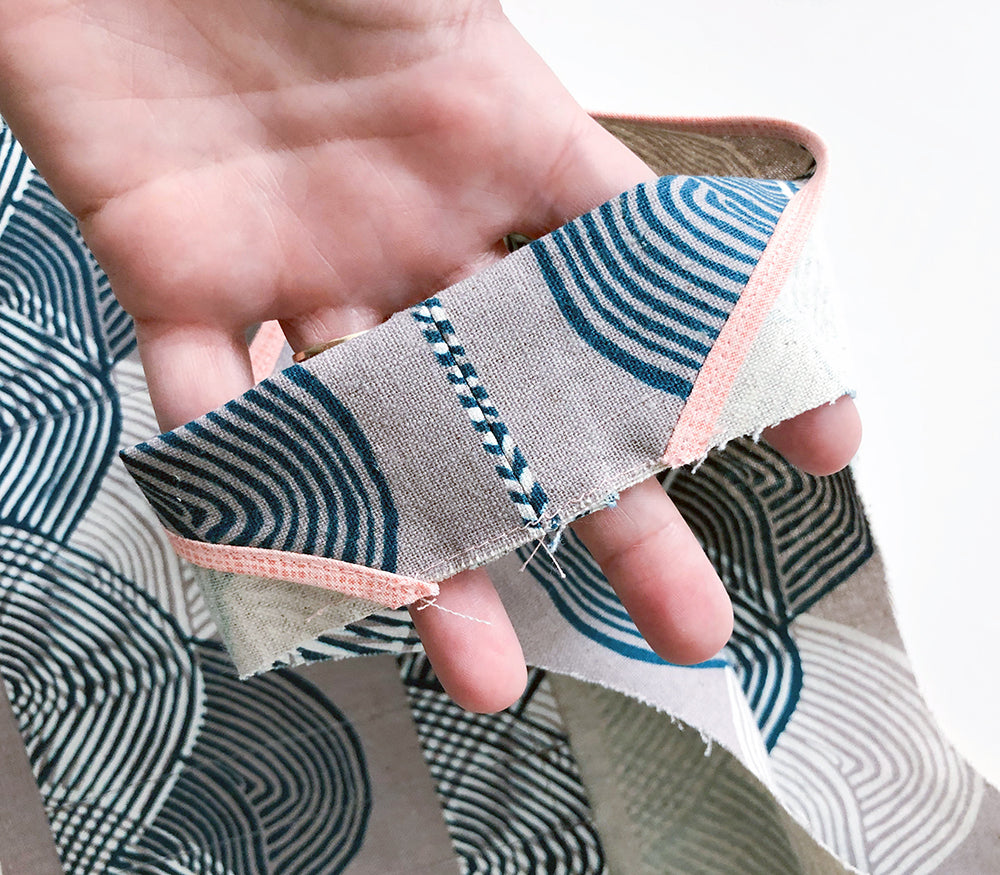
Take one handle in your hand as shown in the first image above. Then grab the edge furthest from your palm and bring it in, over the edge in your palm, as shown above. That's all there is to it!

You do not need to do this but I just wanted to show you how this will look from another angle since we get the bulk of our questions about this step.
Head over to your machine and sew across the two raw edges of the handle just shy of ¼″ from the edge. Repeat these steps for the other side of the bag handle.

Your bag now looks like this and we're all ready to bind the inner edge! Cut a length of bias binding 30" long for the small bag and 57" long for the large. Depending on the type of fabric you're using and how much stretch it has across the bias this number can vary slightly. Before completing this next series of steps I would recommend walking your strip around your bag opening just to double check you don't need to adjust anything before you start.

Once you have your bias strip cut to the proper length, unfold the two folded edges and align the ends of the strip with right sides facing. Make sure your strip isn't twisted anywhere or you'll be in a pickle trying to pin it to your bag!

Sew across the edge you pinned with a ¼″ seam allowance.

Press the seam allowance open and we're now all set to apply the binding to the bag. You're going to follow the same steps that you did for the handles, the only difference is that this binding is a circle.

Pin the binding to the bag and stitch around it in the first fold. Since this is a circle, you might find it easiest to quarter both the binding and the bag opening and pin those points first, then work from the center of each quarter out.

Fold and press the binding over and pin, making sure that you just cover the stitching line from attaching the binding to the bag in the last step.

Stitch around the bag using your edgestitch foot if you have one.

Before you call this step done, double check the area up where the handle is folded and make sure that you've caught everything properly, if anything is going to go wrong in this step its usually right there. If everything looks good, you're all set and ready for the next steps! We'll be back here Monday to finish up our bags, so if you need to catch up on anything, or perhaps start a second bag ;) you've got all weekend!
