Portside Dopp Kit: Cutting
Shop this post

Portside Travel Set

Today we're going to talk all about cutting your Portside Dopp Kit. It's pretty straighforward, you'll be cutting your main fabric (fabric A, shown as blue above), your contrast fabric (fabric B, shown as white above), your lining, and your fusible interfacing. Since there are so many pieces these cutting maps should help you visualize what you're cutting and fusing. If you don't have the Portside Pattern yet, you can grab a copy here!
Main Fabric/Fabric A

In our sample for this sew-along we're using this camo print twill as our main fabric. We've listed the pattern piece numbers, names, and the amount of each you'll need to cut on each pattern piece above, as well as listed out here:
- 13 End / cut 2
- 16 Strap / cut 1
- 12 Lower Front & Back / cut 2
- 15 Bottom / cut 1
Contrast Fabric/Fabric B
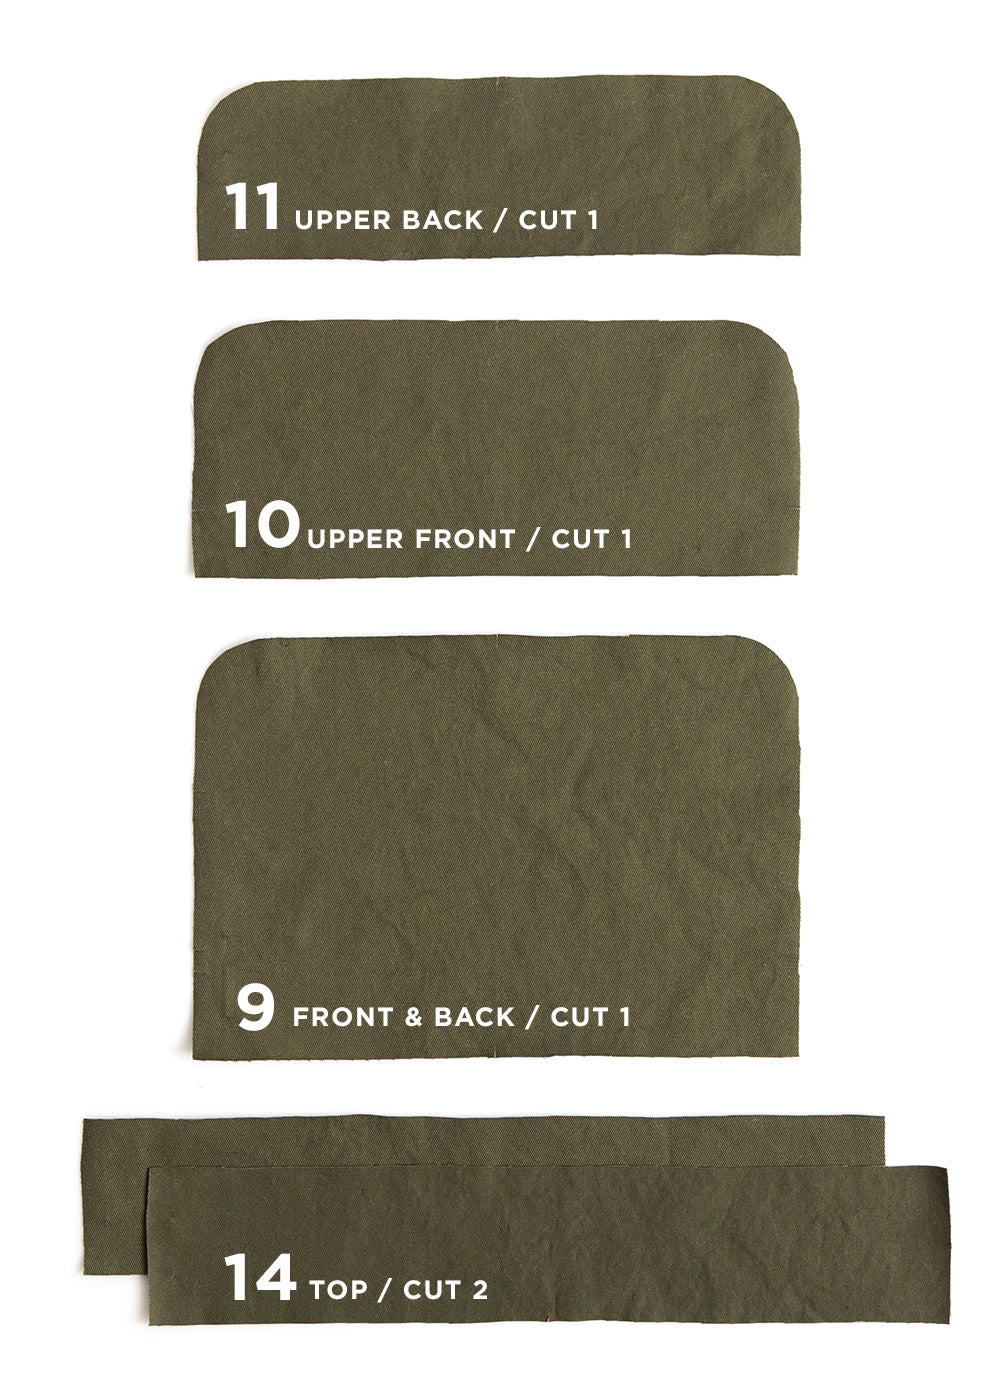
We're cutting our contrast, or fabric B, out of this army green twill. Again, you'll find the pattern pieces needed listed on each of the cut pieces above, as well as in the list below:
- 11 Upper Back / cut 1
- 10 Upper Front / cut 1
- 9 Front & Back / cut 1
- 14 Top / cut 2
Lining Fabric
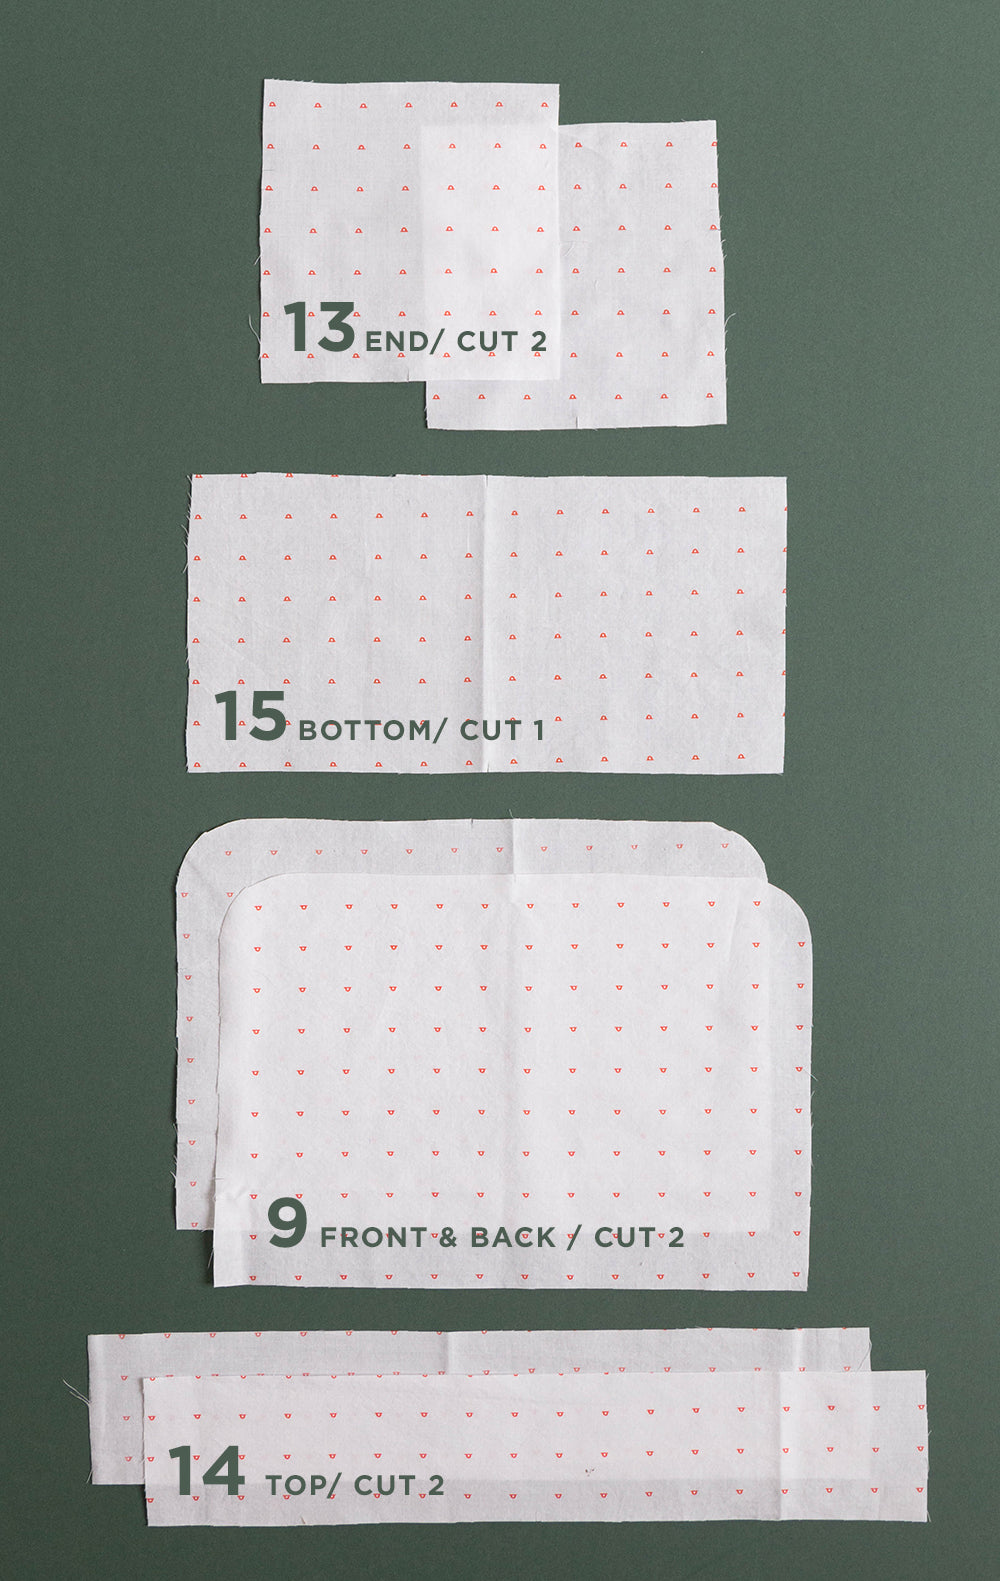
For the lining you'll need to cut the following pieces:
- 13 End / cut 2
- 15 Bottom / cut 1
- 9 Front & Back / cut 2
- 14 Top / cut 2
Fusible Interfacing

Now to talk about fusible! You'll need to fuse some, but not all, of the pieces of your Dopp Kit as the pattern is written. If you're using a fabric that's too thin, feel free to fuse more pattern pieces, but keep in mind that the fusible will be visible on the inside of the front pocket. I like to fuse the dopp as instructed no matter the weight of fabric because typically they get a lot of use and wear and tear, and it just gives the fabric a bit more strength. The pieces you'll need to fuse are shown above and also listed below:
- 13 Ends
- 11 Upper Back
- 9 Front & Back
- 14 Tops
- 12 Bottom
When fusing, you'll want the glue side of the interfacing face down on the wrong side of the cut pieces. Fuse according to the instructions that came with your fusible interfacing. If you find there's any fusible overhanging the fabric when your done, I like to trim that off so that I have a nice clean edge when sewing, but that's up to you.


Featured Products: