Morris Sew-Along: Making the Facing
Shop this post

Morris Blazer

Today we're going to assemble the main facing that finishes the collar and hem. Begin by taking your two front facing pieces and stitching them together along the center back seam.
Press the seam allowance open and grade it in half.

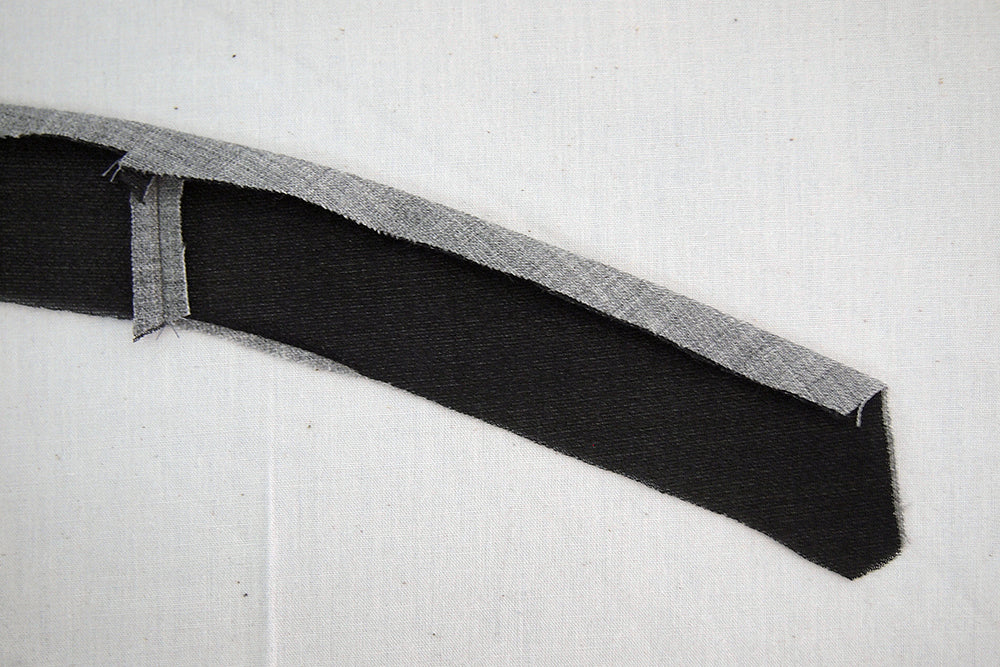
This is an alternative to the finishing method in the booklet, instead of turning the raw edge under along the inner edge of the front facing in step 13, that I used on the original blazer. If you serge around that edge you'll get a clean finish and you won't need to fold the fabric under. There really is no difference between the two, so it's up to you which you'd like to do. Not everyone has a serger though so I wanted to include the folding technique in the booklet.

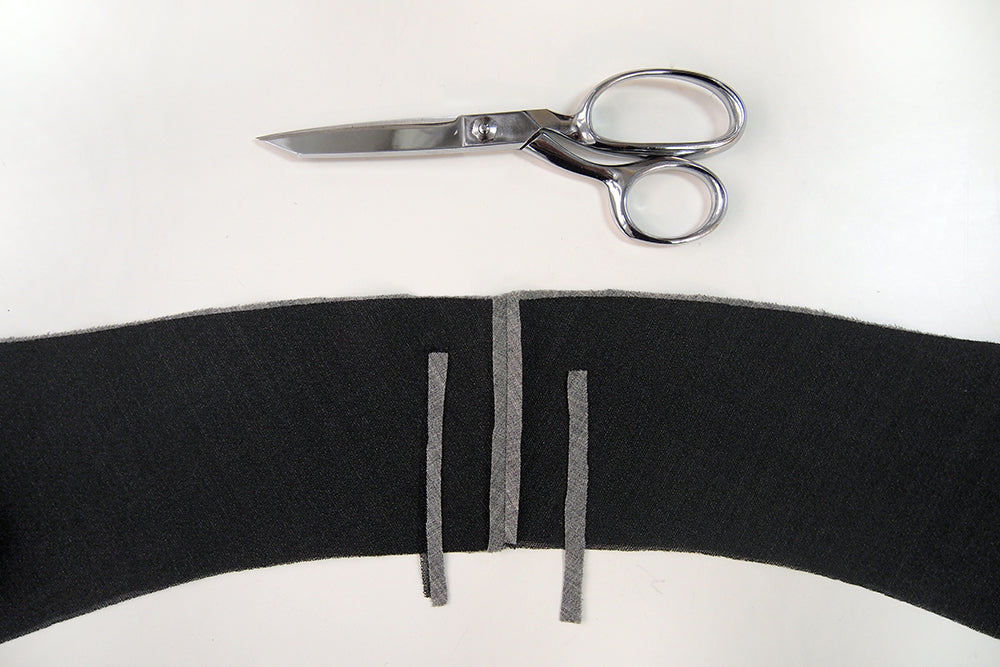
If you are folding the edge under, press the 1/2" seam allowance to the wrong side of the garment. This is the smooth side without the lapel points. It's slightly narrower in this photo because of the line of serging that went around first.

To assemble the hem facing, stitch the front hem facings to the back hem facing at the side seams.

Press the seam allowances open and grade.
Fold the top 1/2" seam allowance of the hem facing over. You don't need to stitch this down at this point, we're just setting the pressing line for when we anchor the facing to the blazer. I like to do this here because it's easier to do when the facing is unattached and you're not dealing with the entire blazer on the board.
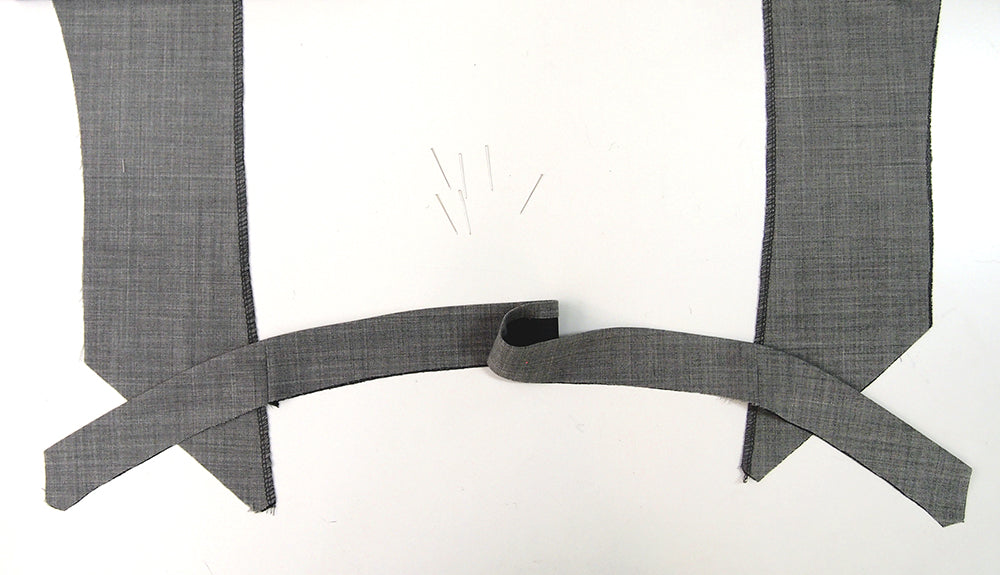
Now this is probably the most confusing part of the whole blazer, but I found in my class at Fancy Tiger that if you lay everything out right side up as it will appear when finished you can cut the rate of error to basically zero. So, lay the front facing out right side up with the lapel points to the outside and then place the hem facing right side up on top of it as shown in the photo above.

You'll be attaching these two edges to each other.


Align the edges as shown above and stitch from the lower point of the facings up to the top edge of the hem facing, stopping at the folded edge. This point is marked above with an X.
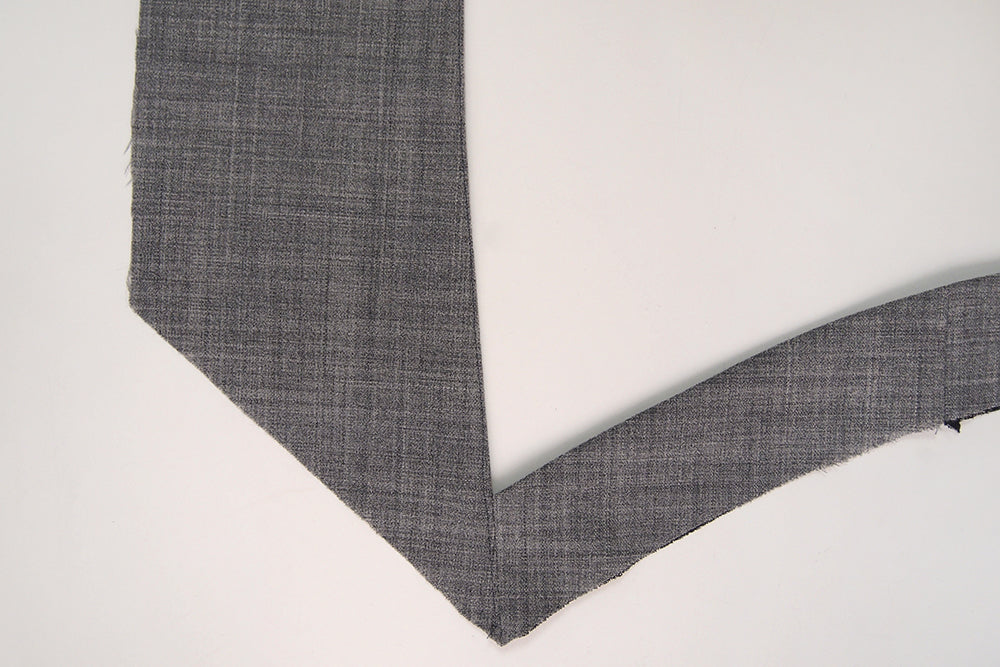
Press your seam allowance open and repeat these steps for the other side of the facing. If you folded the edge of the front facing under earlier you'll now want to place a line of stitching around the folded edge to keep it anchored under. This is on the front facing only, do not stitch along the folded edge of the hem facing. You've now completed your main facing for the blazer. In the next post we'll attach it to the blazer.
Featured Products: