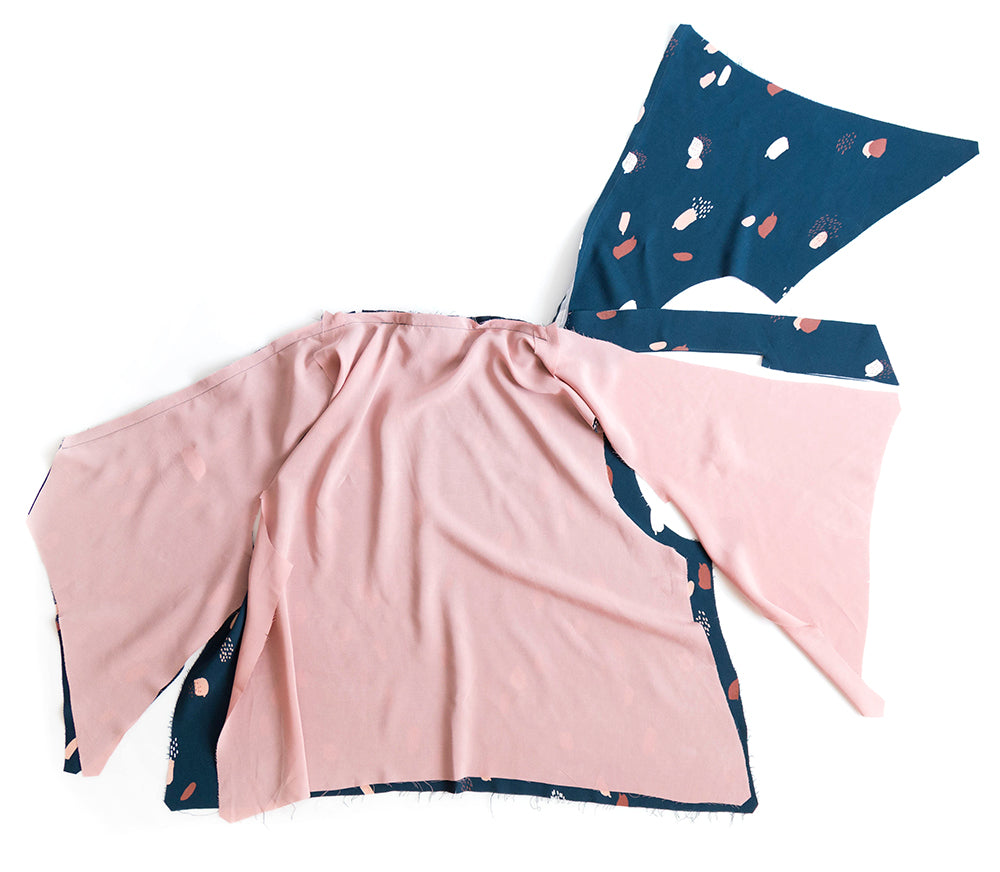
Today we'll be attaching the neckband to the bodice. This is a bit of a non-standard procedure but it produces a completely clean finish and might make you feel like a bit of a sewing magician in the process! I won't show you how to construct the bodice unlined since we're sticking pretty close to the intended instructions, as we do for all of our sew alongs. If you'd like to make the bodice unlined, it helps to think of the neckband as more of a facing. So with that, let's dive in!

Lay your self bodice out so that with the right side facing up as shown above. Place the neckband over top of it with the outside facing down. Pin from the angled end, through the shoulder and center back, over to the other shoulder seam.

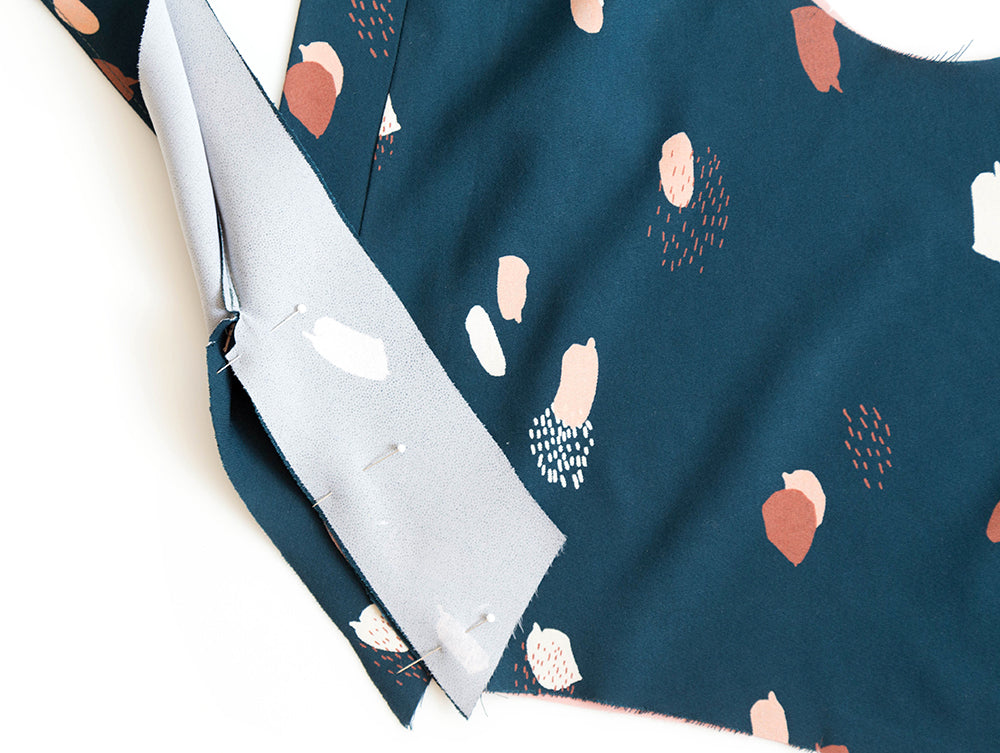
You can see in this closeup that the inside of the neckband (the side with the understitching) is facing up.


Sew the neckband and bodice together within the 1/2" seam allowance along the area you had pinned. We sewed ours at 3/8".

Clip the neckline of the bodice to, but not through the seam line along the center back neck between the shoulder seams.

Your bodice now looks like this from the wrong side.

Lay the bodice out so that the wrong side of the self fabric is facing down and the neckband is facing up. Place the bodice lining over top with the right side facing down. Align the angled end, the shoulder seams, and the center back. Stitch along the 1/2" seam line through both layers of the bodice and the neckband. Backtack at the shoulder.

Grade the seam allowance as shown above. The lining will be graded to the shortest width, followed by the seam allowance of the neckband.

Press the lining away from the neckband from the angled edge up to about the intersection of the underarm and side seam. Then press the self bodice away from the neckband to the same point at the underarm.

Align the angled edges of the self and lining and sew them together within the seam allowance, approximately 1/4 - 3/8".

Flip your bodice so that the right side is facing up and bring the loose end of the neckband down as shown above.

We'll be attaching the un-sewn section of the neckband to the angled edge now.

Bring the right side of the top layer of the neckband over to align with the angled edge of the bodice. You'll want the top notch of the neckband to sit right at the neckline edge.

Bring the other side of the neckband around to the lining side of the bodice as shown above.

Here we've flipped the bodice over so that the lining is facing up and aligned the inside edge of the neckband with what we pinned on the front.

Stitch through both layers of the neckband and the bodice to anchor the neckband in place.

This is what you'll be looking at from the right side after it's sewn.

Grade the seam allowance by trimming as shown above.

Press both sides of the neckband away from the left front bodice. Pin the loose edges of the neckband together and stitch inside the seam line (approx. 3/8") to anchor the two layers together.

Flip the right bodice self over top of the neckband and align the edges. Sew the right bodice self and neckband together just inside the 1/2" seam allowance from the point where you stopped stitching previously, down to the waistline edge.

Flip the bodice over and align the right bodice lining in the same manner. Stitch along the 1/2" seam line from the shoulder seam where you previously stopped stitching, down to the center front waistline. You have now attached the right front to the neckline.

Grade the seam allowance of the remainder of the neckline as you did previously with the lining as the shortest layer, followed by the neck band.

Finally, press the remainder of the self and lining away from the neckband. You've now attached your neckband and the hardest part of the entire dress is over. Well done!! If you have questions let me know below.


