Today we'll be attaching the front bands for View B including the zipper panels. Remember, either view can be made with or without the zipper so don't feel like just because I've omitted them in View A and used them in View B that you need to do the same.


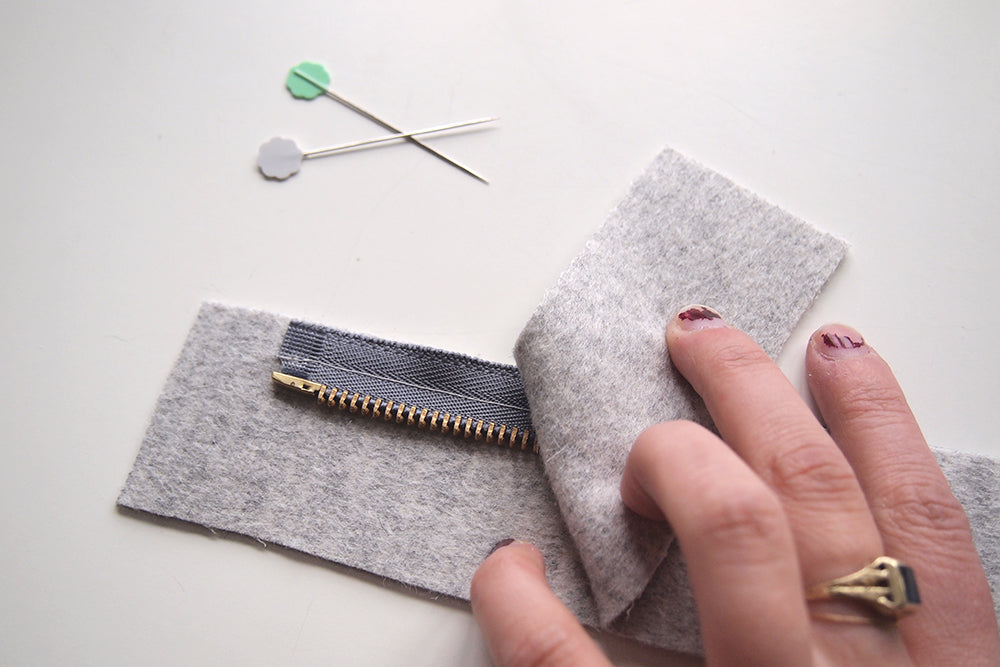
Lets start with the right side of the zipper band. Align the zipper along the edge of the band with the right sides facing each other and baste the two layers together. When stitching you'll want to fold the edge of the zipper over at the end so that the excess tape doesn't get stuck in the top seam of the zipper band. You can see how I did this in the photo above.

Repeat this step for the other side of the zipper.

Now place the other layer of the zipper band over top of the ones you just made creating a sandwich with the right sides of the bands facing and the zipper between. Pin.

Stitch along the top, zipper side, and bottom. Grade your seam allowances.

Repeat for the other side of the zipper. Turn your bands right side out and press. Zip the two sides together to make sure that your tops and bottoms align. Once you've done that and everything is in its proper place, run a line of stitching along the open edges of the bands so that the two layers act as one while attaching it to the coat.

Assemble your front bands using the instructions in the previous post Front Bands: View A.


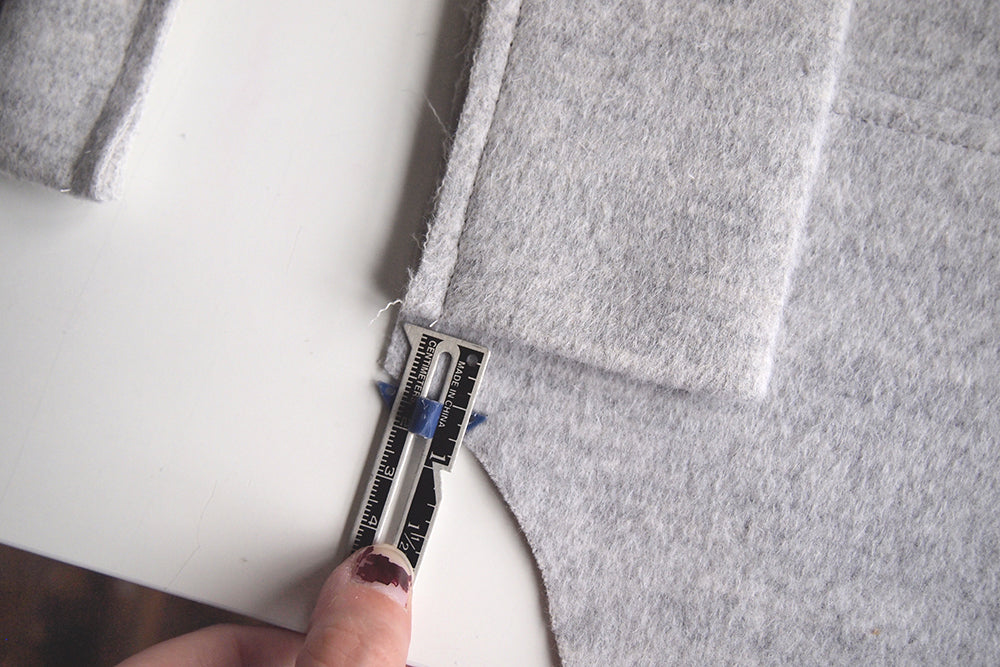
Now we'll attach the bands to the front of the coat. Begin by aligning one of the bands with the interfaced side facing towards the coat. You'll want the finished edges of the band to sit 1/2" from either edge of the coat.

Stitch the band to the coat at approximately 1/4" so that the stitching line falls inside of the 1/2" seam allowance. You can alternately change your machine to a larger basting stitch if you prefer rather than stitching inside the 1/2" seam allowance. I don't like removing stitching so that's why I always stitch inside the seam allowance. 1/4" allows me to still grade the seam without the tedious basting stitch removal.


Now place the right zipper band on top of the band you just stitched to the coat. This is the size of the zipper with the pull. Align the band 1/2" from the top of the front band and pin in place.


Head over to your machine to stitch the zipper band to the coat. You may want to increase your stitch length as I did to help your machine more easily get through so many layers of fabric.

Now align the two halves of the coat front and transfer the placement of the right zipper band over to the left side of the coat. Pin the band in place between these markings and stitch the zipper down inside of the 1/4" seam allowance.


Once the zipper band is in place, repeat the previous step marking the placement of the front band. As with the right band you'll want the left band to fall 1/2" inside of each end of the coat front but more important is the fact that both bands line up. You can always slightly fudge the seam allowance and nobody will be the wiser as long as the bands line up. Stitch through all layers at the 1/2" seam allowance.


You'll now want to lay out your coat fronts next to each other and make sure that everything is properly aligned. Zip the zipper and give that a check as well. If anything needs to be adjusted you can do that now before we attach the toggles in the next post.


