Cascade Sew-Along: Assembling the Fronts, Backs, and Pockets
Shop this post

Cascade Duffle Coat 0-18

In today's Cascade sew-along post we'll be assembling the fronts and backs of your coat as well as making and attaching the pockets. Lets dive in! Just a note, I'll be demonstrating the bulk of the sew along on View A. Since this coat is smaller it fits better into the camera frame and allows us to see the details better. When View B differs from View A I'll add those instructions in. View B is made in a solid grey wool so you'll be able to tell which one I'm working on at a glance.
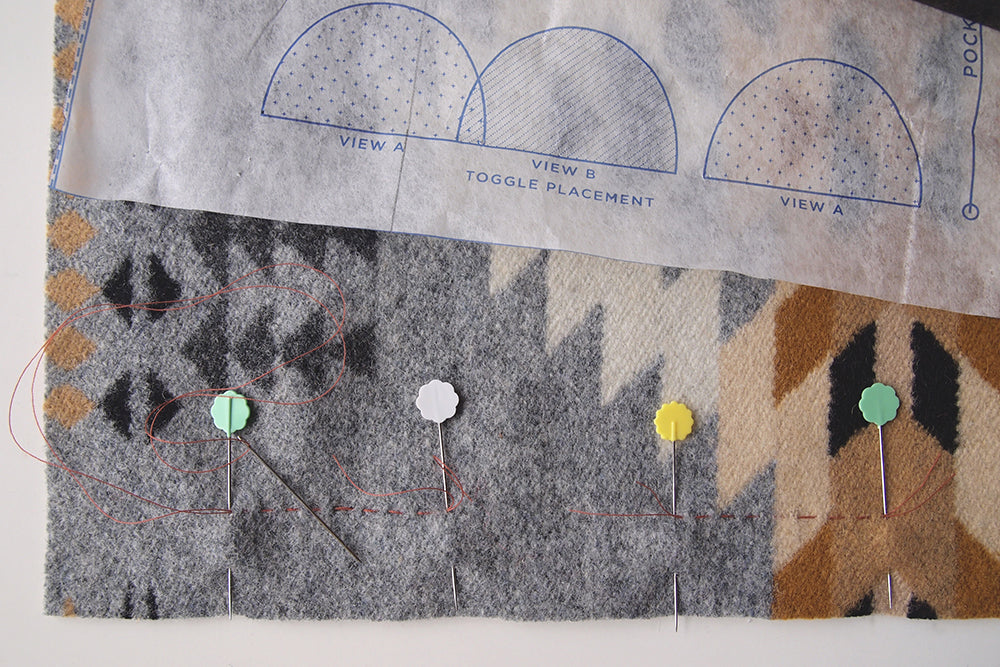
Start out by marking your toggle placement on your front yoke and front body if you haven't done so already. Since we're going to be doing a lot to the front of the coat before it comes time to attach the toggles I like to mark the front edges of mine with large hand basting stitch. This stitch is both easy to remove when the time comes and easy to work around up until that point.

With right sides facing each other align the front yokes and front body pieces.
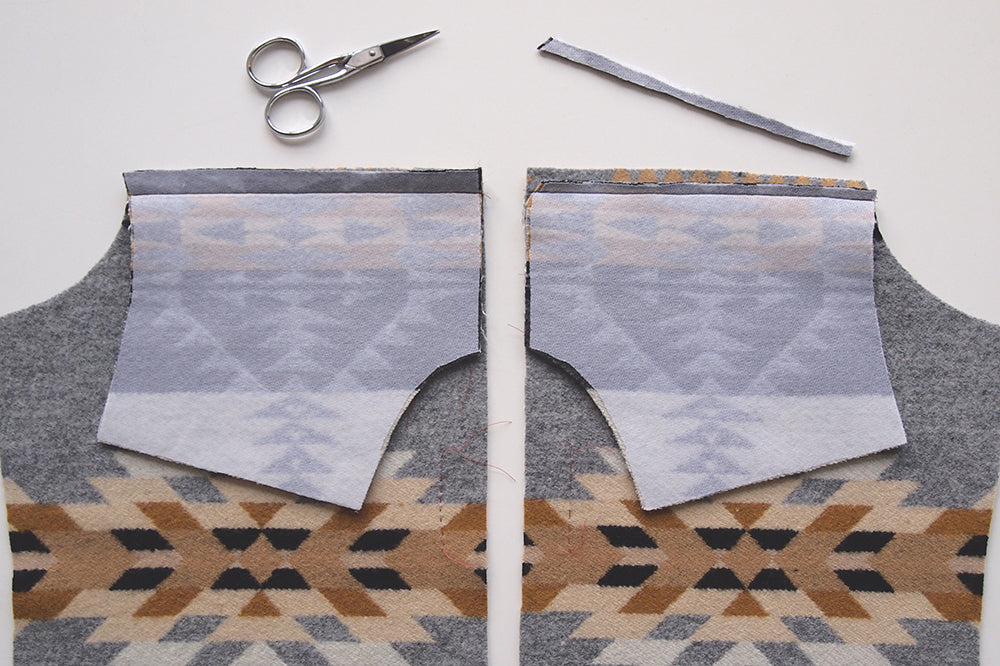
Grade the seam allowances of the yoke edge of the two seams.

Head over to your iron and press the seam allowances up towards the yoke. If you have a sleeve roll you can place it underneath the seam with the wool side facing up. The wool on the sleeve roll will hold heat and steam allowing the seam to set a bit better and crisper as the wool cools. You can also apply pressure to the seam using a press cloth which does the same thing as the wool side of the sleeve roll. Personally I use my palm or inner forearm since they work just as well though I'd recommend that you buy or make yourself a press cloth.
Another thing I like to do in conjunction with this while pressing wool is before pressing straight onto my wool seam, I first give the entire seam a hefty steam from the iron. I will then finger press the wool over to mold it around the seam. Wool loves to be molded with steam, it's almost more important than heat, and this way you can make sure that everything is in its proper place before you give it a solid iron press.


After pressing the seam allowance up, topstitch along the yoke side of the seam allowance at 1/4".

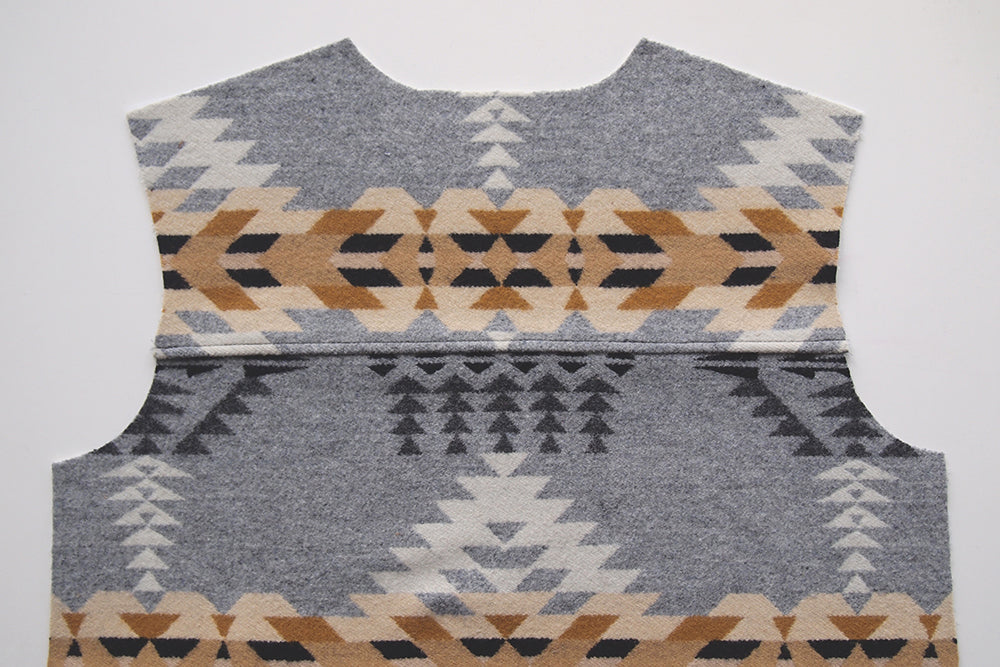

Repeat the previous steps for the back of the coat.


For View B you'll need to attach the lower body piece. The instructions for doing this are almost identical to the instructions for attaching the yokes. Pin the upper body and lower body together with right sides facing matching notches. Stitch the two layers together.

Grade the seam allowance of the lower body.

Press the seam allowance down towards the hem of the coat and topstitch the seam on the lower side of the seam.

Repeat these steps to attach the lower portion of the back of the coat.


The next step is to place your pocket interfacing and mark your pocket placement. You'll want to make sure that the top and sides of the pocket interfacing will extend beyond the top and sides of the pocket by about 1/2" then fuse it in place according to the instructions included with your fusible. I then like to draw a line with a ruler between the two pocket placement points on the back of the pocket and place a running stitch between the two points so that you can see the placement on the front of the coat.

Now we're going to construct the pockets. You'll notice that the pocket and pocket lining are different widths, this is not a mistake, the pocket lining is smaller in order to force the wool over ensuring that the lining isn't visible when your pocket is sewn in place. Align the two edges of the pocket and pocket lining along the un-notched edge and pin in place. Place a third pin into the center of the layers, you'll want to evenly ease on either side of the center pin.

Grade the seam allowance of the pocket lining.

Press the lining up away from the pocket run a line of stitching across the lining next to the seam line.

Fold the pocket and lining together so that the right sides of both are facing each other. Since the pocket is longer than the interfacing it creates a small facing at the top of the pocket. You'll want to make sure that each side of the facing have the same measurement. It should be approximately 1" though depending on your stitching it could vary by a sixteenth of an inch or so. Just make sure both are even to avoid a lopsided pocket.

I like to sew the two sides of the pockets separately, I find it's a bit easier to be accurate this way since you're stretching the lining to the edge of each side of the pocket. Align the edges of the pocket and lining and pin in place. Stitch from the top edge, down the side and around the bottom of the pocket stopping at the first notch you come to. I like to use this perfect points technique at the corners to get sharper corners that don't bow out at the sides. Repeat for the other side of the pocket.


In these photos you can really see how the wool being larger than the lining will pull the seam line towards the underside of the pocket.

Trim the corners of your pocket and grade the lining seam allowance.

Turn your pocket right side out through the hole you left in the bottom.

Slip stitch the hole closed, then head over to the ironing board and press your pocket flat.

Align your pocket with the pocket placement markings on your coat. Measure over from the center front edge to make sure the pocket is parallel to the front of the coat.

Pin the pocket in place.

Stitch the pocket in place around the sides and bottom following the directional layout of stitching above. The triangle tack at the top of the pockets is optional but it holds the stress of using pockets better than if you just straight stitch around the three sides.

Your pockets are now in place and you're ready for the next step, of attaching the front bands and toggles. We have one post before that happens, how to make your own toggles since a lot of you have mentioned that you'll be creating your own rather than using pre-made.

Featured Products: