Archer Sew Along: Sleeves and Side Seams
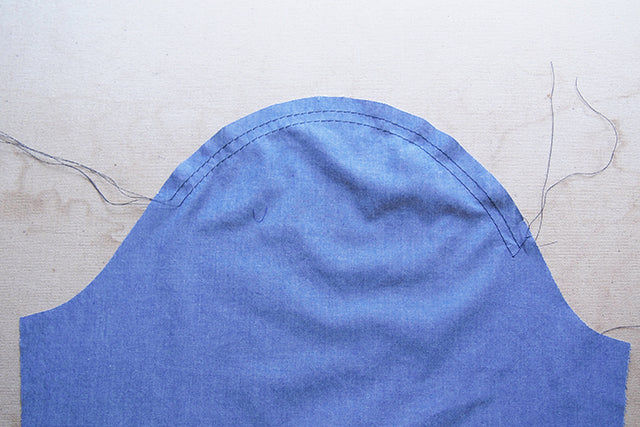
This is a relaxing sew along day, we're setting our sleeves and sewing our side seams - no big deal. Start by placing two lines of basting along the sleeve cap between the front and back notches. I like to place one line at 3/8" and another at 5/8" that way your stitching line falls between the two lines of basting.
Pin the sleeve to the shirt with right sides facing. Ease the sleeve cap between the front and back notches and stitch sleeve in place. Finish your edges as desired. I serged mine but you could zig zag, pink, or french seam if you're using a lightweight fabric or silk.
Match the side seams with right sides facing, the seam of the sleeve should face away from the garment towards the cuff of the sleeve. Stitch and finish seams in the same method you used above. Press side seams to the back of the garment. The following instructions on topstitching the side seams is completely optional and gives the look of a flat felled seam. This is done on a lot of menswear shirts + a high percentage of ready to wear shirts I've seen. I don't do this on silk or if I french seamed my side seams but for this chambray it's a yes.
Start by turning the garment inside out. It will be easier to stitch through the length of the sleeve this way, I promise.
Then just start stitching at the hem, I stitch 1/4" from the seam line, and continue till you reach the cuff edge of the sleeve. Once you get into the sleeve you're going to have a lot of extra fabric pooling up that will be pretty awkward. Don't worry about it, just keep piling it up behind the foot as shown above and keep going. Repeat for the other side.
That's that on the sleeves and side seams. Tomorrow we'll be making and attaching the collars. It's a bit of a long post but it will be easier to follow if I include it all in one post. Get ready!