5 Essential Serger Tips for a Healthy Happy Machine

Lately it seems like sergers are getting more and more attention as an essential part of a home sewing machine lineup, and rightly so! Sergers not only can assist in cleanly finishing a woven garment, they can also be used to sew knits with ease. Today we're sharing a few of our favorite tips & tricks to help you get the best serger results possible. If you're new to sergers, or are just looking for a few tips to up your serger game, this post is for you!
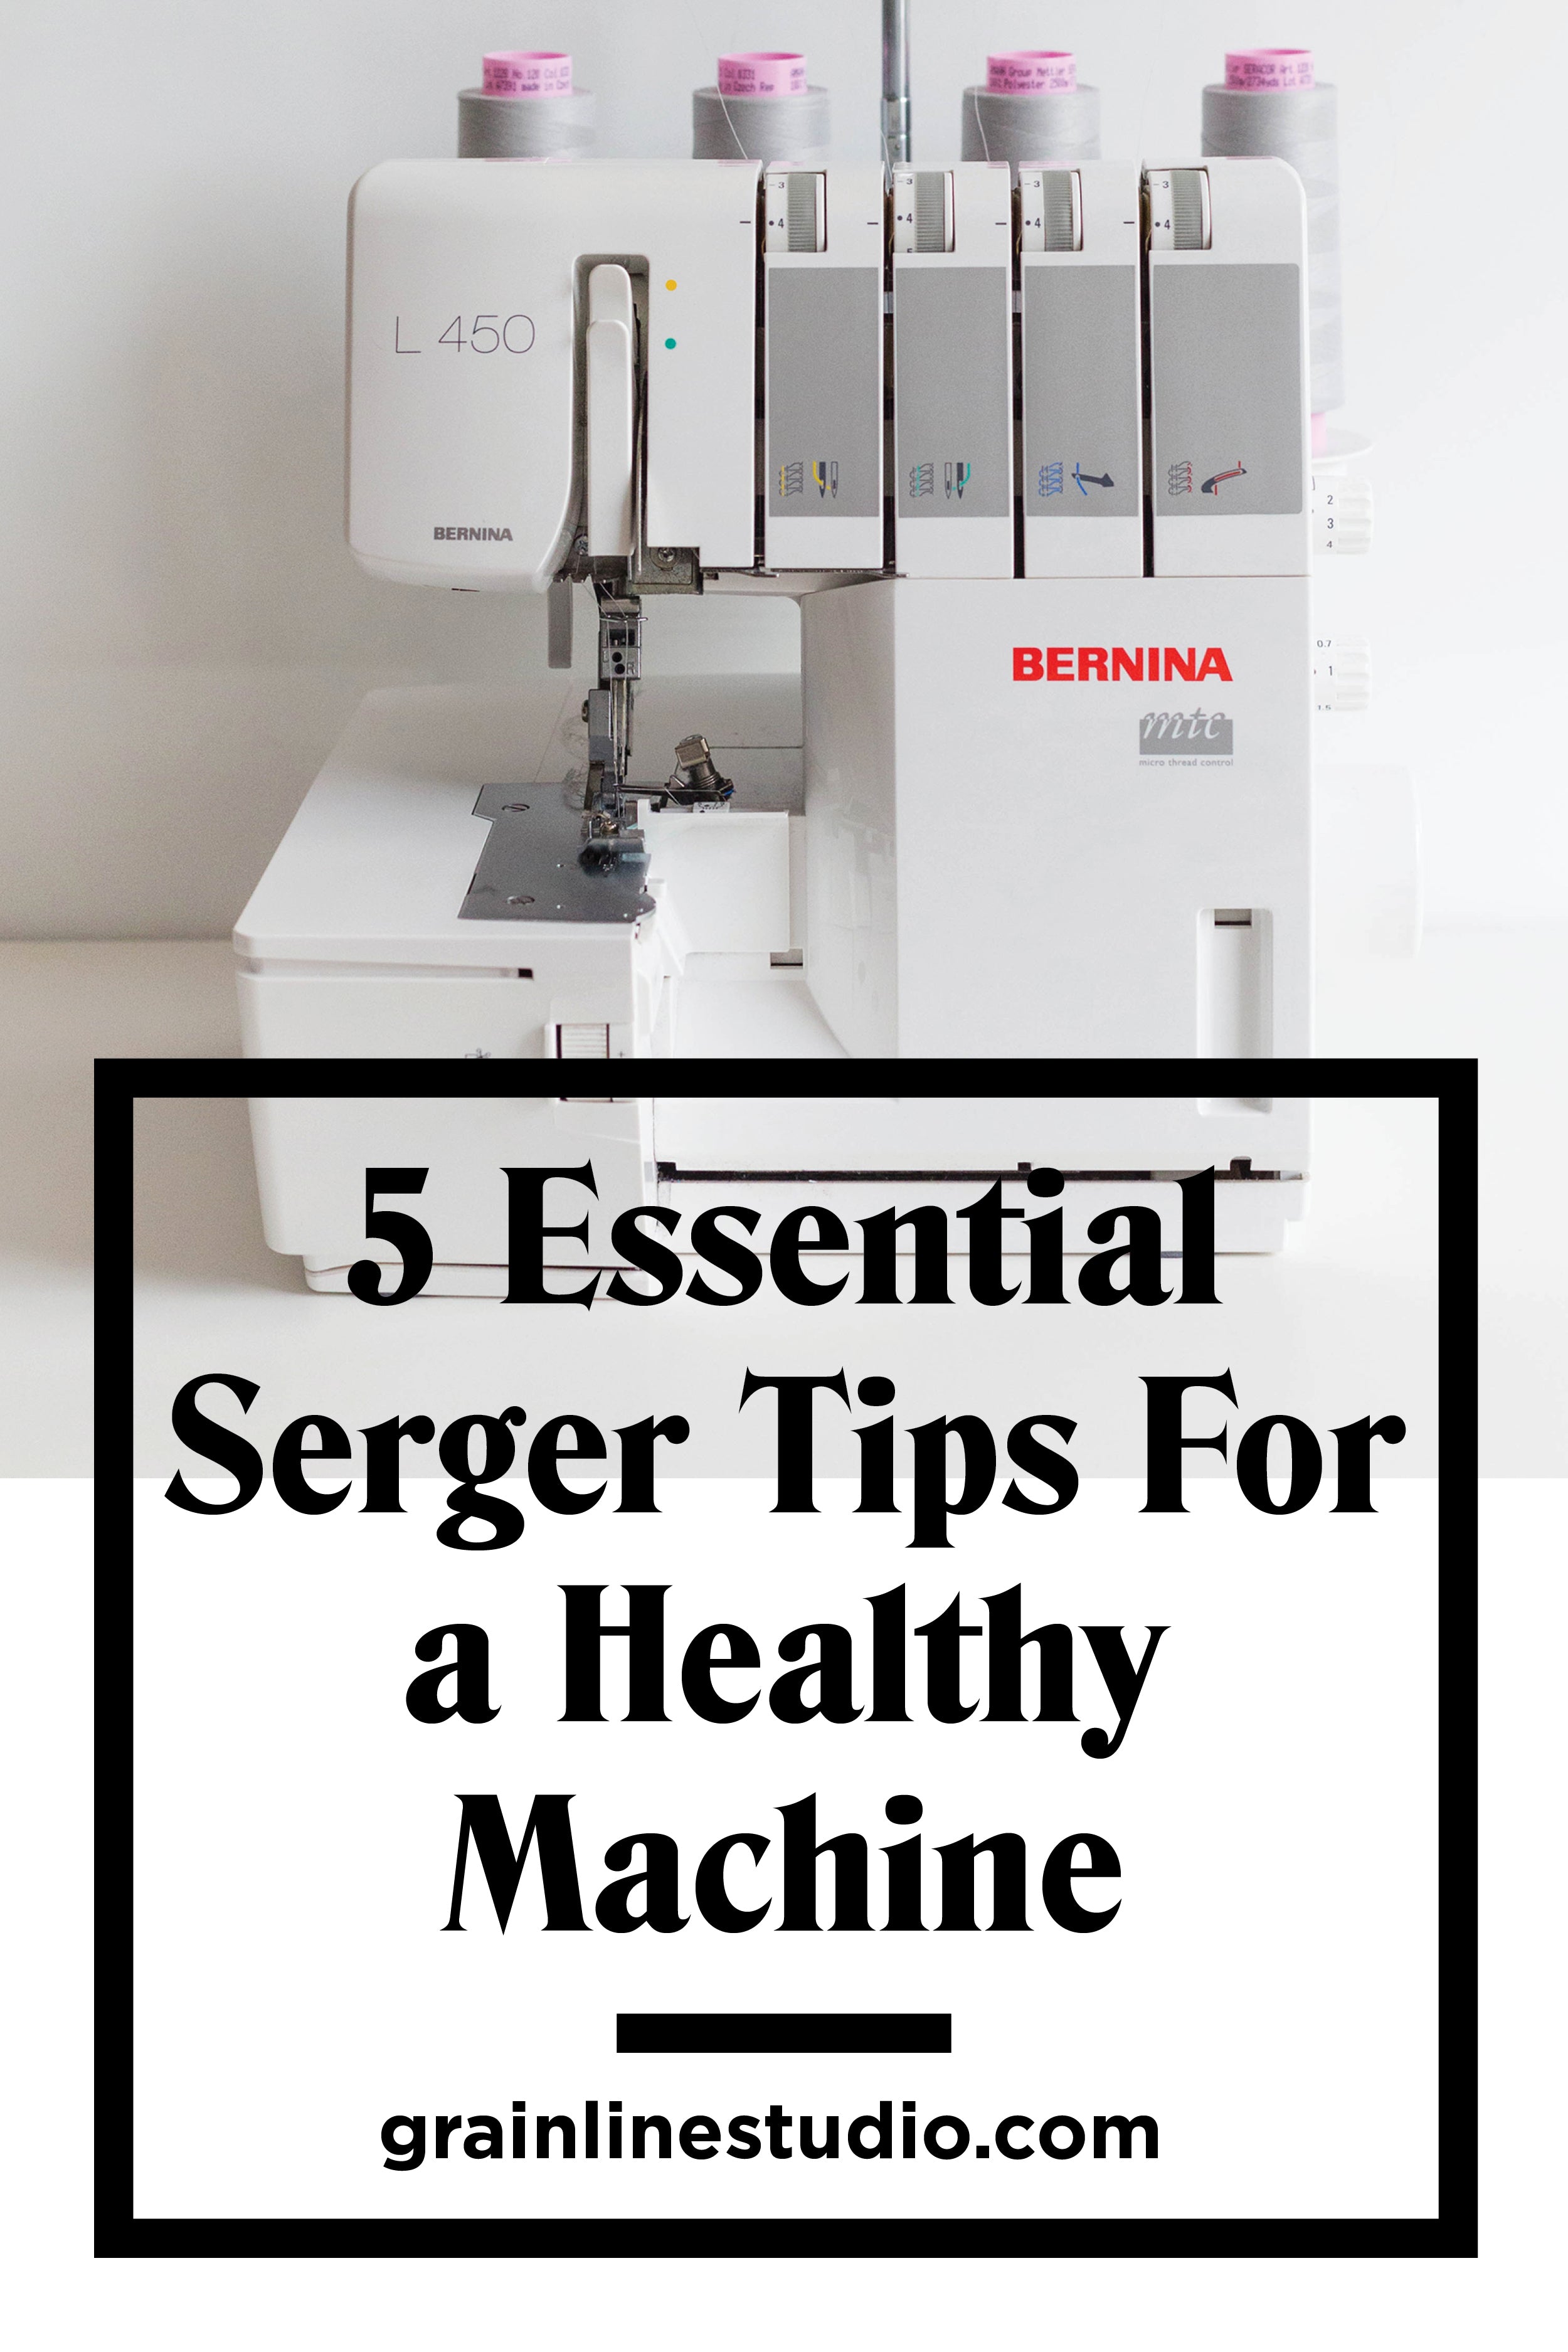
 First off I'd like to clarify that a serger, overlocker, and merrow machine are all the same thing - a typically 3-4 thread machine that trims and overstitches the edge of the fabric as you feed it through. Coverstitch machines on the other hand are a separate thing entirely and we'll touch on them in a different post. The serger we're using in our photos here is our studio serger, the BERNINA L450, and we love it so much! So now that we've established that, lets get to those tips.
Tip No. 01: It is highly worthwhile to spend a bit extra on high quality serger thread.
You probably already use high quality thread for your sewing machine, but it's just as important for your other machines as well! As tempting as it can be to grab those always-on-sale thread cones at your local big box sewing store, we've got a few reasons why you'll want to splurge on higher quality thread for your serger.

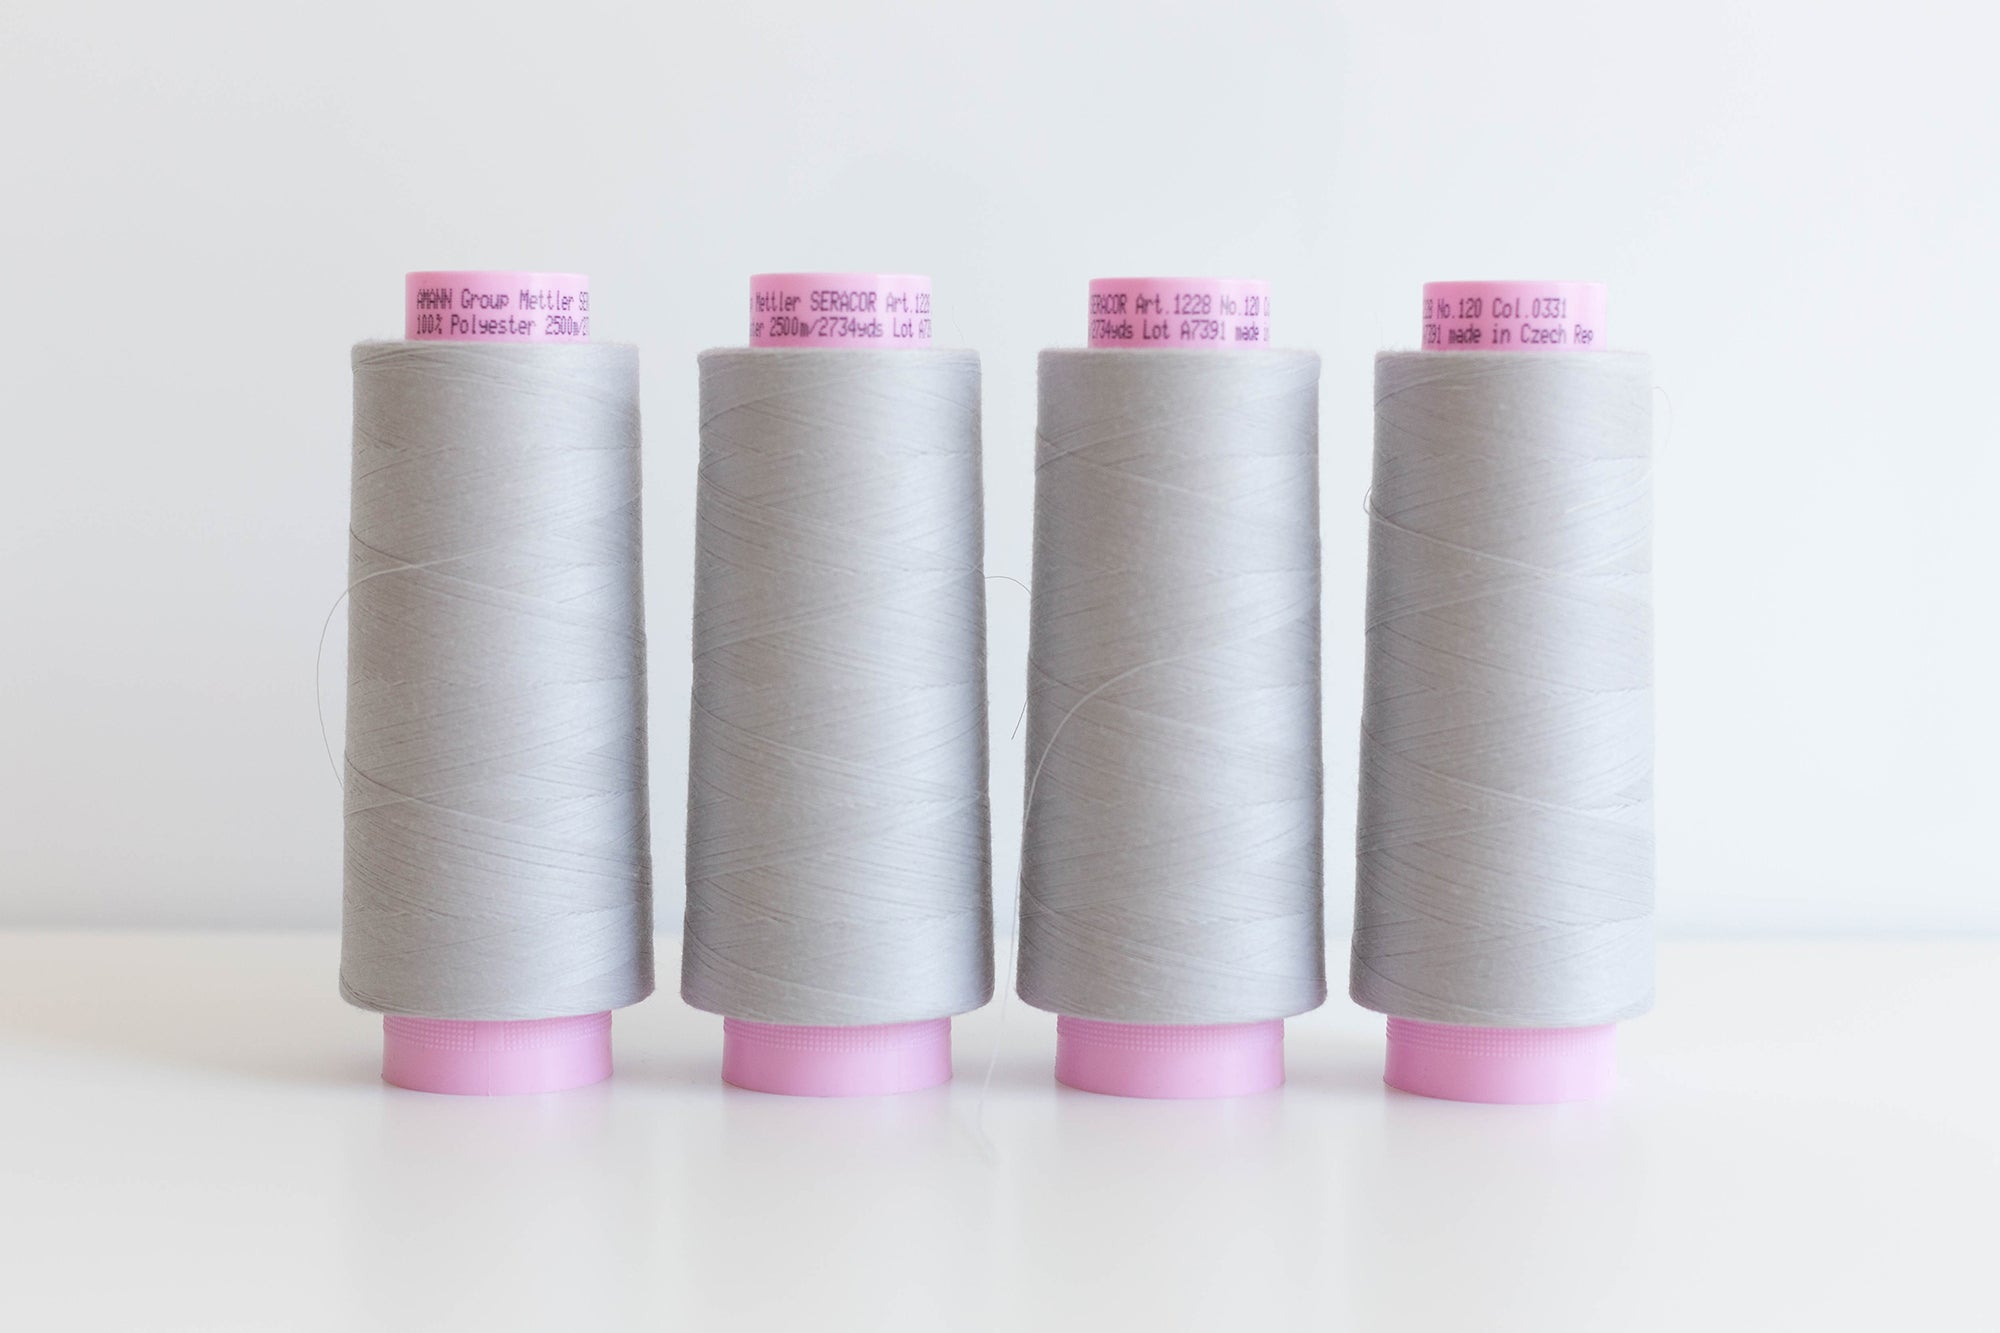
Much like with your sewing machine, higher quality cones, like these Mettler cones, have a smooth, even thread that passes easily through your serger's tension discs. You'll get beautiful tension with the machine's default settings 95% of the time if your machine has an even thread passing consistently through it. High quality threads are not only smoother, they also have less lint which means your machine stays cleaner! Sergers especially collect a lot of fiber lint since they cut and sew, so we don't need to add to it with a thread that sheds. A smooth, even thread is also stronger so this is especially important if you're using the serger to put your garment together. You can see in the above image that the Mettler cone has a much smoother sheen than the cone on the right because the thread is smoother and stronger.

You can see more clearly in these closeup photos the difference between the two threads. We're comparing the Mettler SERACOR serger thread that we buy here in the studio on the left with the cheaper Maxi-Lock All Purpose serger thread available cheaply at most larger craft stores on the right. We really think it pays off to use the nicer thread in your machines the majority of the time.

Tip No. 02: Purchase 1 specialty color spool for the upper looper thread.
Rather than buying 4 spools of an odd color you'll likely not use very often, purchase one specialty color to match your fabric and have a good stock of basic colors like black, medium grey, and ivory. Put the special color into the upper looper of your machine and thread the rest with the neutral that stands out the least against your fabric. The other threads will barely show while the top side of your seam allowance will match perfectly! You can see how effective this is in the above photo. Like good sewing machine thread, high quality serger thread isn't cheap, so this is a great trick to save money while still having the insides of your garment look as amazing as the outsides.
Tip No. 03: Save thread by rotating your spools.
The upper looper is the system that uses the most thread, followed by the lower looper. To make sure you run out of all 4 cones at approximately the same time you'll want to rotate your cones occasionally switching the needle cones with the looper cones. This should help prevent you from having to make unexpected thread runs!

Tip No. 04: Watch out for those pins!
Running over a pin while sewing is never a great idea, but it's especially troublesome on a serger. It can only take one pin to damage your machine's knife badly enough that you need a replacement and you also run the risk of jamming the machine. Not only that but since the knife is rapidly going up and down the pin is likely to fly at you and that's really never a great time. If you like using pins but don't like hitting them, try using something like these Clover flower head pins. They're easy to spot as they approach the knife meaning you're less likely to run one over!

Tip No. 05: Clean your machine.
Last but not least, it's important to clean your serger more frequently than your sewing machine. Due to the fact that your serger is cutting fabric while sewing it ends up collecting a lot more lint and dust than your sewing machine. Most machine's come with a small lint brush you can use to keep it clean and tidy. In addition to brushing we also use our tweezers for grabbing larger fuzz puffs, as well as these microfiber cloths that I'm completely obsessed with. We highly recommend not using compressed air though, it can force lint back into places that are hard to clean and certain types of air that come out cold can actually damage or crack machine parts. The fuzz shown above is only from 2 small woven projects so you can imagine just how quickly debris builds up in there. Like any hardworking machine, you'll want to get your serger professionally serviced about once a year along with your sewing machine. This will help keep it running smoothly for a longer length of time.
That's it for our tips! If you have any you'd like to add, feel free to leave them in the comments below.