Making a Zipper
One question we get a fair bit, especially in regards to the Portside Travel Set, is how to make your own zipper. I personally love making zippers because you can pick out exactly what you want in regards to the gauge, metal, type of slider, etc. and also because if I have the supplies on hand I don't need to order custom zippers and then wait for them to arrive. Instead I can whip up a zip and get started on my project right away! To start, lets talk a bit about the parts of the zipper and what supplies you'll need to make your own zippers.

The type of zipper we're going to make in this tutorial is called a non-separating, or closed end, zipper. This means that the zipper is open on one end, the top, and the bottom is permanently closed with a bottom stop that spans the zipper tapes at the other end. You'll find this type of zipper on pants, dresses, bags, etc. You can also get invisible non-separating zippers but those will have plastic teeth and I've never seen parts for purchase to make one of your own before. Lets quickly go over the labeled parts above before we start making our own zipper below.
- Top / Bottom Tape End: this is the part of the tape above and below the stops at the top and bottom of the zipper.
- Top Stop: one of two pieces crimped to one side of the zipper just above the last tooth. This stops the zipper slider from sliding off the end of the chain when closing it.
- Teeth: these are the individual pieces attached to the zipper tape that make up the chain.
- Slider: the piece of the zipper that moves up and down the teeth to open and close the chain.
- Pull Tab: the moveable piece attached to the slider that you grab to pull the slider up and down. These come in many different shapes and can be basic or stylized.
- Tape: the fabric that the zipper teeth are clamped to.
- Chain: the teeth form the chain when closed with the slider.
- Bottom Stop: a single piece that spans the two zipper tapes and stops the zipper from going off the end of the tape.
- Tape Width: refers to the width of the tape on one side of the zipper only.
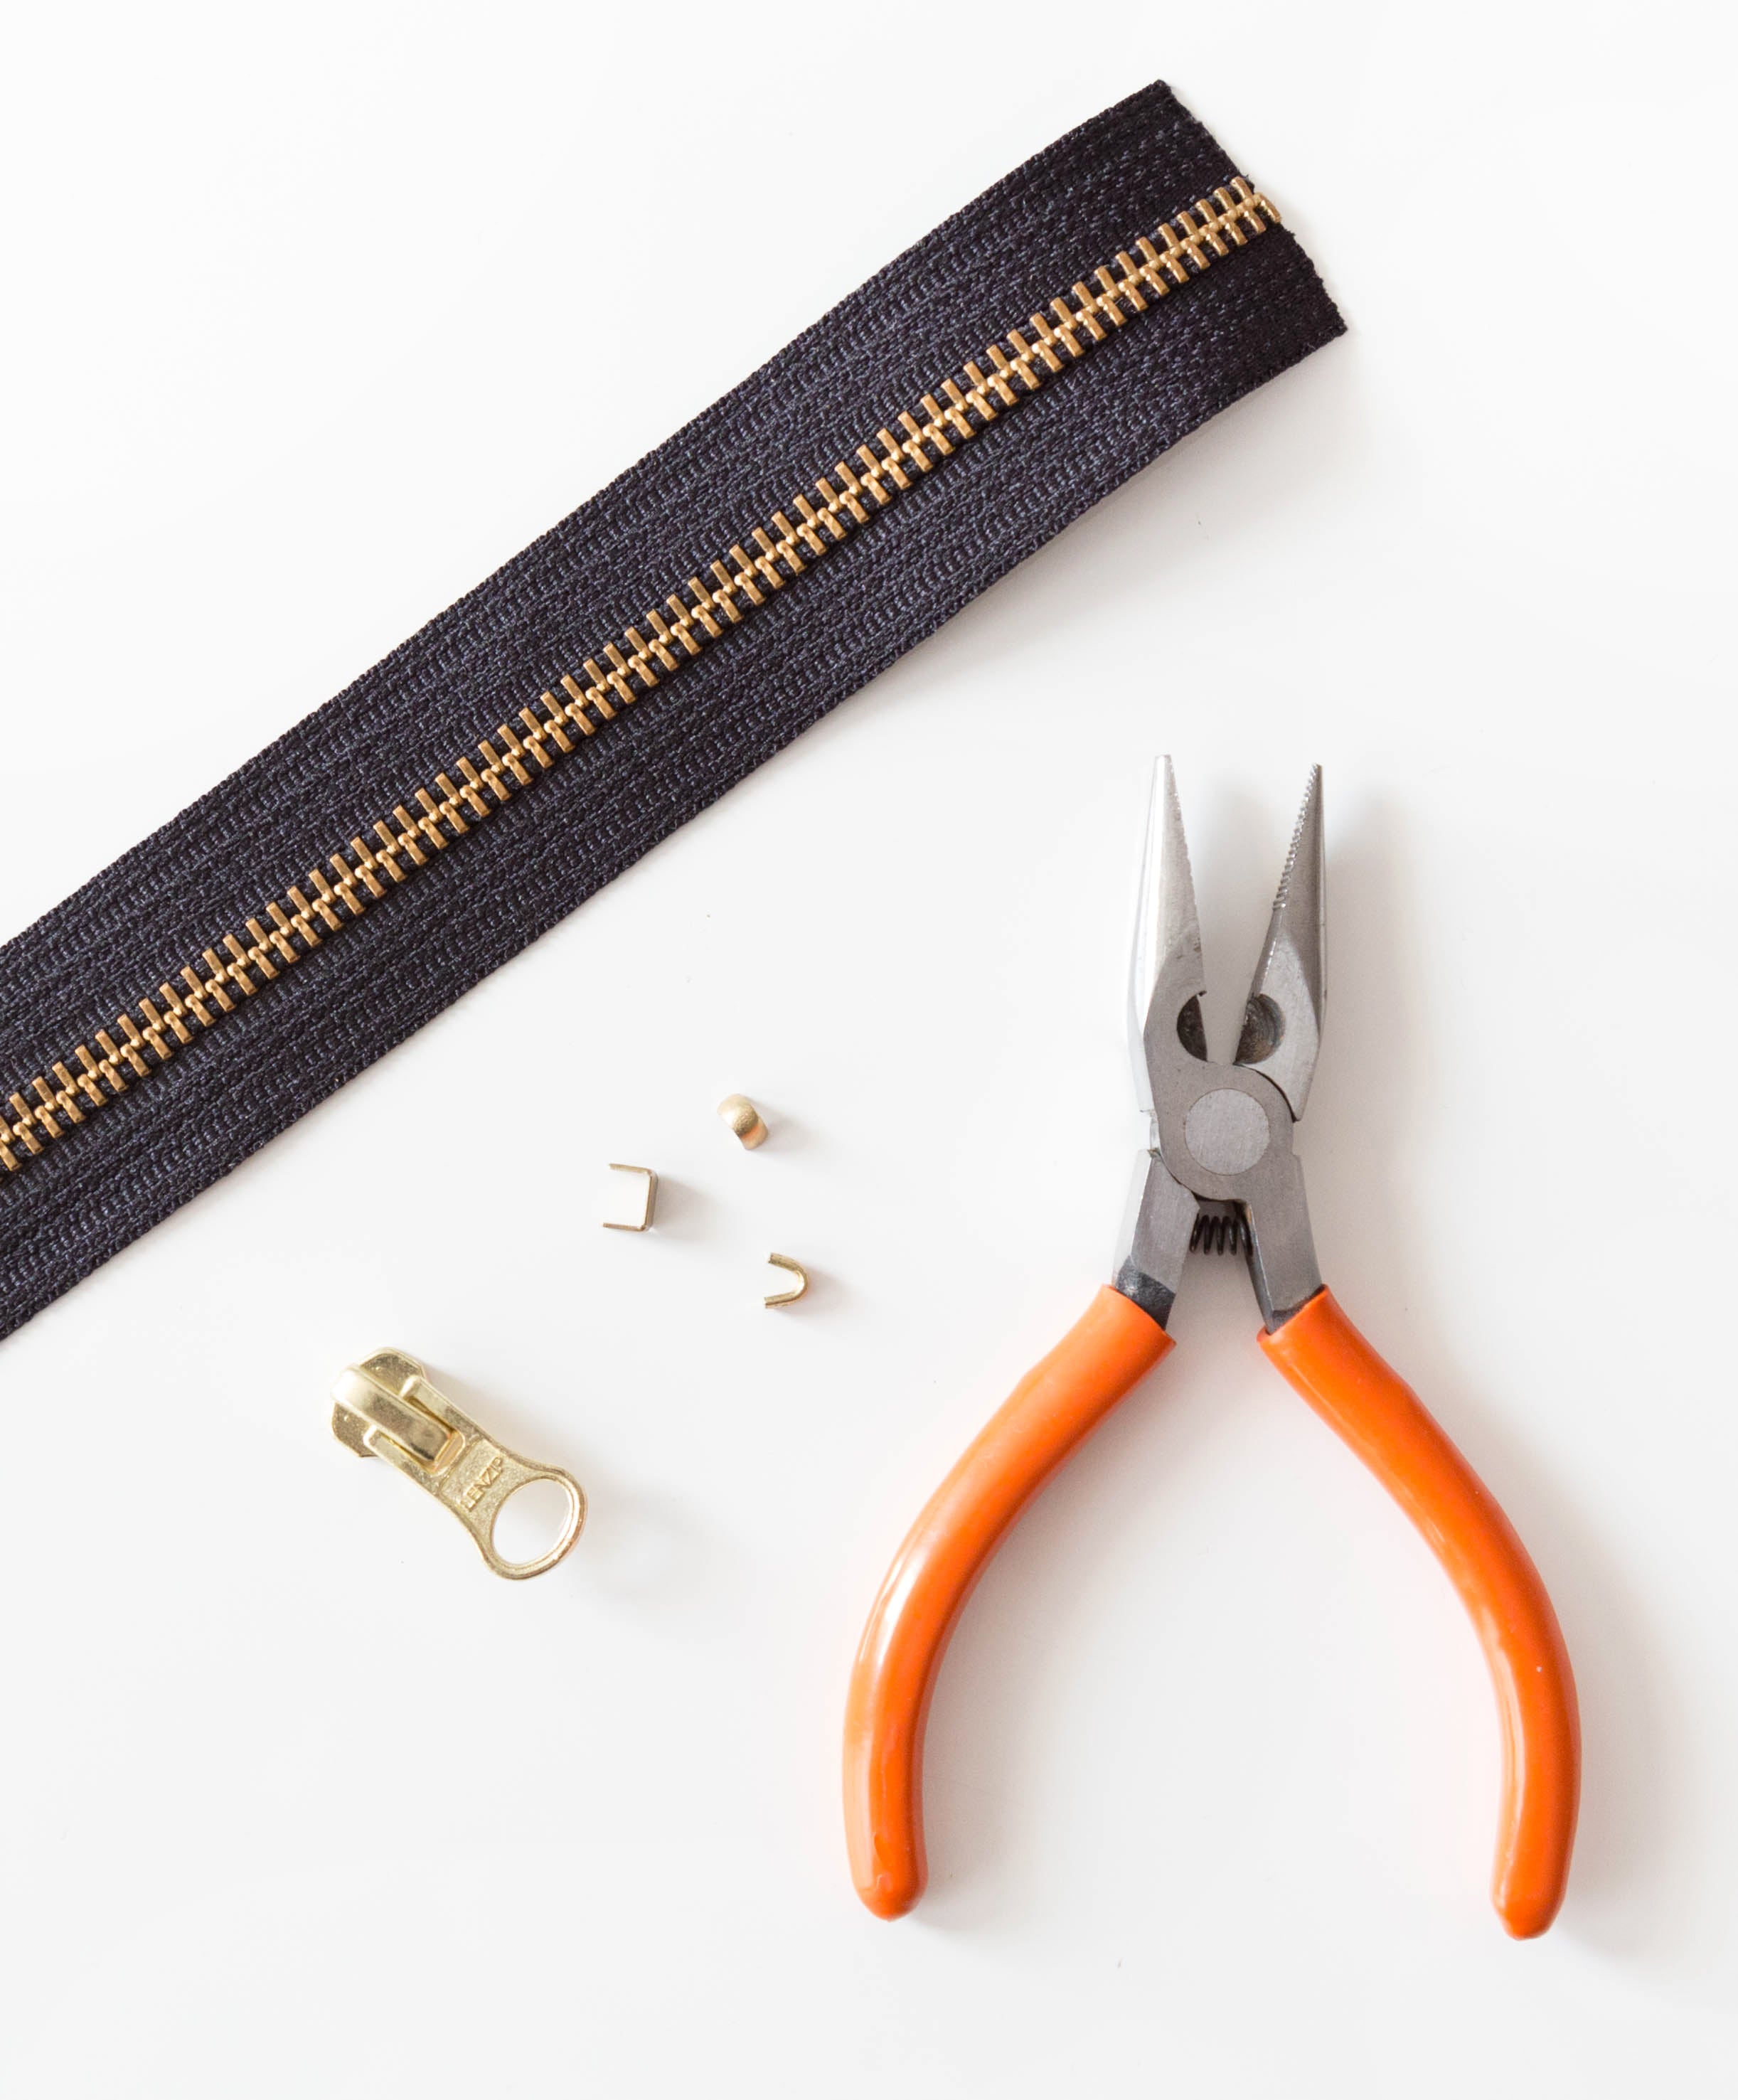
If you're going to make your own zipper you'll need a few supplies which I've laid out below. I ordered these from ZipperSource.com though there are other places that sell these parts as well.
- Continuous Chain: this is a large spool of uncut zipper tape with chain. You can choose your metal and chain size here and when you do, note them so you're sure you're buying the right size for the rest of the zipper parts.
- Zipper Slider: you'll need to make sure your slider size matches your chain size and there are often a variety of pulls to choose from based on your style and need.
- Top and Bottom Stops: again based on the chain size. Again these are based on chain size but outside of that there isn't much to choose from aside from color.
- f: I prefer a needle nose plier for this, but I wouldn't recommend using your best pair. We'll be yanking the teeth off the tape so a mediocre pair you have laying around is recommended as this can tend to strip the gripping grooves off the surface of the pliers.
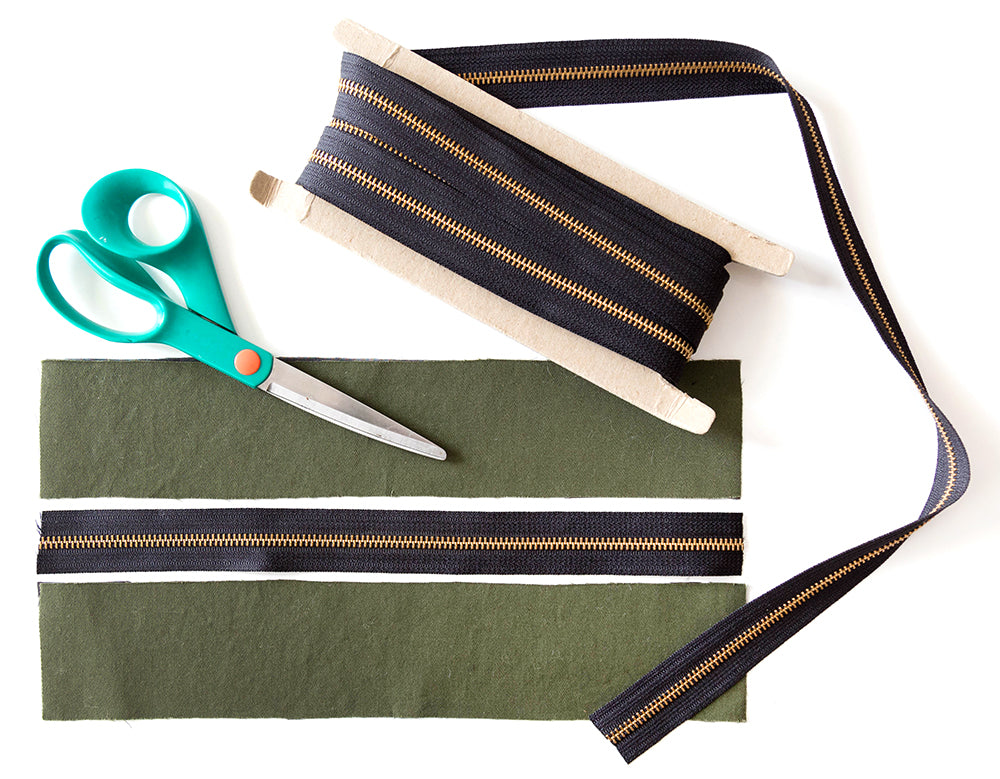
Now that we've got our supplies squared away, lets make our zippers! Start by cutting off a length of your continuous chain. You'll want to either match the length of the piece you're sewing the zipper to, or make it a bit longer and I highly recommend using a pair of scissors you don't care about as you'll need to cut through the metal section.

To prep the zipper for the bottom stop, pull the two sides of the zipper apart and lay it out so that the raised part of the teeth are facing up, pointing towards the top of the zipper. With a seam gauge, measure up the amount of your seam allowance plus the height of the bottom stop, in this case that equals 5/8″. You'll need to remove the zipper teeth within this measurement at the bottom of the zipper.

I've found the easiest way to remove the teeth is to grip the tip of the zipper tooth with your pliers and pull the tooth straight off the end of the tape. The higher up you go, the more you'll need to tug but it's a pretty easy process.

Once you've removed your 5/8″ of zipper teeth from the one end of the tape, you'll need to repeat this process for the other side. Keep in mind that the zipper teeth are staggered so that they can zip together and close to form the chain so you'll need to remove one extra tooth from the second side.

One both sides of the tape have the requisite number of teeth removed you're going to feed both sides of the tape through the zipper slider. Once you think you have them pretty even give the pull a tug up the teeth. If the chain is uneven at the bottom, you can remove the slider and try again.

With the slider part-way up the chain it's time to attach the bottom stop. There are four prongs on the stop which will pierce the zipper tape and fold under to secure the tape in place. Align the bottom stop as shown above and when you have it in the correct position, push down on the stop to force the prongs through the tape.

Here you can see the bottom stop prongs from the underside of the zipper.

Take your pliers and fold each of the prongs over towards the center of the zipper to secure the stop in place.

We're now over halfway to your new zipper!

Now you'll need to measure the top of the zipper to remove the teeth needed for the seam allowance and top stops. Again we removed 5/8″ worth of teeth from both sides of the top of the zipper.

Now grab two of your top stops, one for each side of the zipper.

The stops are open really far so I find it easier to position and clamp them down on the tape if they're slightly more closed. To do this I arrange the stop in my pliers as shown above and give it a little squeeze.

Now align the top stop above the last zipper tooth.

Clamp down hard on the stop with the base of your needle nose pliers so that the stop is really on there. You definitely don't wan this coming off!

Repeat for the other side of the zipper and your zipper is complete. Sew in this zipper as you would any other regular zipper or according to the instructions on your pattern.