Cascade Sew-Along: Attaching your Toggles

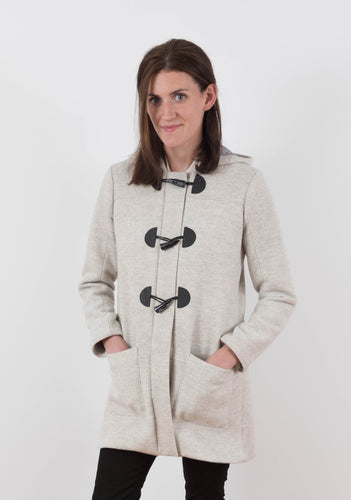
Today we'll be attaching the toggles to the coat. Begin by placing your clasped toggles across the front of your coat to double check that the toggle strap length is correct before they're permanently affixed to your coat. You want the toggles to clasp tightly across the front of the coat, especially if the cord is leather since it can tend to stretch with wear. If you need to make any adjustments to the placement do that now.

You'll want to make sure you're working with a leather needle if you're sewing leather. The sharp tip of a leather needle is shaped a bit like a knife allowing it to easily slice through the leather without skipping stitches like you would with a regular needle.

I recommend sewing one test toggle if you're sewing through leather. It feels a bit different running through your machine than regular fabric and since leather doesn't heal after you puncture it like fabric does, once you've pierced it the hole is permanent. You'll want temporarily affix your toggles to the fabric using either tape or a fabric glue stick so that the toggle doesn't move around while sewing.
Please note: If you are making your toggles with the suede side of your leather facing up do not use tape. Get a glue stick. You guys know I'm not really into buying extra things when you can get away with using something you have but trust me on this. I taped the first of the Pendleton toggles (shown at the bottom of this post) and it took me about 15 min and lots of silent yelling to get the tape off of one toggle tab. There also may be a small piece stuck under the stitching that I have decided I can live with...maybe.

Practice stitching around the toggle until you get a feel for how the leather moves under your machine. This also lets you test out how far in from the edge you like the stitching to fall.

Once you've got your stitching worked out you can go to town on your actual toggles. I like to start with the loop side of the closures but it doesn't matter which side you sew first. Don't backtack through the leather, instead leave a long thread tail and start at one of the corners which we'll tie off later to keep the stitching in place. Sew the straight edge, then curve around the back to where you started. When you get to the end, again do not backstitch and leave another long thread tail. You'll notice the green foot on my machine above, it's a Teflon foot. Leather can be sticky on the bottom of your foot but the Teflon foot lets it slide smoothly. You can alternately try a walking foot or some people like putting scotch tape on the bottom of their regular foot. That works but I don't like the fact that the tape can leave a residue on the bottom of my foot. Bernina feet can be a bit expensive so I like to take a bit more care with them.

After you've cut your threads, pull the front threads to the back of the garment and tie everything off to secure your stitching.

Sew all three toggles on that side in the same manner as the first.

Repeat these steps for the other side of the coat.


All your toggles are now attached!

For View A we sized the toggles down a bit and shaped them into triangles to go with the print of the Pendleton Wool. The toggle buttons are actually antlers too which is so awesome! When I saw them show up on Sara's Instagram I immediately contacted Fancy Tiger so I could have some of my own. I think they're perfect for this coat! Next up, sewing the side seams & inserting your sleeves.