Stone Lake Sweater
The Details Pattern: Stone Lake Sweater (rav link)
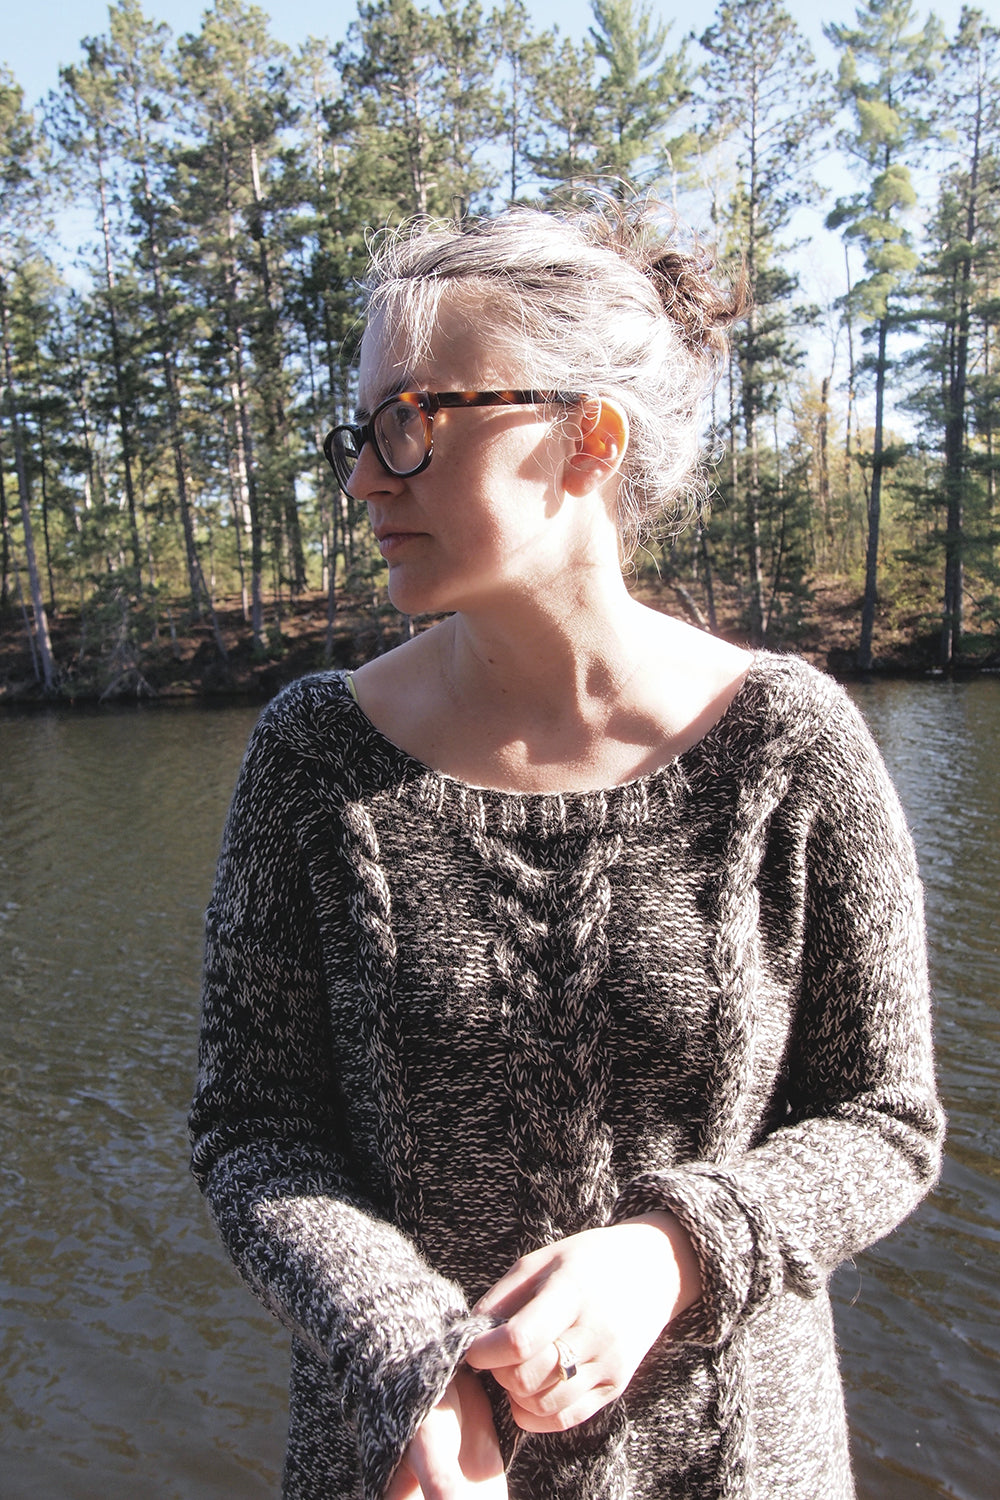
Yarn: Purl Soho Line Weight in Sea Salt & Dark Loam
Needles: US 7, 8, 9
Shoes: Dieppa Restrepo Penny
In Progress Photos | #stonelakesweater on Instagram
Sometime last year between knitting my Benton, Stonecutter, and Bellows I got it into my head that I wanted to try to design and knit my own sweater. It was partially in an attempt to understand how to alter existing knitting patterns to fit exactly what I want, partially because I had a specific sweater in mind I couldn't find a pattern for, and partially because I like a challenge. It's a little known fact that I originally wanted to become a knitwear designer long before I got into patternmaking so I think a part of me wanted to see if I could do it. This is how the Stone Lake Sweater was born!

When Jess, Amy and I hatched the Sunday Sweater KAL at the beginning of the year I figured that was as good a time as any to give this sweater a go! My goal for this sweater was to create something cozy that I could wear with leggings in the fall and winter (aka tunic-ish length) with sleeves slim enough that they still fit into my jean jacket. I wanted the perfect black and white marl, and a bit of cabling up the front, just enough so that you could see it from an open jacket, but I didn't want an overall cable project.


Since this was my first sweater I wanted to start with something I knew fit as the base so I loosely used the measurements for the Hemlock Tee and went from there. This ended up being a fun math experiment that I think went pretty well. The yarn I used was Purl Soho Line Weight in Sea Salt and Dark Loam, not quite white and not quite black. I held two strands of the Dark Loam and one strand of Sea Salt together which created my perfect marl.
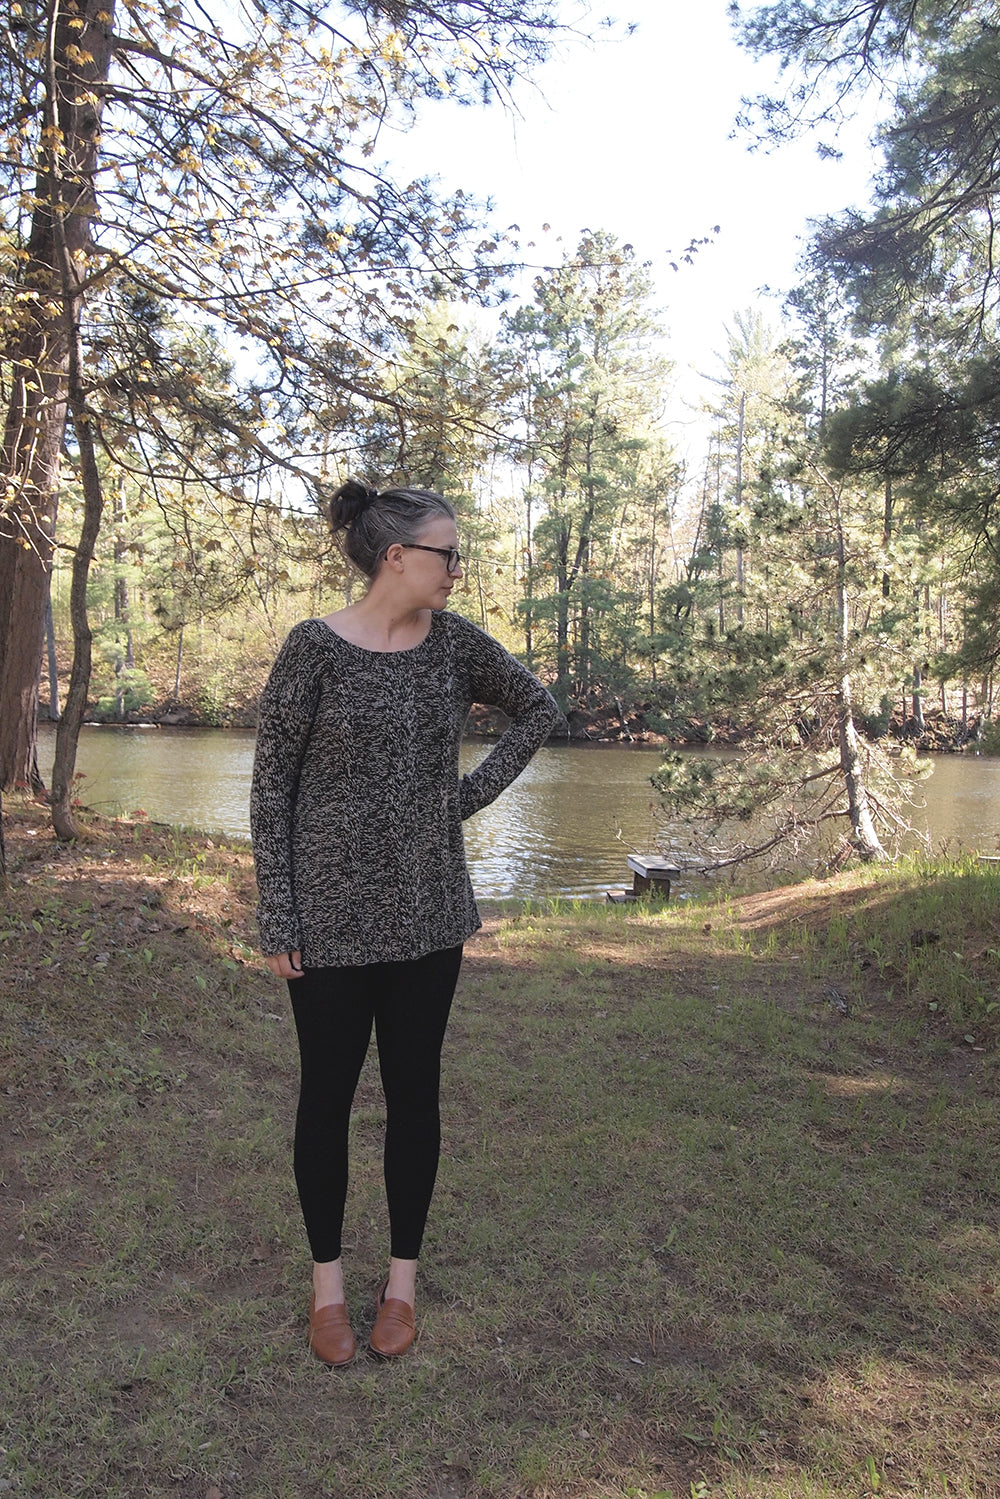

I essentially knit two complete sweaters while making this. After quite a bit of swatching I began knitting the sweater, completed the front, back, and one sleeve, and decided that I needed to go up in needle size because the fabric was more dense than I would have liked. At that point I knew I needed to rip out the entire thing but it took a few days for me to get actually do it. Once I started ripping though it was such a good feeling knowing that I was getting closer to my finished sweater, done the way I wanted it.

I also took this opportunity to change the center front cable from a braided cable to a large horseshoe cable and I really glad I did that also. I think the first cable was too busy with the marl and this larger, softer cable looks a lot nicer. The body is reverse stockinette with cables on the front and the sleeves are regular stockinette. I'm really into the contrast between the two, I think it adds a little bit of added interest and texture to the sweater.
 Transitioning from the ribbing to the cables at the hem in a way that looked smooth took a bit more thought than I had imagined it would. After the last ribbing row there's a setup row which included increases so that the cables rose out of the knit stitches evenly. This part probably took me the longest of the design / math portion of this sweater and I'm really glad I took the extra time to make it look neat and tidy.


I love the way the sweater turned out so much. The fabric drapes beautifully and the yarn is so soft you can wear it next to your skin with no trouble. The sweater, while warm, is incredibly light for being as large as it is, and especially with three strands held together. I’m almost sad it’s time for summer now that it’s finished…at least I can wear it up at the cottage pretty much year round! I'm super excited to try another self designed sweater and have a few ideas I'm already swatching. P.S. More photos & slightly more technical info can be found on my Ravelry page.