Trouser Refashion Swap | Tutorial

I'm excited to show you one project I've been working on over the past few weeks, the Trouser Refashion Swap. You may remember the past swap organized by Miranda of One Little Minute, the Button Up Refashion Swap, well this is part two and, obviously, we're refashioning pants this time around. I was partnered up with Krista of Lazy Saturdays and fashioned this denim skirt for her. She has a really fun, colorful style so I wanted to do something that started with either great colors or an awesome print, unfortunately my thrift stores were coming up with none of the above so I may or may not have purchased these pants at F21 (shhhhh). I thought the colors were up her alley so I went for it. The zippers were inspired by my favorite J. Crew dress and I think they add a really cool, modern touch to the flowery sweetness of the skirt. The skirt is still en route to her so Krista, hope you like this preview! If you're interested in seeing the tutorial on how to refashion your jeans into a similar style, keep scrolling down!
Be sure to check out the other ladies participating in this swap as well, I haven't seen any of them yet (prescheduled post and I'll be midway between Chicago and Seattle when this post goes live) but I'm sure they're rad and can't wait to check them out when I'm killing major time at Sea Tac. Boom!
Suzannah of Adventures in Dressmaking Miriam of MadMim Miranda of One Little Minute Melissa of I Still Love You Liz of Cotton & Curls Krista of Lazy Saturdays Kelli of True Bias Kate of See Kate Sew Jennifer of Grainline Studio Carrie of This Mama Makes Stuff

Gather your supplies, I used one pair of skinny jeans, two metal zippers, regular thread (not pictured) and topstitching thread.

Mark how long you'd like to make your skirt plus seam allowance. I went a little bit longer so I had room to even out the hem incase my chopping was a little wonky, which it was.

Chop those suckers!

Take out the inseam.

Redraw the center front seam. You'll generally want this to be a straight line down from the end of the fly stitching. Sew your new seam.

Draw the back line, I like to curve this line a bit since, you know, we aren't straight lines back there. Stitch this seam.

Serge your seams, or finish them however you like to do that sort of thing. Pug supervision is helpful at this stage.

If your hemline is a little crooked like mine was, measure down and straighten it out.

Mark how high your zippers go on the side seams.

Remove side seam stitching to marked point, reinforce the end of the side seam stitching and serging if possible. Clip to, but not through, the seam at the point where the zipper will stop, finish the edges of the open seam.

My pants had a LOT of elastic in them so I hand basted the zipper in place before I sewed it in.

Stitch around your zipper, repeat for the other side.

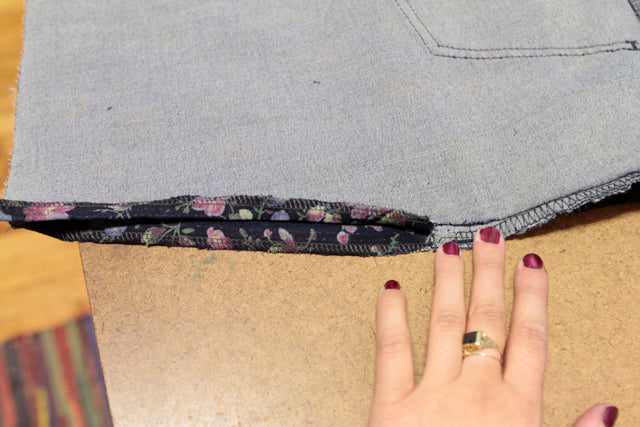
Fold up your hem allowances and stitch hem in place.


There you go, a skirt with zippers on the side...

...and enough fabric left over for the cat bed you never knew your cat wanted. Win win all around!
Hope you enjoyed this tutorial, apologies for the pet cameos, they just really are EVERYWHERE I am, ALL THE TIME. Check back on October 1st to see the refashions in their new homes.
