The Button Up Refashion Swap

So a few weeks ago I got an email from Miranda of One Little Minute asking if I would be interested in participating in a refashion swap with some other lovely ladies in which we would refashion the classic button down shirt into something new for another participant. Well you know how many refashions I do here (umm I've literally never done one before) so of course I said yes! Today we are all posting tutorials on how to make our refashions and next week we'll be showing off the tops that were made for us.

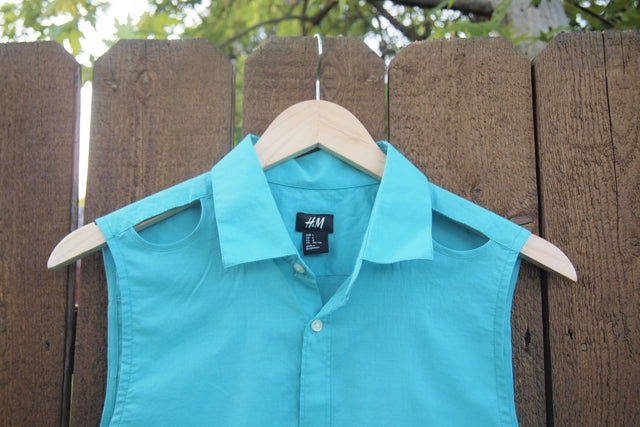
For the making part of the swap I was paired with Miranda. Her style description was 'classic with a twist' and the colors she included were pretty great, neon orange, navy, peach, chartreuse! We all know that I never say no to color so this part was particularly exciting for me. Unfortunately I couldn't find a top in any of those colors but I thought this seafoam green fit in with her palette pretty well. I wanted to make the top really fun since if there's one thing that you can take from her blog it's that she is always having an excellent time doing whatever she's doing, I mean this is a girl who ran a 5K in a tie dyed American flag unitard. I made a scalloped hem for a little bit of cute but then echoed the scallops at the front yoke in the form of cutouts to add a little bit of an edge to the top. When I tried the shirt on to make sure it was wearable it was pretty cute with the color of my tank peeping out of the cutouts! This was definitely a challenge for me, I've literally never refashioned anything before that I can remember (Luke agrees, he can't remember me ever doing this in the 10 years we've been together) and I was (and still am) terrified that she'll hate the top! Anyway, hope you like it Miranda and to everyone else, if you like it you can find the tutorial below! Also check out the refashions of the other super cool ladies involved in the swap!

Step 1 : Detach your sleeves and set them aside, we'll need them later.

Step 2 : Take out the side seams and press flat. You may need to take out a bit of the hem to get things to lay flat.

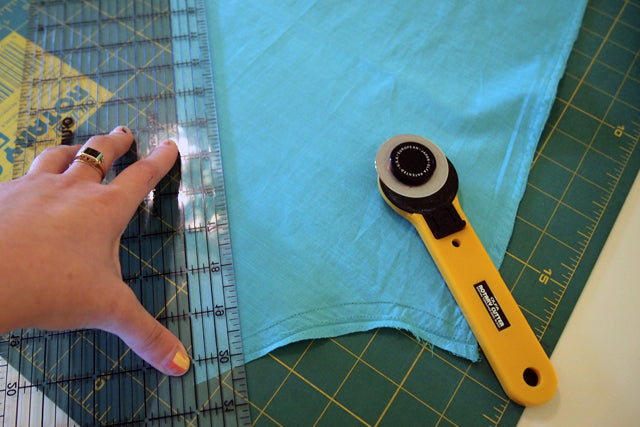
Step 3 : Mark the new bust measurement plus seam allowance and blend to the hem. Stitch along the new sideseam and trim excess.


Step 4 : Trace the piece that you cut off onto the other side of the shirt. Sew the new side seam and trim excess.
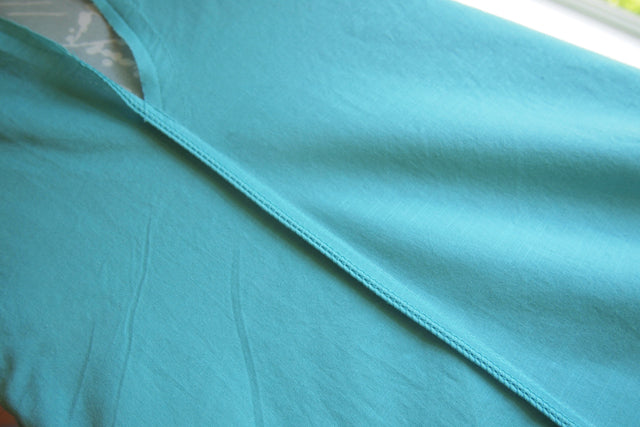

Step 5 : Finish edges with a zig zag stitch or serger. Press seam to back and topstitch stitch 1/4" from seamline.


Step 6 : Mark new shoulder line and trim away excess, then transfer new shoulder line to the other side of the shirt by tracing the cut off excess. Trim.

Step 7 : Cut one of the sleeves into 1" bias pieces to finish the armholes. You can refer to this tutorial for detailed instructions on how I bound the sleeves or use your preferred method.

Step 8 : Lay the top out folded on CB with CF's meeting and draw out your new hemline, shorter in front and longer in back. Make sure that the hemline meets both CF and CB squarely. Cut.


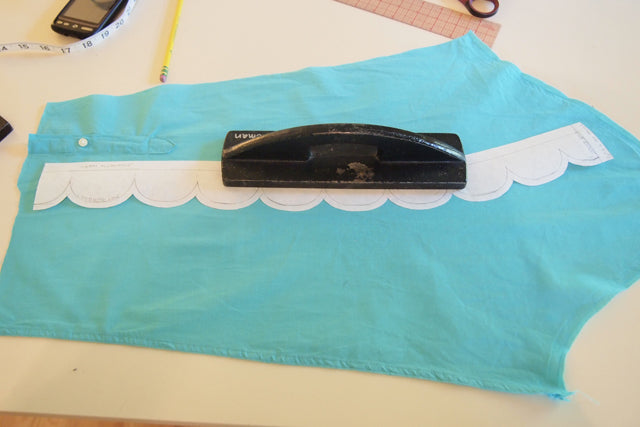
Step 9 : Trace the hem of the top onto paper and mark out your scallops, make your facing about one scallop longer at CF than you need. Mine are 2.5" x 1.5". Add 1/4" seam allowance to the bottom of the scallops, 1/2 to the center back and add 1" on top of the high points of the scallops. Cut this template out.

Step 10 : Cut two scalloped pieces from the other sleeve and join together at CB.


Step 11 : Pin scallop facing to right side of shirt hem. At CF wrap the extra scallop along to the other side of the shirt. Sew along the scallops at 1/4" seam allowance as we marked on the facing pattern.


Step 12 : Clip and notch scallops as shown.
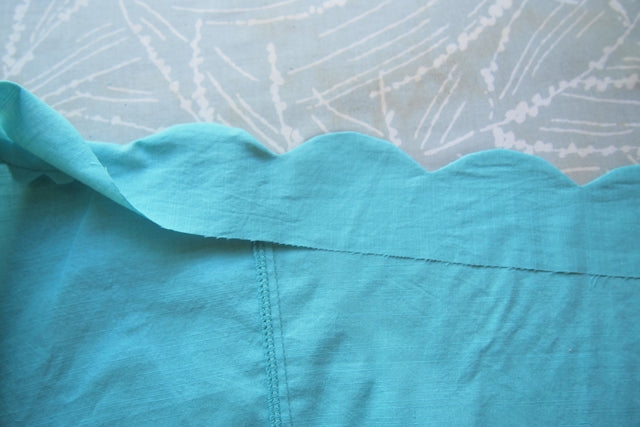
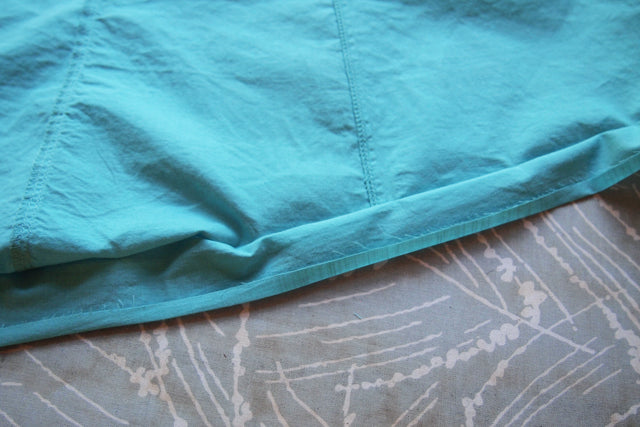

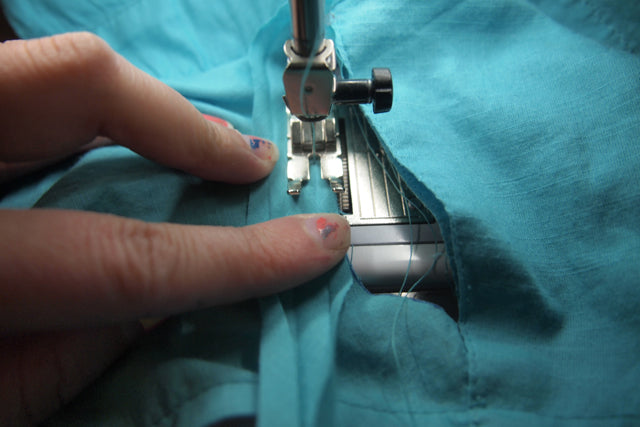
Step 13 : Turn scallops right side out and press. Turn under seam allowance at raw edge and sew the hem. You can use a blind hem foot for this or just sew it by hand.


Step 14 : Trace a scallop centered under each side of the front yoke. Take apart the stitching holding the yoke to the front of the shirt and cut out the scallop shape.

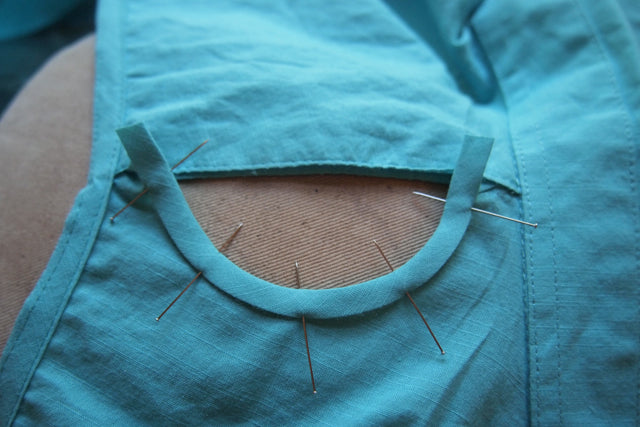

Step 15 : Bind the edges of the scallop cutout with the extra bias binding from the sleeve.

Step 16 : Sew the two layers of the yoke back together and you're done!
Here's the schedule for next week when we'll all be posting the refashions that were made for us!
Monday, May 21st: Lizzie of Cotton & Curls, Krista of Lazy Saturdays Tuesday, May 22nd: Sunni of A Fashionable Stitch, Kate of See Kate Sew Wednesday, May 23rd: Suzannah of Adventures in Dressmaking, Miranda of One Little Minute Thursday, May 24th:Miriam of MadMim, Melissa of I Still Love You Friday, May 25th: Megan of Megan Nielsen Design, Jennifer of Grainline Studio