Grainline Studio x Britex Fabrics | Tasseled Scarf Tutorial


I'm super excited to present my first project in collaboration with Britex Fabrics, a tutorial to make this super cute polka dot chiffon scarf with tassels! This scarf is the perfect thing to throw on with your sweaters this winter, it dresses things up a bit and also adds a new texture to a typically knit heavy season. The silk was a dream to work with, softer and silkier than any chiffon I’ve worked with before and with a most beautiful sheen. Also can we talk about the color and print? It’s not just ivory, it has a subtle blush hint to it that makes it super flattering on everyone who’s tried it on so far and I’m a huge fan of the scattered polka dot. It’s a perfect way to throw an updated polkadot into your wardrobe.
This was actually my first time working with silk thread (other than needle turned applique) and it really added a subtle polish that probably only I will notice, but isn’t that the best kind really? I think so. Make this scarf with or without the tassels, I think they’re pretty fun but unfortunately so does my cat who tried to steal one right before we took these finished project photos. You can follow the instructions below to make your own, click on the project supplies to order your own scarf materials! Also a shoutout to my friend and insanely talented photographer Julia who did the three nice looking photos on this post. Girl's got skills!

SUPPLIES Silk Chiffon or other sheer fabric 45" x 45" Silk Thread Pearl Cotton Needle with eye large enough for the pearl cotton to pass through

Working one side of the scarf at a time, fold the raw edge of the scarf over 1/4" and stitch down in a straight line as close to the seam line as possible. You will be folding while you're stitching, just focus on folding a few inches over at a time.

Trim the excess folded fabric back to the stitching line. I find this easiest to do on a slightly curved surface such as the back of my hand.

Again while you're sewing, fold the hem over so that no raw edges are showing and stich the turned edge down. You can follow the stitching line from the previous seam for a neat look. Repeat these steps for all four sides.

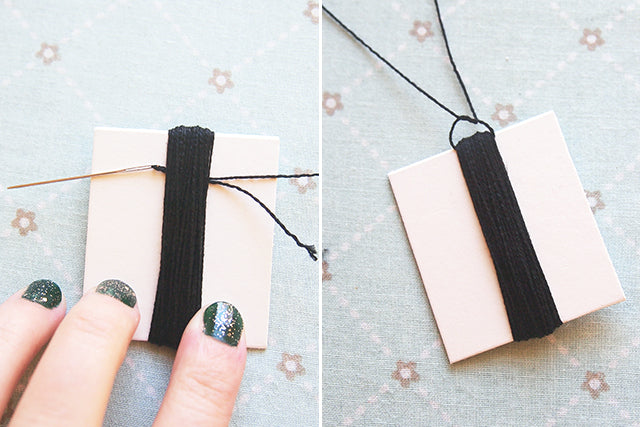
Now for the tassel. Decide how long you'd like your tassel to be from tip to tail and cut a piece of cardboard that size. My tassels were 2 3/4" long for this scarf. Wrap your pearl cotton around the cardboard until you get your desired amount of tassel thread.

Pass a length of pearl cotton approximately 6" long under one side of the tassel threads, bring thread to the top of the tassel and double knot.

Carefully slide your tassel off the cardboard. Cut another piece of pearl cotton about 11" in length and start wrapping the top of the tassel making sure to wrap on top of the start of your thread. When you've wrapped enough times around (I did about 5 wraps but this will depend on the size of your tassel) knot the thread around the tassel then pass the thread around the wrapping threads about 3 times to secure the end. Any extra length will be cut off in the next step.

Cut the bottom of the tassel open and neaten any ends that may be uneven. Repeat these steps to get all 4 tassels.

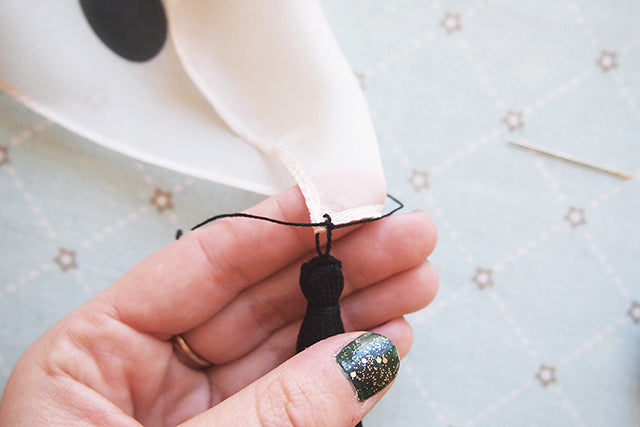
Thread the top threads of the tassels through the corners of your scarf, knot the threads and clip the extra ends off. You're done!

