Inserting a Fly Front Zipper

I used to hate HATE inserting flies until I figured out this awesome method. It's nothing groundbreaking but I feel like every time I opened a new book or pattern they would give me a slightly different variation on how to insert a fly. These are my 7 steps to inserting a fly that works and looks great every single time, no more dreading this process.
You may recognize that this is a repost of part of my Maritime Shorts sewing instructions. I figured it would be useful in a singular post for a few reasons. One, for people who need to insert a fly and aren't making the Maritime Shorts, now you don't have to wade through 30 some odd instructions just to insert a fly in something completely unrelated. Two, as I release more patterns with flies it would make me SO happy to have a tutorial to refer to for that step instead of doing the same photos over and over and over. So without further ado, here is the tutorial for Inserting a Fly Front Zipper (after the jump).
Step 1 | First prepare your Fly Facing and Fly Shield by fusing your interfacing to the wrong side of each piece according to the instructions that came with your fusible. You can optionally serge or zig zag stitch around the curved edge of the Fly Facing. For the fly facing you can do one of two things. Fold the Fly Shield in half with wrong sides together, sew around the side and bottom edges and either serge or zig zag stitch around the edges OR you can fold the Fly Shield in half with right sides together, stitch around the side and bottom edges and flip right side out so the seams are concealed inside of the Fly Shield.


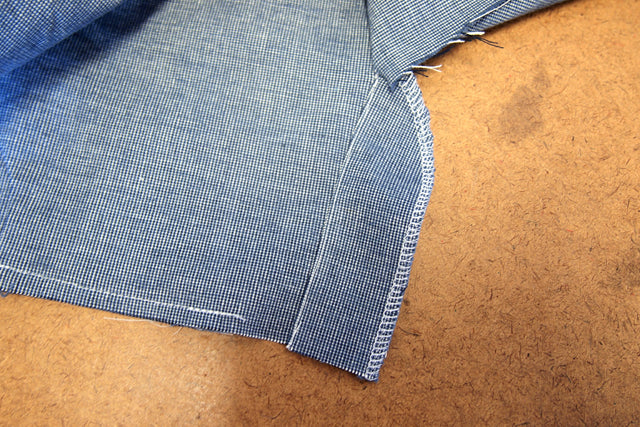
Step 2 | Place Fly Facing on Left Front edge and stitch from top to start of crotch seam. Grade the seam allowance, press Fly Facing away from garment and understitch.

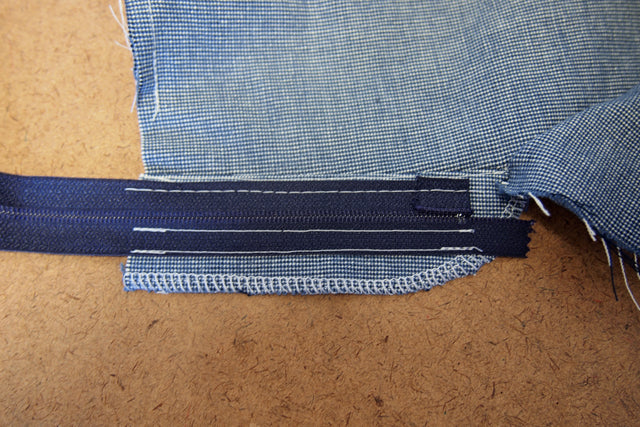
Step 3 | Place closed zipper face down along the edge of the Fly Facing making sure that the zipper stop is ¾” from the bottom edge of the facing. Using a zipper foot, baste along the right edge of the zipper with bottom edge of zipper turned up. This will keep this side of the zipper from becoming caught when you topstitch the Fly Facing curve. Sew the left side of the zipper to the Fly Facing both along the coil and along the edge of the tape.

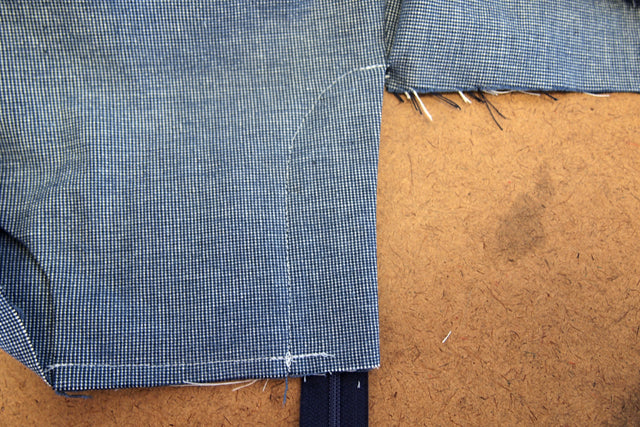
Step 4 | Turn Fly Facing to inside along the seamline and press. Baste along the curved edge of the Fly Facing about ¼” in from the edge, this is the line you will follow to topstitch the fly curve. Turn shorts right side out and topstitch along your basted line going from bottom to top. Remove basting threads.


Step 5 | Now to attach the right side of the zipper. Fold the right side of the shorts under ¼”, pin and baste to zipper. Close zipper to be sure that it is positioned correctly and evenly and that the tops of your shorts meet.


Step 6 | With the zipper closed position the Fly Shield from the inside of the shorts aligning the folded edge with the topstitching of the Fly Facing. Pin in place and flip garment to the right side. Baste along the zipper through all layers. Remove pins, open zipper and stitch along the zipper.


Step 7 | Place a bar tack across the bottom of the fly catching both the Fly Facing and Fly Shield. With the zipper open stitch across each side of the zipper tape. Trim the excess zipper tape even with the top of the shorts. Do not cut the zipper tapes without first stitching across the zipper tape!

That's it, that wasn't so bad, was it. Pretty easy actually! Now you'll have to find something else to dread sewing. As always, if you have any questions you can post a comment below or send me an email.