
After posting my navy lace scout tee I got a few questions asking how I french seamed my armholes. It can seem a little confusing at first but, as with apparently all of my tutorials, I promise it really is very easy. I’m first going to do a run through of the french seam and then will show you how to apply it to the armhole.
Just a few notes before we begin… 1. french seams are usually best used on light to medium weight fabric. 2. French seams require you to split your seam allowance in two parts. This tutorial is done using a 1/2″ seam allowance, but if you are working with a 5/8″ seam allowance, sew the first seam at 3/8″ and the second at 1/4″. I’ve tried to notate where this applies. With that, lets get to it! Click through to view the tutorial.
Part 1 | French Seams on Straight Seams

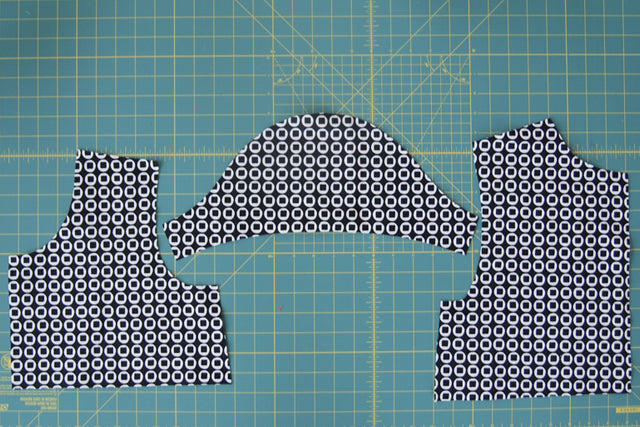
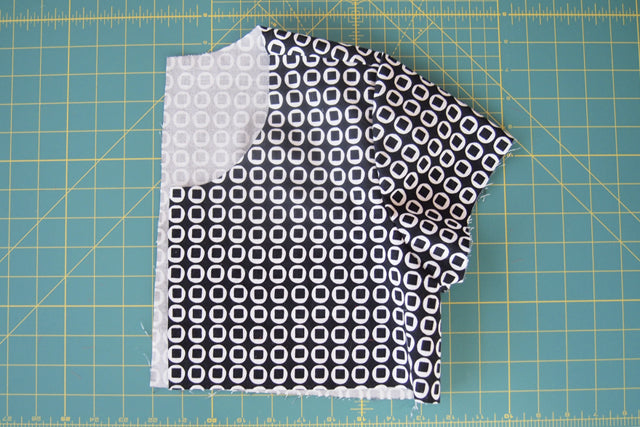
Step 1 | Cut your pieces from your fabric. I only made a half top for this so photographing would be easier, but yours will look normal of course.

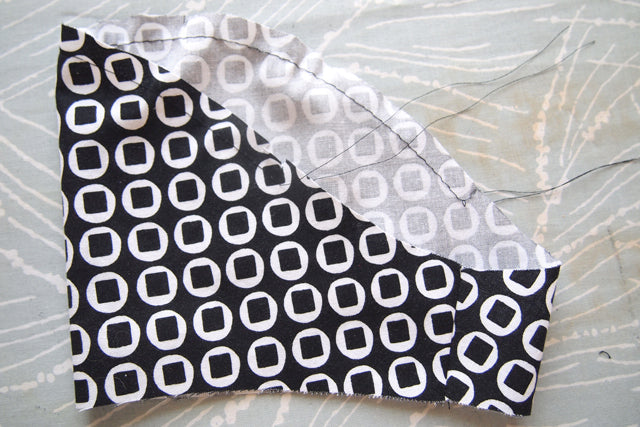
Step 2 | Sew the sides and shoulder seams with the wrong sides of the fabric together at 1/4″ (or 3/8″ if you have a 5/8″ seam allowance) and press the seam open. I like to do all of the seams at once instead of completing one seam at a time because you are much less likely to end up with one seam backwards.

Step 3 | Grade your seam allowance down to 1/8″.


Step 4 | Fold and press along the seam so that the right sides are together and stitch at 1/4″.

Step 5 | Press both the side seams and shoulder seams towards the back of the garment and this part of the process is over!
Part 2 | French Seaming Armholes (and other curved seams)

Step 6 | First we will assemble the sleeves, this part is a bit repetitive. Sew the underarm seams with the wrong sides of the fabric together at 1/4″ (or 3/8″ if you have a 5/8″ seam allowance).


Step 7 | Press the seam open and grade the seam allowance down to 1/8″.


Step 8 | Fold and press along the seam so that the right sides are together and stitch at 1/4″. Press seam towards back of sleeve.

Step 9 | Sew a line of gathering threads from the front notch to the back notches.


Step 10 | Pin your sleeve and armhole together with wrong sides facing. Begin by matching the underarm seams and notches.


Step 11 | Pull on your gathering stitches to ease the sleeve cap into the armhole. Stitch around the seam at 1/4″ (or 3/8″ if you’re working with a 5/8″ seam allowance). After sewing this seam, check for any tucks and remove them if you have any.


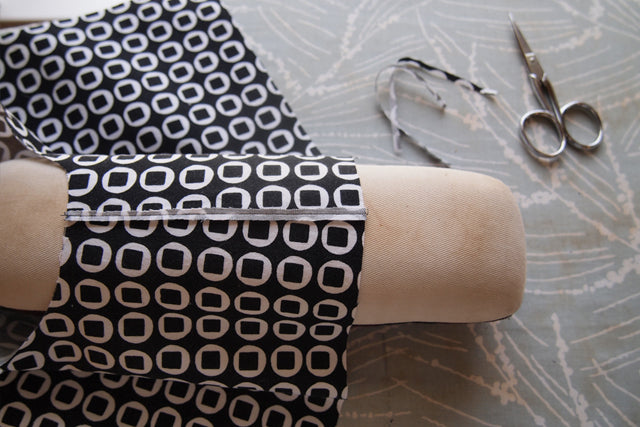
Step 12 | Press the seam open and grade the seam allowance down to 1/8″. This will be most easily accomplished by cramming a ham or sleeve roll inside your shirt and pressing the seam around that.


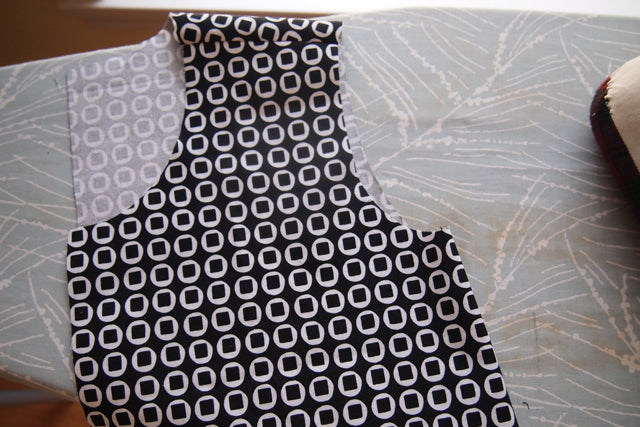
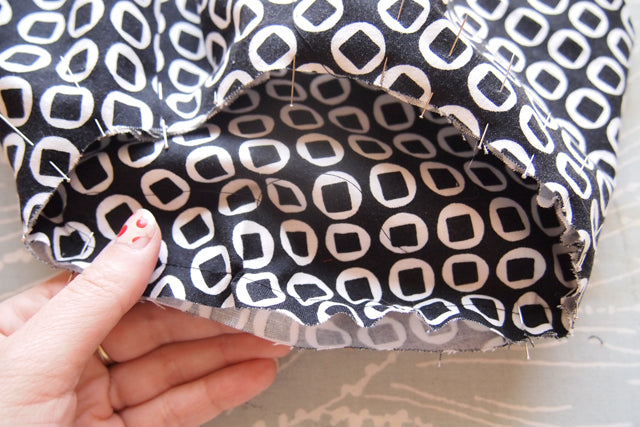
Step 13 | Fold and press along the seam so that the right sides are together and stitch at 1/4″. Check for any tucks and correct those if you have any. You should now have a french seamed armhole like the one below, congrats!


And that’s that! As always if you have any questions leave me a note below and I’ll leave you a reply; I try to respond to all comments. Hope you find this tutorial useful!


My scout sleeve seems way too big for this.
Just sent you an email.
Very cool! Nice way to finish the seams on the inside – especially if someone doesn’t have a serger (overlocker). And, it’d be good for any fabrics that might unravel – as the raw edges will be enclosed
!
Definitely the best for loosely woven fabrics! I am a french seam fiend personally, ha
Mind blown. LOVE this! Thank you for the visual!
Score! No problem
I’ve been thinking about doing these seams because I don’t have a serger. Thanks so much for showing how it’s done together with the measurements for seam allowance and sewing. Your tutorial is very clear.
Glad to help out!
I followed your tutorial and my french seams turned out fine – http://opportunityknits.blogspot.com/2012/03/crafty-start-to-my-weekend.html
Thanks so much for the instructions!
thank you!! this is SO helpful.
you are very welcome!
thank you so much for this!!! i’ve always wondered. i love french seams but always skipped the armhole because it seemed way too difficult. I will give this a try. one quick question: how far in from the edge do you sew the line of basting stitches? 1/4 “? can you make more than one line of basting stitches for more control? do you take out the basting stitches before sewing the second part of the french seam? ok, that was three ?s…
I was definitely sewing things in backwards the first time I attempted it! As for your q’s, those are all things I should have included in the tutorial, so thanks for asking!
1. I sewed the basting line in at 3/8″.
2. You can definitely do more than one row of basting stitches, I think most books recommend that, but I guess I’ve gotten a bit lazy.
3. You will want to take out any basting stitches that will be bound up into the seam out before you sew the second seam or it will be a little difficult to get the inside thread out. If I was going to do 2 lines of stitching I would probably do 3/8″ and 5/8″ and take out the 3/8″ after the first pass and the 5/8″ after the second.
thank you!! you are awesome.
I’ve always skipped the armhole seams too, but it definitely looks so much more polished! And not nearly as scary as I thought.
p.s. did I comment on how awesome your lace tee is?
I feel a little silly because with every tutorial I say “It’s really easy!!” but it really is once you see it all laid out with clear photos. You’re gonna have the best looking armhole seams on the block!
I am really pumped up about that top you’re thinking about making! I’m ordering a bunch of chambray for my next collection this week and I’m seriously considering throwing in a few extra yards and making one myself. It looks SO perfect.
This is fab, thanks! I’ve done french seams on simple straight seams, but I never would have dreamed it possible on a curvy armhole! Wow!
another lovely tutorial! I’ve never tried french seams on an armhole, but I will now! I love the finished look.
When I was trying to exempt my way out of a beginning construction class I did a french seam on a sleeve sample and I got marked down for it! I was told french seams only worked on straight seams. This was troubling and I am delighted to see this tutorial. I feel so vindicated.
So funny you would mention that, I did my first one in school and had a similar experience, though it was of surprise that I had successfully done it rather than a marked down grade. Apparently one of the teachers says that you can’t do them, luckily I didn’t have that teacher. I find that confusing because I own more than a few nice silk shirts + dresses with french seamed armholes and every seamstress I’ve worked with at the bridal studio does them on our dresses, though they were all trained outside the US (mostly eastern europe). Of course it’s not going to work in all situations, but what technique does?!
Beautiful! I love how you’ve really made it look simple and easy (as it should!)
Pingback: In progress: French mustard top | the secret life of seams
Love this! I didn’t realize you could do a French seam on armholes! And it looks so simple! Thanks a million!
Hi. It’s so nice to found your blog.
I came here through blog and blog and blog…i don’t know anymore.
I loved your pattern immediately and ordered one immediately and got one two days ago and made it. so i have a Tiny pocket tank now. it was so easy and fits perfect.
oh, Thanks for your tutorial. I used this french seaming for Tiny pocket tank.love it.
i always thought it’s difficult but it wasn’t. your tutorial was very helpful.
Please show us more of your patterns.I’ll make it again.
Pingback: Scout’s Honor | Grey's Fabric and Notions
Pingback: Sewing Tutorial seams – Sewing Tutorial | Sewing » Blog Archive
Hey this was a really good tutorial. My expertise is not in garment construction at all though I have picked up bits and pieces on various jobs and online. I’ve just bought your Scout T and Tiny Pocket Tank to start making some nice light summer tops (to wear under cardigans of course) I’ve been meaning to do this for ages and I’m off to practise with some nice A.P.C.-style checked fabric today. Can’t wait!
I’m definitely going to give French Seams a go.
I’ll let you know how it works out…
Thanks!! I never understood it properly!
I can’t wait to try this
Thanks again!
Great tutorial!!! French seams are just… classier. I don’t own a serger, don’t really want to own one and have always seen French seams as the better way to finish things. Just looks better. I guess I am a bit French seam crazy too! Great Blog as well
They definitely are a nice seam finish!
This was a very easy to follow tutorial thank you! I do have one question: When the French seams are done, do you have to press them to one side or the other? I was thinking they might poke out of the top? I am a relative newbie to better sewing so all this is a learning curve for me (in other words, please excuse if that was a dumb question LOL). I am making a blouse for myself this weekend and it is the first blouse I have made in probably 30 years! OMG the sleeve was tricky — the pattern didn’t even suggest making the gather threads! Obviously I need to order one of your patterns instead of the one I got! I just found your blog and am eager to read through your other great info! Thanks!
Glad you found the tutorial useful / easy to follow! I press my seams to the back of the garment for straight seams and as far as the armscye seam, typically you’d want to press typically press it towards the sleeve. Hope that helps a little!
I am a french seam fiend as well … admittedly I would rather take the extra time and french seam everything rather than use my serger … But I do thank you for the armhole tutorial … I tend to skip the french seams on the arm holes but actually it looks so easy I now have no idea why I didn’t try this earlier … must be that mental space thing
I have just printed out my Woven Scout Tee pattern and I am definitely going to try this now. The tutorial is so clear. I love french seams on straight lines but have been too intimidated to try them on an armhole until now. Thank you.
Pingback: salme lydia blouse « tidytipsy.photography
Thanks for the tutorial! I had wondered how I would finish my armscye on a sheer jacket. Now I know!
Thanks!
Great tutorial! I did this on another shirt with a sleeve similar to the one on your T. It worked pretty well. I was thinking it might even work better with a few clips along the curves after the first round of stitching, before encasing the seam. Have you tried that before?
Pingback: Floral tops last longer than flowers « Blogless Anna…
Pingback: Green scout woven tee | girl with a sewing machine
It’s funny. I’m french and in France we call these seams “coutures anglaises” !
Pingback: Chain Print Blouse | Sewing in Athens
supper happy I came onto this page. that’s me done with bias binding….thank you so much for sharing, x
Do you press the finished seam down or top stitch?
Thank you for this excellent tutorial. I’m making a pattern from a garment that was made in India, and opened it up to find it was made with French seams. I’ve been uncertain whether to create 5/8″ seams or larger; now I know I can go with the 5/8″.
Your website is fabulous. I’m looking forward to checking out your other tutorials. Keep up the great work!